

Home and Living Made Simple!




Interior Design

A well-planned black bedroom feels calm and grounded, not gloomy or cramped. Designers pair black walls with brass fixtures, warm

Quick Answer: Mid-century modern is a postwar design movement, roughly 1945 to 1969, built on uncluttered forms, tapered wood furniture,
A bedroom should feel like a place where you can slow down, breathe, and reconnect with the person you share

At some point, decorating started to mean taking things away. People were told to pare things back, stick to
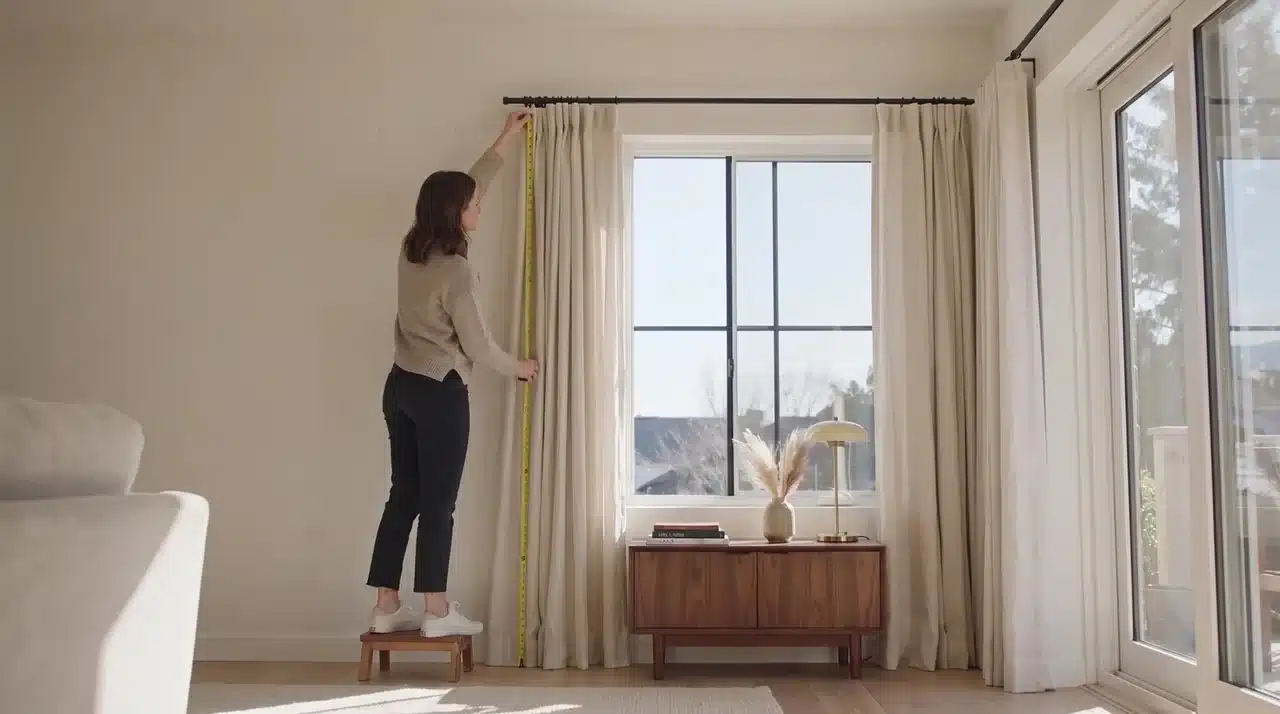
Quick Answer: Measure hardware placement first, calculate fabric width using your fullness multiplier, then determine drop length. Always measure at

Welcome to Minimal and Modern
Jordan Lee, lead author of Minimal & Modern, has long championed the idea that thoughtful space planning is the foundation of both beauty and function in a home. With a background in design and a passion for creating purposeful interiors, his approach reflects a balance of style and practicality.
His story and design philosophy are shared more fully elsewhere on the site.
DIY Projects
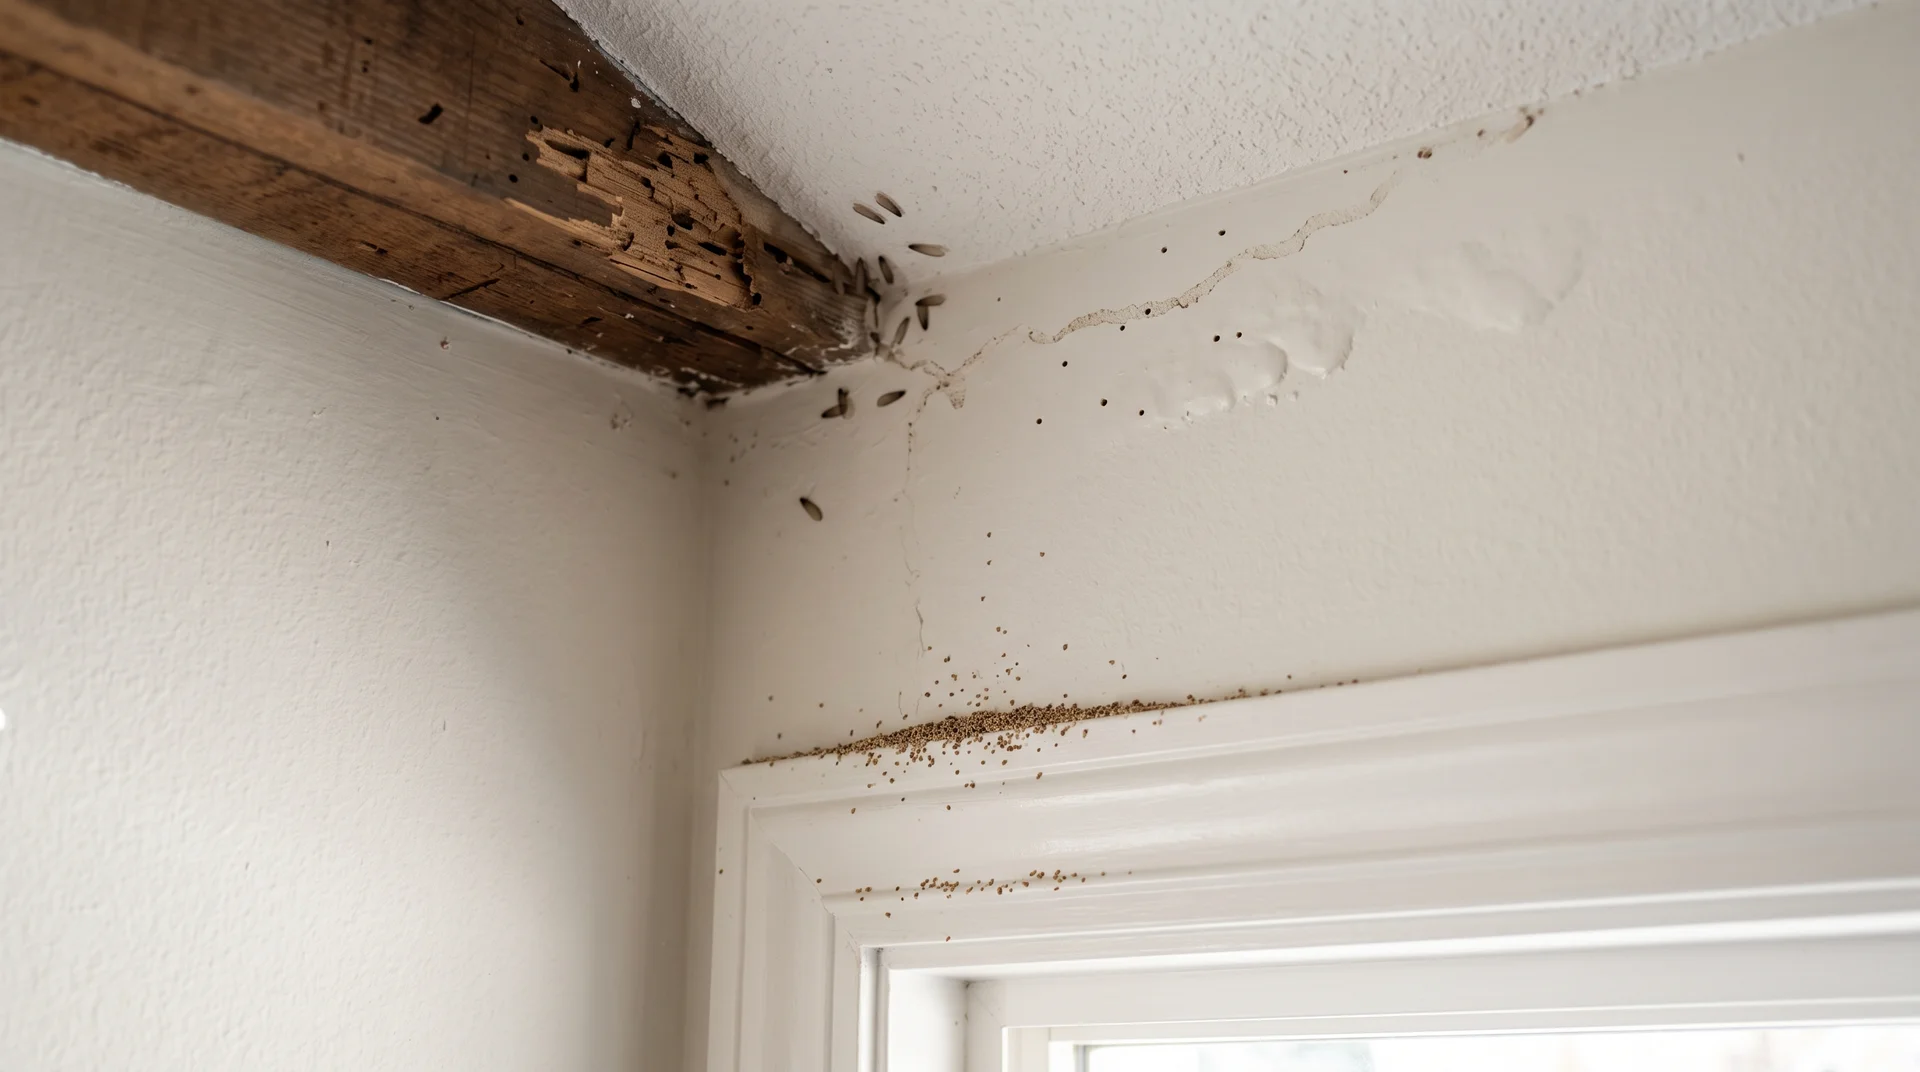
Early signs of termites in a ceiling include tiny holes, pellet-like droppings, mud tubes, irregular surface trails, discarded wings, hollow or weakened ceiling wood, and unexplained bubbling or peeling paint. A single hole or patch of damaged paint does not confirm a termite infestation. Nail marks, leaks, settling, and other insects can create similar symptoms. Several related signs in the same area are more concerning than a single isolated mark. For example, a small ceiling hole directly above a fresh pile of pellets deserves closer attention than a hole with no debris or other termite clues nearby. 8 Early Stage Signs of Termites in the Ceiling Ceiling termite activity often leaves small, easy-to-miss clues before obvious damage appears. Check for several related signs in the same area rather than relying on a single symptom. 1. Tiny Holes in Drywall or Plaster Small holes in modern drywall texture or plaster may appear when termites push waste from their galleries or emerge from infested wood. These small, round holes may occur around ceiling seams, crown molding, beams, corners, light fixtures, or attic openings. Drywood termites commonly create kick-out holes, while other insects, old repairs, or settling can cause similar marks. Look for nearby pellets, wings, trails, or other signs before concluding that termites are present. 2. Pellet-Like Droppings Below the Ceiling Small piles of hard pellets beneath a ceiling area may indicate drywood termite activity. These pellets, called frass, are pushed out through kick-out holes as termites clear their galleries. Frass is usually small, hard, and uniform in shape. It may resemble coarse sand or pepper and often collects beneath a single opening. If fresh pellets return after cleaning, the opening may still be active. Check the surrounding area for pellets, discarded wings, irregular trails, or damaged wood before assuming termites are responsible. 3. Mud Tubes or Soil-Like Material Subterranean termites build mud tubes to travel safely between the soil and wooden parts of a building. Made from soil, moisture, and termite saliva, these tubes may appear as narrow brown lines, dried mud, or raised trails. Around ceilings and attics, they may occur near wall joints, joists, plumbing openings, chimneys, masonry, or areas connected to the foundation. Ceiling-level mud tubes are less common but may indicate termites have moved upward through hidden framing or wall cavities. Leave them intact for inspection. 4. Raised or Sunken Surface Trails Termite galleries near the ceiling surface may create irregular lines or changes in texture. These signs can appear as narrow dents, raised paint lines, vein-like marks beneath drywall paper, darker tracks, or uneven areas that do not follow straight seams. Unlike normal drywall joints, termite trails are usually irregular and may curve or branch. They are more concerning when found with pinholes, frass, mud material, or damaged wood. 5. Bubbling or Peeling Paint Paint may bubble, blister, peel, or become uneven when the surface beneath it is disturbed. Termites are one possible cause, but moisture issues are more common. Check for leaks, condensation, poor ventilation, or previous water damage before assuming an infestation. Water damage often causes staining and swelling, while termite activity may create thin, uneven surfaces with nearby holes or debris. Treat damaged paint as a supporting clue, not proof on its own. 6. Hollow or Papery Wood Termites often feed inside wood while leaving the outer layer intact, so joists, beams, molding, or trim may look normal despite internal damage. Affected wood may look thin, blistered, uneven, or cracked, with small holes nearby. Avoid testing suspicious wood by pressing or striking it, as weakened surfaces may break. If an exposed beam appears damaged or unstable, stop examining it and keep people away until it is assessed. 7. Discarded Wings or Termite Swarmers Winged reproductive termites, known as swarmers, leave established colonies to start new ones. They may emerge from ceiling cavities, attic framing, or upper walls and shed their wings near windows, vents, lights, or attic openings. Termite wings are usually similar in length and appear in small piles. Swarmers have straight antennae and four equal-sized wings, unlike flying ants. Shed wings indoors can indicate termite activity. Finding shed wings indoors, especially near ceiling openings or wooden framing, can be an important sign of termite activity. 8. Faint Clicking or Rustling Sounds Termites can sometimes produce faint sounds inside wood, such as soft tapping or rustling. However, ceiling noises are more often caused by plumbing, HVAC systems, rodents, or normal house movement. Sounds alone do not confirm the presence of termites and are more meaningful when accompanied by signs such as pellets, holes, mud tubes, or wings. What to Do After Finding Possible Termite Signs Finding one suspicious sign does not mean you need to begin tearing out the ceiling. The next steps should focus on safety and professional confirmation. 1. Avoid Disturbing the Area Do not spray household insecticide into holes or ceiling cavities. Killing a few visible termites will not eliminate a hidden colony and may push the remaining insects deeper into the structure. Avoid patching holes, painting over surface damage, breaking mud tubes, removing damaged wood, opening the ceiling, or cleaning away debris before documenting the evidence. Move furniture away if loose material may fall. 2. Address Active Leaks Repair active roof or plumbing leaks, but do not cover the suspected termite opening before inspection. Fixing moisture problems can help prevent further deterioration and make it easier to determine whether termites or water damage caused the issue. Check areas around the ceiling for signs of ongoing leaks, condensation, or poor ventilation that may be affecting the structure. Avoid cosmetic repairs, such as patching holes or repainting damaged areas, until you confirm the cause. Covering the evidence too early can make it harder to identify the source of the problem. 3. Arrange a Licensed Termite Inspection A professional may inspect the ceiling and attic framing, connected walls, foundations and crawl spaces, mud tubes and frass, moisture conditions, plumbing and utility routes, and other areas with structural wood. Ask whether the evidence appears active, which type of termite is suspected, and whether any parts of the structure could not be accessed. The inspection should also explain the recommended treatment and whether a contractor or structural professional should assess damaged materials. Ways to Make Ceiling Areas Less Inviting to Termites Home remedies can help reduce conditions that favor termites. They cannot remove termites hidden inside ceiling wood or framing. If you see multiple signs of termites, schedule a professional inspection. 1. Reduce Excess Moisture: Fix roof leaks, plumbing leaks, and condensation issues. Keep attic spaces dry with proper ventilation. Dry wood is less attractive to termites. 2. Remove Wood and Cellulose Debris: Remove old lumber, cardboard, branches, and firewood near the building. Keep wood materials away from exterior walls. Clear unused wood scraps from attic spaces. 3. Vacuum Visible Swarmers and Wings: Vacuum termite swarmers and discarded wings when found indoors. Seal and dispose of vacuum contents outside. Record where swarmers appeared for inspection. 4. Keep the Area Dry and Ventilated: Use fans or dehumidifiers in damp areas. Improve airflow in attic and ceiling spaces. Reducing humidity helps protect wooden structures. 5. Avoid Unproven DIY Treatments: Vinegar, bleach, oils, and household sprays may only kill visible termites. They cannot reach hidden colonies inside wood. Avoid drilling holes or applying mixtures into ceilings. How to Prevent Future Termite Activity 1. Control Moisture- Repair roof leaks, plumbing problems, condensation, and overflowing gutters before water reaches the attic or ceiling framing. Improve attic ventilation where humidity regularly builds up. 2. Remove Wood-to-Soil Contact- Check siding, porch posts, deck supports, steps, and other wooden materials that touch the soil. Create separation between structural wood and the ground where possible. 3. Protect the Foundation and Exterior- Keep gutters clear and extend downspouts so water drains away from the foundation. Store firewood off the ground and away from exterior walls. Remove dead wood, stumps, and leftover building timber near the home. 4. Schedule Periodic Inspections- The right inspection schedule depends on local termite pressure, previous infestations, construction type, moisture conditions, and any existing termite warranty. Homes with a history of termite activity may need closer monitoring than properties with no previous evidence. What Early Termite Signs Could Be Telling You Most ceiling termite activity remains hidden well before visible evidence appears. When clues surface, such as a fresh pile of frass, a cluster of shed wings near a vent, or irregular surface trails, they typically indicate a colony that has been active for some time. Acting on early evidence keeps repair scope limited. Infestations identified before structural deterioration sets in tend to require less remediation. Waiting until visible damage appears often means managing an active infestation and the resulting structural repairs simultaneously. Frequently Asked Questions Can Termites Be in the Ceiling Without Visible Damage? Yes. Termites can remain behind drywall, insulation, or framing while feeding on hidden wood. Wings, frass, mud material, or small holes may appear before the ceiling shows obvious damage. Why Do Termite Pellets Keep Appearing After Cleaning? Drywood termites may continue pushing frass through an active kick-out hole. Pellets that repeatedly return beneath the same ceiling location are more concerning than one old, undisturbed pile. Can Ceiling Termites Spread to Other Rooms? Yes. Termites can move through connected joists, wall cavities, roof framing, and other wooden components. Visible evidence in one room may represent only part of the affected area. How Quickly Can Termites Damage Ceiling Joists? The rate varies based on colony size, termite type, moisture, wood condition, and the duration of the infestation. Visible sagging, cracking, or surface deterioration suggests you should not delay a professional assessment.

Some rooms just feel off. Not cluttered, not dirty, just heavy. The kind of feeling that settles in after a stressful week, a big life change, or simply too much time spent indoors without a real reset. For that kind of heaviness, people have been turning to sage for centuries. Rooted in Indigenous and spiritual traditions across cultures, the ritual uses the slow drift of sage smoke to clear stagnant energy and invite calm back into a space. It’s less about belief and more about intention, a deliberate, unhurried act that signals to your mind and your home that something is shifting. If you’ve been curious about trying it, this blog covers everything you need to know: what to gather, how to move through each room, and how to do it safely from start to finish. What Does Saging a House Mean? House saging is the practice of burning dried sage and letting the smoke drift through each room to clear stagnant energy and refresh the space. Many people use it after a stressful event, a move, or simply when a home starts to feel heavy or unsettled. It can also become part of a broader home-reset routine, alongside decluttering, opening windows, rearranging furniture, or creating a calmer atmosphere. The smoke itself isn’t magic. What matters most to practitioners is the intention behind the ritual and the sense of a fresh start it creates. What You Need to Sage Your House Gathering supplies ahead of time keeps the ritual calm and uninterrupted. A sage bundle or loose sage A fireproof bowl or abalone shell Matches or a lighter Sand or water for extinguishing the sage An open window or maybe a bathroom door An optional feather or hand fan to guide the smoke. How to Prepare Your House Before Burning Sage A little prep work before lighting the sage makes the whole process safer and more effective. Tidy clutter and remove trash. Open windows and interior doors. Turn off fans that may spread embers. Move flammable objects away from your path. Keep children and pets in a safe area. Decide on an intention for the ritual. How to Sage Your House for the First Time Safely First-timers often worry about doing it wrong, but the process is forgiving. The steps below walk through everything from lighting the bundle to finishing near the front door. Step 1: Set a Clear Intention Choose a simple purpose for the cleansing before you begin, like creating a peaceful environment or marking a fresh start after a hard week. Keeping it short and specific makes it easier to stay focused on the rest of the ritual. Safety tip: Keep your fireproof bowl and extinguishing material within reach before you begin. Step 2: Open a Window or Door Ventilation lets smoke leave the home rather than build up indoors, so open at least one window or door before lighting the sage. This single step does more to keep the air breathable than almost anything else in the process. Safety tip: Check that smoke alarms near the opened window won’t trigger from drifting smoke. Step 3: Light the Sage Bundle Safely Hold the sage bundle over your fireproof bowl, light the tip, let it burn for a few seconds, then gently blow out the flame so it smolders and produces smoke instead of fire. A steady stream of smoke, rather than an open flame or flickering light, is the sign that the sage is smoldering properly and producing smoke as intended. Safety tip: Never light the bundle near curtains, paper, or other flammable materials. Step 4: Begin at the Main Entrance Many people start at the front door since it’s considered the main point where energy enters the home, then move through the house in one continuous direction. Starting here also gives you a clear reference point to return to later. Safety tip: Keep pets and children away from the entryway while the sage is lit. Step 5: Move Slowly Through Each Room Carry the sage in its fireproof bowl and walk slowly through each room, letting a small amount of smoke drift into the space as you go. There’s no need to fill the room with smoke, just enough to pass through each area. Safety tip: Watch for falling ash and keep the bundle angled downward over the bowl as you walk. Step 6: Focus on Corners, Doors, and Windows Direct the smoke toward corners, closets, entryways, and painted vinyl windows other spots where air tends to sit still, since these areas are often the focus of the ritual. These are the same spots that tend to collect dust and stale air day to day. Safety tip: Keep a safe distance from window treatments and stored items in closets. Step 7: Repeat Your Intention As you move from room to room, repeat your chosen intention quietly or aloud. Keeping the same words in mind can help you stay focused and present throughout the process. There is no need to rush. Move at a comfortable pace and repeat the intention whenever you feel your attention drifting. Safety tip: Don’t let focus on the intention distract you from watching the burning tip. Step 8: Return to the Starting Point Finish your path near the main entrance or the open window you started with, completing the loop through the home. This closes out the ritual with the same clear structure it started with. Safety tip: Do a quick visual check of the bundle for any active embers before setting it down. Step 9: Extinguish the Sage Completely Press the burning end firmly into sand or a fireproof container and check closely for any remaining embers before setting it aside. This last step matters just as much as the ritual itself. Safety tip: Confirm the bundle is fully cold to the touch before storing it away. How Often Should You Sage Your House? There’s no fixed schedule for saging a house. Many people do it after moving into a new home, following an argument, before starting something new, after guests leave, or simply whenever the space starts to feel unsettled. The ritual is performed as needed rather than on a strict routine. Some people prefer a light, regular rhythm, like once a season or at the start of a new month, while others reach for sage only when something specific prompts them. Neither approach is more correct than the other. The right frequency really comes down to how often the home feels like it needs a reset, not a set number of times per year. Which Direction Should You Move While Saging? There’s no single required direction for staging a house, so the table below covers the most common approaches. Approach How It Works Best For Clockwise Starts at the front entrance and follows a consistent clockwise path room to room People who want a simple, repeatable routine Counterclockwise Moves in the opposite direction from clockwise, starting at the same entry point Practitioners with a personal or traditional preference Natural layout Follows the home’s floor plan in whatever order feels easiest to walk through Larger or irregularly shaped homes What matters more than the exact direction is covering every room at a steady, unhurried pace; sticking to the same path each time can make the ritual feel more familiar over time. How to Complete Your House Cleansing Ritual A few simple steps wrap up the ritual once you’ve worked through every room. Let fresh air circulate for a few minutes before closing the windows. Dispose of ash safely and store the cooled sage bundle in a dry, fire-safe place. Take a quiet moment to acknowledge the fresh start before returning to your routine. Check the room where you started one last time to make sure no embers remain. How to Choose Sage for House Cleansing When buying sage for house cleansing, look beyond price and packaging. The more important details are the type of sage, where it was grown, and whether the seller explains how it was harvested. You can find white sage from established herb suppliers such as Mountain Rose Herbs, which offers organically cultivated white sage of California origin, and Taos Herb Company, which carries California white sage sourced from private land. For smaller growers, marketplaces can also be useful, especially when sellers provide clear details about cultivation and harvesting. For example, Blossom Valley Sage grows and harvests white sage on private property in San Diego, California. Before buying, check whether the sage is cultivated or wild-harvested, where it comes from, and whether the seller provides transparent sourcing information. White sage is particularly vulnerable to overharvesting, so cultivated plants or responsibly harvested sage from private land are better options when available. Common Mistakes to Avoid When Saging a House A few small missteps account for most of the problems people run into with this ritual. Creating too much smoke is one of the most common mistakes, since a light, steady stream works better than a heavy cloud that overwhelms the space. Skipping ventilation quickly compounds the problem, so keep windows and doors open throughout. Carrying the bundle without a fireproof bowl underneath it is another oversight worth correcting before you start, as ash and embers drop without warning. Moving too quickly through each room undermines the whole process; slow, deliberate movement gives the smoke time to do its work. Keep an eye on anything flammable nearby, including curtains, loose papers, and dry decorative pieces, since sage burns longer than it appears to. When you’re done, make sure the bundle is fully extinguished rather than just set aside, since smoldering sage left unattended is a fire risk. Frequently Asked Questions What time of day should you smudge your house? You can smudge at any time, though many people prefer the morning or before a new beginning to create a fresh atmosphere. Does burning sage invite bad spirits? No, there is no evidence that burning sage invites bad spirits; many people use it as a symbolic cleansing practice based on personal or cultural beliefs. Does sage have to be gifted? No, Sage does not have to be gifted; you can purchase it yourself if you choose to use it respectfully. What is the prayer for powerful home cleansing? There is no single required prayer; you can say a simple, sincere intention asking for peace, protection, and positive energy in your home. Does dried sage ever go bad? Dried sage does not spoil quickly, but it can lose its fragrance and burn quality over time if stored in a damp or humid place. A Fresh Start for Your Home Sagging a house comes down to a few simple stages: preparing the space, lighting the bundle safely, moving smoke through each room with intention, and finishing the ritual with care. Keep the smoke light, the ventilation open, and let the process bend to your own beliefs and your household’s needs rather than a rigid set of rules. Long after the smoke has cleared, what stays behind is the quiet shift in how the home feels. That’s the real point of the ritual, not the smoke itself.
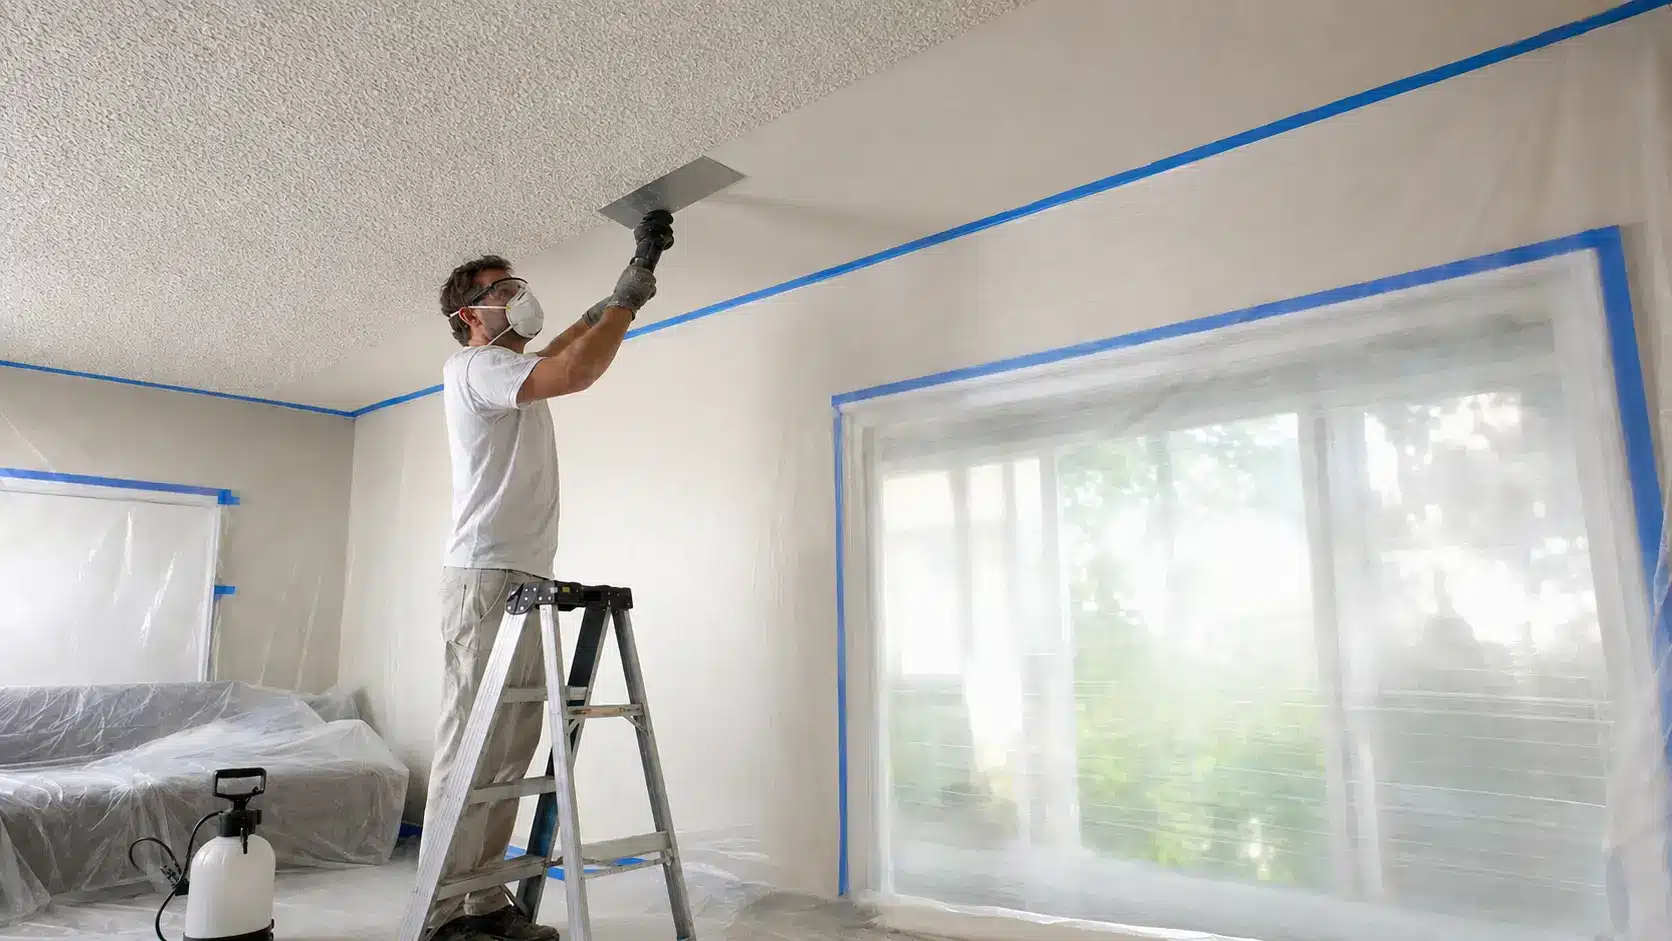
Removing a popcorn ceiling can give a room a cleaner, more updated finish, but the process involves more than simply scraping away the texture. Safety checks, proper preparation, careful removal, and surface repairs all play a role in achieving a smooth result without unnecessary damage. This blog explains how to remove a popcorn ceiling step by step, including asbestos testing, the tools you’ll need, DIY versus professional removal, expected costs and timelines, common mistakes, and alternatives if you prefer to cover the texture instead. Test Your Ceiling for Asbestos Before You Start This step determines everything else about your project, so it comes first for a reason. Older homes are more likely to have asbestos in the ceiling texture, so it is best to test first rather than guess. Testing is simple: Use an EPA-approved test kit, costing about $30 to $50 Results usually come back within about a week If positive, stop right away, do not scrape or sand, and call a certified asbestos abatement contractor If negative, you are safe to move forward with removal yourself Tools and Materials You Will Need Gather everything before you start so you don’t stop mid-job to run to the hardware store. Protective gear: Goggles, a dust mask or respirator, and old clothes you don’t mind ruining. Plastic sheeting: Enough to cover floors, walls, and furniture in the work area. A garden sprayer: For wetting down the texture in sections. A wide scraper and a sturdy ladder: For safely removing softened texture and reaching the ceiling. Joint compound, sandpaper, primer, and paint: For repairing and refinishing the ceiling once the texture is off, especially when preparing a smooth finish that complements a cathedral ceiling. How to Remove a Popcorn Ceiling Step by Step Working in small sections keeps the texture manageable and prevents the ceiling from drying out before you can scrape it. 1. Test a Small Area with Water Spray a small patch first to confirm the texture softens and comes off without damaging the drywall underneath. This test run tells you how long the texture needs to soak and whether your scraper is the right tool before you commit to the full ceiling. Reminder: Wait a few minutes after spraying before you test scrape, since rushing the test can give you a false read on how the texture behaves. 2. Spray the Ceiling in Small Sections Mist a three-foot by three-foot section with water from the garden sprayer, avoiding oversaturation that can soak into the drywall. Working in small patches keeps the texture wet enough to scrape while you finish each section before it dries out again. Reminder: Keep a light, even mist instead of soaking the surface, since heavy spraying is what leads to drywall damage down the line. 3. Let the Texture Soften Give the water a few minutes to soak in until the texture looks darker and feels soft to the touch. Softening time varies depending on texture thickness, so check a small spot with your scraper before working across the whole section. Reminder: Don’t let a sprayed section sit too long, since texture that dries back out will need another pass of water before it scrapes clean. 4. Scrape without Damaging the Drywall Hold the scraper at a low angle and work in gentle, even strokes to lift the softened texture without gouging the surface underneath. A wide, flexible scraper distributes pressure more evenly than a narrow one, helping protect the drywall as you go. Reminder: Stop and re-wet any spot that feels like it’s fighting back, since forcing a dry patch is what causes gouges and extra repair work. 5. Collect and Dispose of the Debris Scoop the wet debris into a trash bag as you go, then wrap up the plastic sheeting once the room is clear. Wet popcorn debris is heavier than it looks, so double-bag it before hauling it out to avoid tears or spills. Reminder: Check local disposal rules first if there’s any chance the texture contains asbestos, since regular trash pickup may not allow that material. DIY vs Professional Popcorn Ceiling Removal The right choice depends on how much time you have, how comfortable you are with the mess, and the condition of the ceiling. Factor DIY Professional Cost Lower, materials only Higher, includes labor Safety Depends on asbestos status Trained for hazardous materials Time Longer, especially for beginners Faster with experienced crews Mess Contained but hands-on Managed with less homeowner effort Ceiling condition Best for simple, unpainted texture Better for damaged or painted ceilings Finish quality Varies with skill level Consistently smooth results If your ceiling is simple and asbestos-free, DIY can save real money. Anything more complicated is usually worth handing off to a pro. How Long Does Popcorn Ceiling Removal Take The timeline depends on the room size, how well the texture absorbs water, and the amount of follow-up repair work. Preparing and covering the room can take a couple of hours, while spraying and scraping a single average bedroom often takes a few more hours. Drying time between repair coats, sanding, and painting usually stretches the full project across two to four days from start to finish. Painted or heavily textured ceilings tend to push that timeline toward the longer end, since extra scraping, skim coating, or minor concrete repair around adjoining surfaces can add more time. How Much Does Popcorn Ceiling Removal Cost Cost varies significantly depending on whether you do the work yourself or hire someone to do it. Option Typical Cost Notes DIY removal Often under $100 per room Covers an asbestos test kit, scraper, sprayer, and finishing supplies Professional removal $932 to $3,086 on average Contractors typically charge $1 to $6 per square foot Higher-end costs Toward the top of the professional range Driven by water damage, cracking, or unusually high ceilings needing extra repair and equipment Get a quote from at least two contractors before committing, since pricing can vary based on local labor rates. Factor in the cost of an asbestos test either way, since it protects you regardless of which route you choose. Popcorn Ceiling Removal Mistakes to Avoid A few small missteps can turn an easy weekend project into extra repair work, so it helps to know what to avoid. Oversaturating the drywall lets water soak through and damage the paper backing, while scraping too hard gouges the surface and creates more repair work than the texture removal itself. Skipping an asbestos test in an older home can expose you to fibers that are dangerous to breathe, and leaving fixtures uncovered puts them at risk of water and debris damage. Painting over damp joint compound is another common mistake, since it often bubbles, peels, or shows uneven texture once dry. Failing to protect floors and walls with plastic sheeting or drop cloths can leave behind a difficult cleanup, as wet texture tends to stick to nearby surfaces. Ways to Decorate Over a Popcorn Ceiling Removing the texture is not the only option, and decorating over it can work well if you would rather skip the mess entirely. Wood plank ceiling: Adds warmth and fully hides the texture once installed over furring strips. Works well in living rooms and bedrooms where a rustic or coastal look fits the space. Drop ceiling tiles: A straightforward option that also gives easy access to wiring or plumbing above. Popular in basements and utility spaces where future access matters more than a seamless finish. Textured wallpaper or ceiling paper: Covers the popcorn look with a fresh pattern without removing anything. A budget-friendly choice that can be swapped out again later if your style changes. Tin or faux tin ceiling tiles: Add a decorative, vintage look while fully covering the old texture. Common in kitchens and dining rooms, where a pressed-metal pattern adds character. Beadboard panels: Create a clean, cottage-style look and can be installed directly over the existing texture with minimal prep. A good fit for bathrooms and entryways seeking a classic, textured wall-to-ceiling look. Frequently Asked Questions Can I Just Put Drywall Over a Popcorn Ceiling? Yes, you can install drywall over a popcorn ceiling as long as the existing surface is stable and there are no signs of moisture damage or structural problems. Does Removing a Popcorn Ceiling Increase Home Value? Removing a popcorn ceiling can make a room look cleaner and more modern, which may improve buyer appeal, though the effect on resale value depends on the home and local market. Is It Safe to Sleep in a Room with a Popcorn Ceiling? Yes, sleeping in a room with an intact popcorn ceiling is generally safe, but you should avoid scraping, sanding, or damaging it if asbestos may be present. When Should I Worry About a Popcorn Ceiling? You should be concerned if the ceiling is crumbling, stained, water-damaged, or showing signs of disturbance, especially in homes built before the mid-1980s. Will 30 Minutes of Asbestos Exposure Hurt You? A brief exposure does not guarantee illness, but no asbestos exposure is considered completely safe; contact a professional if exposure occurred. Final Thoughts A smooth ceiling comes down to following the sequence: test first, prepare the room, soften the texture, scrape carefully, repair the surface, then prime and finish. Skipping a step creates more work later, so take it one stage at a time, and the results will hold up. Give yourself a full weekend if it’s your first time, and don’t rush the drying stages between repairs and paint. Once that last coat goes on, you’ll have a ceiling that finally matches the rest of the room.
Paint Colors

Painted stairs can completely change how a staircase feels inside a home, and they do it without the cost of a full replacement. A fresh coat of paint covers scratches, uneven wood tones, and the kind of wear that stain would only draw attention to. It also opens up a color range that stained wood simply cannot reach, from soft warm whites to deep charcoal and everything in between. Painted stairs are not a shortcut. They demand proper surface prep, the right primer, and a paint product built for foot traffic. Skip any of those steps and the finish will chip, scuff, or peel within months instead of lasting years. This blog covers how to paint stairs correctly, which colors work best for different home styles, and how to keep the finish looking good long after the project is done. Are Painted Stairs a Good Idea? Paint hides dents, old stains, and uneven wood grain better than any other finish. It also opens up a full range of colors, from crisp white to deep charcoal. Stained wood cannot match that range. Softer woods like pine and poplar take paint especially well. These woods are common in older staircases. Paint covers the flaws that stains would only highlight. Here is a quick side-by-side to help you decide: Factor Painted Stairs Stained Stairs Color options Unlimited, any shade Limited to wood tones Hides imperfections Yes, very well No, highlights flaws Durability on treads Chips and scuffs faster Wears more evenly Best for Softer woods, budget updates Hardwoods with good grain Maintenance Touch-ups every 1-3 years Occasional resealing Upfront cost Higher, needs primer and coats Lower, fewer materials 15 Painted Stairs Ideas for Every Home Style This finish works with nearly every design style. Farmhouse, modern, minimalist- it fits them all. The right color and pattern depend on your home’s palette and ceiling height. It also depends on how much contrast you want between treads and risers. Below are six popular directions homeowners take, each suited to a different look and budget. 1. Classic White Painted Stairs White remains the most requested option for good reason. It reflects light and makes a narrow stairwell feel larger. White also pairs with almost any wall color. A soft white with a bit of warmth tends to feel more inviting than a stark, cool white. The tradeoff is that the scuffs show more easily. A durable, washable sheen matters here more than in most other rooms. 2. Black Painted Stairs for a Modern Look Black creates drama and works well in contemporary or industrial-style homes. It also hides scuffs and dirt better than white. That makes it a practical pick for busy households. Pairing black treads with white risers, or the reverse, adds contrast. It does this without overwhelming a small space. 3. Two-Tone Painted Staircases This look pairs one color on the risers and another on the treads. Some homeowners paint the stringer and leave the treads as natural wood. This approach adds color without committing to one bold shade. It also works well when you want to tie the staircase to a nearby room’s color scheme. 4. Painted Stair Risers with Pattern or Design Patterned risers turn a staircase into a focal point. Homeowners use stencils, wallpaper, or hand-painted designs on each riser. The pattern often varies from step to step. This works well in hallways or basements where the stairs are the main visual feature. Keep the treads in a solid, durable color. That way, the pattern will not compete with foot traffic wear. 5. Neutral Painted Stairs Gray, greige, and soft taupe offer a middle ground. They sit between stark white and bold color. Neutrals hide everyday wear better than white. They still keep the space feeling calm and put together. This is a popular pick for homeowners who plan to change decor over time. 6. Bold and Colorful Painted Stairs Some of us want our staircase to make a statement. Navy, emerald, and even a bright yellow bring real personality to the space. This approach works best when surrounding walls stay neutral and best to paint the stairs. That way, the staircase becomes the clear focal point. It won’t compete with busy wallpaper or artwork nearby. 7. Ombre Painted Stairs An ombre staircase shifts gradually from a dark shade at the bottom to a lighter tint near the top. Some homeowners mix white into the same base color for each step. Others go the opposite way, moving from light to dark as the stairs rise. This effect works well in entryways and adds real visual movement without using more than one color family. Keep the transition subtle, since jumps that are too dramatic between steps can look uneven instead of intentional. 8. Painted Faux Runner Stairs A faux runner mimics a fabric stair runner using paint alone. Painters tape off a center strip on each tread and riser, then fill it with a contrasting color. The outer edges stay in a solid neutral to frame the look. This approach offers the charm of a traditional runner without the need to clean or replace fabric. A satin or semi-gloss finish on the runner section keeps it easy to wipe down. 9. Striped Painted Risers Striped risers bring a graphic, structured look to a staircase. Horizontal stripes tend to make a narrow staircase feel wider. Vertical or diagonal stripes draw the eye upward instead. Homeowners often use two contrasting shades, such as gray and white or navy and cream, for a clean finish. Careful taping matters most here, since crisp lines make the difference between a polished look and a messy one. 10. Chalkboard Painted Stairs Chalkboard paint turns stair risers into a spot for notes, doodles, or seasonal messages. It works well in family homes because kids can draw without leaving permanent marks. The dark, matte finish also gives the staircase a simple, modern edge on its own. This style suits basements, playrooms, and other casual spaces more than formal entryways. Wipe risers clean with a soft cloth before adding a fresh chalk design. 11. Geometric Stencil Painted Stairs Geometric stencils bring a modern, graphic pattern to plain risers. Triangles, hexagons, and diamond shapes are common choices for this look. A single accent color against a neutral base keeps the pattern from feeling too busy. This style works especially well in contemporary or minimalist homes with clean, simple decor elsewhere. Stencils also let you repeat a pattern from a rug or backsplash for a more pulled-together space. 12. Painted Stairs That Match the Walls Painting a staircase the same color as the surrounding hallway creates a calm, continuous look. This approach works well in smaller homes because it eliminates visual breaks between the stairs and the walls. It also makes a narrow hallway feel larger and more open. This style suits homeowners who want their staircase to blend in rather than stand out. A slightly higher sheen on the stairs than on the walls still gives the treads enough durability for daily wear. 13. Dark Treads with Light Risers This is a practical twist on the standard two-tone staircase. Painting the treads dark while keeping the risers pale puts the contrast where it works hardest. Black, charcoal, deep brown, and navy hide everyday scuffs better on a walking surface than lighter shades do. The pale risers keep the staircase from feeling too heavy overall. This split shows up often in real staircase projects because it suits traditional and modern homes alike. Use floor-rated paint on the treads, and add an anti-slip additive for better grip. 14. Alternating Color Painted Risers Unlike an ombre staircase, which shifts gradually, this treatment repeats two fixed colors riser by riser. Muted green and cream, or dusty blue and soft gray, can alternate from the bottom step to the top. The look adds color without stencil work or complicated patterns. Keeping the treads in one neutral shade stops the staircase from feeling too busy. Benjamin Moore features this exact alternating-riser technique in its own painted stair gallery, which makes it a tested look rather than a purely decorative idea. 15. One-Color Statement Stairs Paint the treads, risers, stringers, and often the balusters in one solid color, while the surrounding walls stay a contrasting shade. Deep green, charcoal, navy, or terracotta can turn the whole staircase into one architectural feature. Unlike stairs painted to match the walls, this treatment intentionally sets the staircase apart. It also cuts maintenance, since there are no pattern lines or color transitions to touch up. How to Paint Stairs for a Long-Lasting Finish Step 1: Prepare the Surface: Remove dirt and grease with a mild cleaner. Sand any existing finish so the new paint has something to grip. Repair cracks, dents, or damaged wood before you pick up a brush. Step 2: Prime the Stairs: Primer seals the wood and provides a surface for paint to bond to. This one step reduces peeling and chipping more than almost anything else you can do. Step 3: Apply Stair Paint: Use quality brushes and rollers suited to the paint you choose. Apply thin coats rather than one thick layer. Follow the drying times on the label between coats. Step 4: Allow Proper Curing Time: Paint can feel dry to the touch within hours, but full curing takes longer. Keep heavy foot traffic off the stairs for at least 24 to 48 hours, longer if the label recommends it. Choosing the Right Paint for Stairs Picking paint for a staircase means two decisions, not one. First comes color, then comes the product itself. The right shade depends on light levels, nearby wall colors, and how much wear the stairs get. 1. Best Paint Colors for Stairs Below is a quick reference of colors that consistently perform well, based on guidance from major paint brands. Color Name Brand Best For Pure White Sherwin-Williams Bright, airy stairwells Alabaster Sherwin-Williams Soft warmth without stark white White Dove Benjamin Moore Warm white for treads and risers Hale Navy Benjamin Moore Bold, dramatic staircases Agreeable Gray Sherwin-Williams Neutral, hides everyday wear Revere Pewter Benjamin Moore Warm greige for busy households 2. Use Floor and Porch Paint Stair treads need floor or porch paint, not standard wall paint. These products are built for horizontal surfaces that take constant foot traffic. They resist scuffing, cracking, and peeling far better than a regular interior paint. Risers and balusters can use a durable semi-gloss wall paint instead, since they see less direct wear. For exterior stairs, choose a paint rated for outdoor use and temperature swings. 3. Choose the Right Paint Finish Sheen matters as much as paint type. Semi-gloss and high-gloss finishes hold up best on treads because they resist scuffs and wipe clean easily. A flat or matte finish hides small imperfections well, but scratches and dents show through quickly. For a balance of durability and a softer look, try satin on risers. Save semi-gloss or gloss for the treads. Problems with Painted Stairs and How to Avoid Them Most issues with a painted staircase trace back to prep, product choice, or timing. Here are the four problems homeowners run into most, along with simple fixes. 1. Paint Peeling or Chipping: Peeling almost always comes down to skipped primer or rushed prep. Grease, dust, or old wax left on the wood keeps new paint from bonding. Sand the surface, clean it well, and prime before you paint. Let each coat cure fully before the stairs see regular foot traffic again. 2. Visible Scratches and Scuff Marks: Scuffs show up fastest on flat or matte finishes and on very dark or very light colors. A semi-gloss or gloss sheen resists marks better and wipes clean more easily. Adding a runner or rug on the treads also reduces visible wear over time. 3. Slippery Painted Stair Surfaces: Glossy paint can feel slick underfoot, especially in socks or smooth-soled shoes. Adding a non-slip additive or choosing stair-tread paint adds grip without significantly changing the look. Runners, grip strips, or textured paint on treads also help on stairs used by kids or older family members. 4. Uneven Paint Coverage: Thin or blotchy coverage has a few common causes. The paint may have gone on too thick, too thin, or too soon after the last coat. Apply thin, even coats and let each one dry completely before adding the next. Two coats over a properly primed surface almost always give full, even coverage. Painted Stairs vs Stained Wood Stairs Painted stairs give you more design freedom and hide flaws better. Stained stairs cost less upfront and wear more evenly over time. Consideration Painted Stairs Stained Wood Stairs Color flexibility Any color or pattern Limited to wood tones Wood grain visibility Covered Highlighted Best wood types Softer woods, pine, older stairs Hardwoods with strong grain Repair visibility Touch-ups can show Touch-ups blend in more easily Upfront cost Higher, primer plus paint Lower, fewer coats needed Long-term upkeep More frequent touch-ups Occasional resealing Useful Tips for Creating Durable Painted Stairs A few habits separate a paint job that lasts years from one that needs redoing within months. Sand between coats: Light sanding removes dust nibs and helps each layer bond to the last. Work in thin coats: Thick paint traps moisture underneath and can crack or bubble as it dries. Match the primer to the surface: Bare wood, old paint, and glossy finishes each need a different bonding primer. Paint every other step first: This keeps a path open on the staircase while each coat cures. Round sharp tread edges slightly: Thin, sharp edges chip faster under regular foot traffic. Give paint real cure time: Dry to the touch is not the same as fully cured. Keep heavy traffic off treads for at least 24 to 48 hours. Choose floor-grade paint for treads: Standard wall paint was never built for constant impact. Touch up small chips early: A quick fix now prevents water and dirt from working their way under the paint later. Final Thoughts A painted staircase is one of the most affordable ways to change the feel of a home. The right paint type, sheen, and primer make the difference between a finish that lasts years and one that needs constant touch-ups. A classic white, a bold navy, or a two-tone design all follow the same rules. Prep well, prime first, and use paint made for foot traffic. With a bit of patience, a fresh coat can keep a staircase looking good for years before it needs attention again. Frequently Asked Questions Can You Paint Wooden Stairs Without Sanding? Light sanding is usually recommended because it helps the paint bond properly and reduces the risk of peeling. Are Painted Stairs Slippery? They can be if you use glossy paint. Satin finishes and slip-resistant additives can improve traction. What is the Most Durable Paint for Stairs? Floor and porch paints, or high-quality enamel paints designed for heavy traffic, usually last longer. Should Stair Treads or Risers Be Painted? You can paint both, but many homeowners paint risers and stain or seal treads because treads take more wear. How Many Coats of Paint Do Stairs Need? Most stair projects need primer plus two coats of paint, depending on the surface and paint coverage.
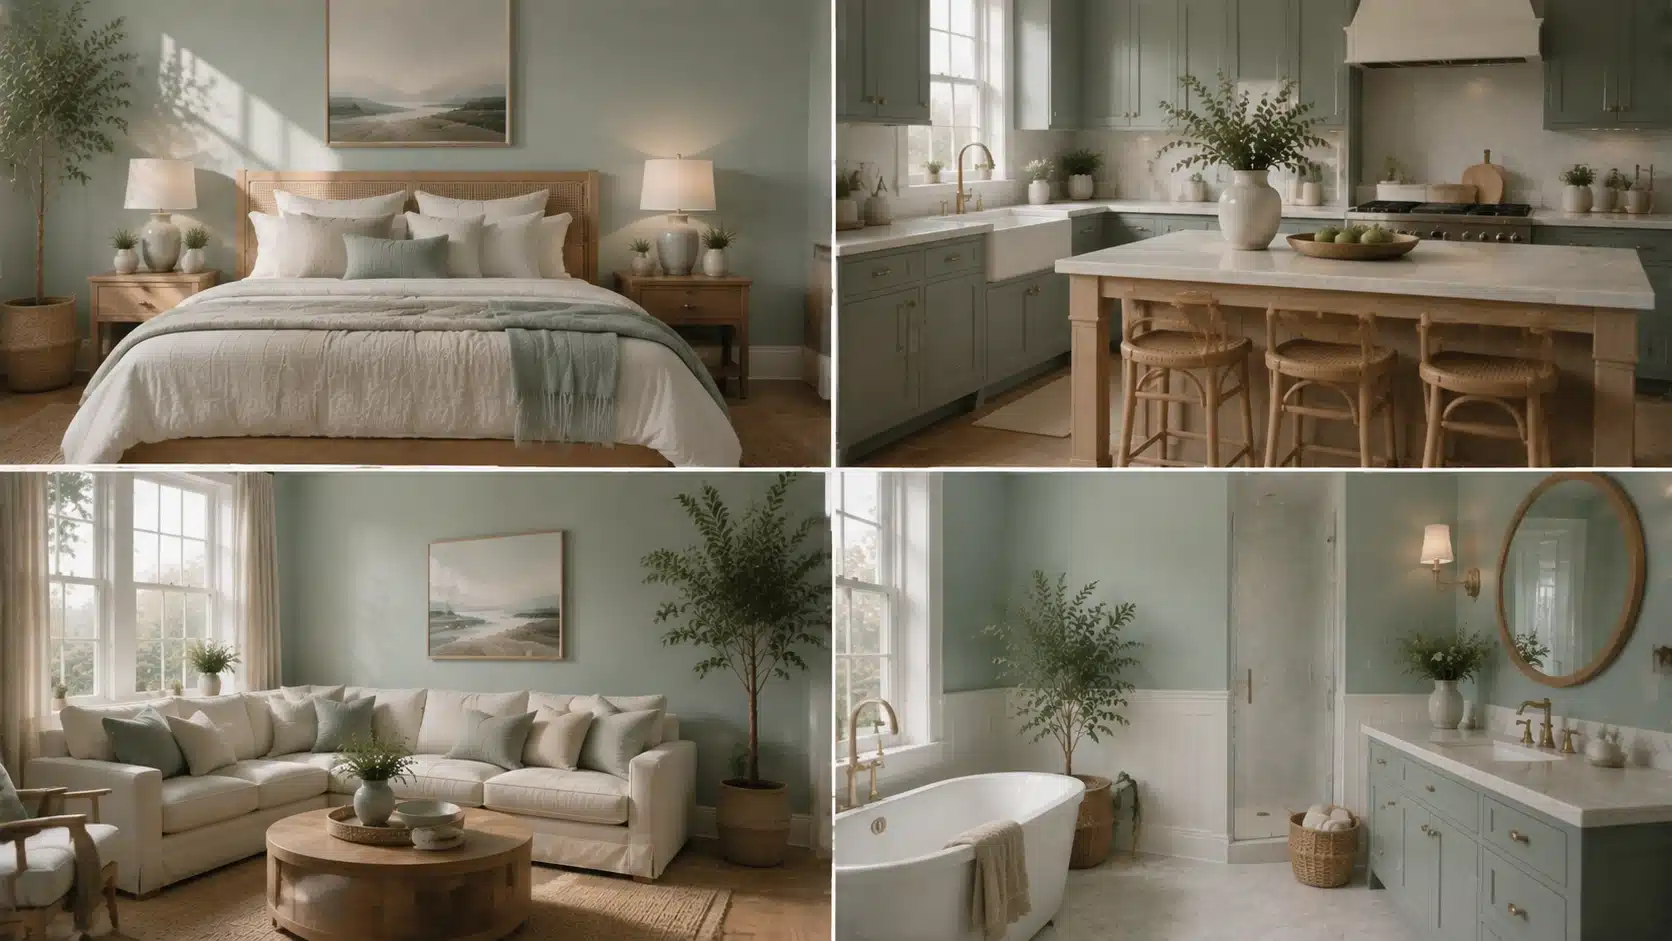
Quick summary: Benjamin Moore Beach Glass is a muted blue-green-gray shade that changes subtly with lighting and surrounding colors. Benjamin Moore Beach Glass is the kind of paint color that can look soft and coastal in one room, then slightly cooler or greener in another. That versatility is part of its appeal, but it also means choosing it requires a closer look at undertones, natural light, surrounding finishes, and coordinating colors. This article breaks down Benjamin Moore Beach Glass 1564, including its LRV and blue-green-gray undertones. How it behaves in different lighting conditions, the best rooms to use it in, how to coordinate whites and accent colors, and how it compares with similar popular shades. What Color is Benjamin Moore Beach Glass? Benjamin Moore Beach Glass 1564 is a soft blue-green paint color with a gray undertone that keeps it from ever looking too bright or too tropical. This shade sits in Benjamin Moore’s blue-green family, but it is not the bright aqua or classic beachy turquoise that its name might suggest. It reads as a muted, weathered blue-green with a gray cast, closer to the color of real sea glass than a swimming pool. Depending on lighting, some rooms will pull more blue while others lean slightly green, but the gray keeps both extremes in check. Benjamin Moore’s own product page describes it as a calming blue with a gray undertone, adding versatility to the shade. Color details Feature Details Paint brand Benjamin Moore Color name Beach Glass Color number 1564 Color family Blue-green LRV 49.7 Overall feel Calm, coastal, muted Benjamin Moore Beach Glass Undertones Undertones are the quiet influence sitting beneath the main color, and they are what make this shade a bit of a chameleon. Here is how each one shows up. Gray undertone: The gray keeps the color from ever feeling tropical or overly saturated. It softens the color and gives it a more grown-up, sophisticated quality, which is part of why it works in so many different design styles. Blue undertone: In cooler, north-facing light, the blue becomes more obvious. This is when the color leans closest to a true sea-glass blue, with an airy, almost weightless feel. Green undertone: Warm, direct sunlight tends to coax out the green side of the color. Paint experts who specialize in undertone analysis note that this warm-light shift is what gives the color its sea-glass character in south-facing rooms. Is Benjamin Moore Beach Glass Blue or Green? If you are trying to decide whether this color leans more blue or green, it can be a little hard to pin down at first. It is technically a muted blue-green, but on the wall it often reads more like a soft sea-glass blue. Its gray undertone keeps it from looking too teal or too close to seafoam. The gray undertone is what stops it from reading as a true teal or seafoam shade. How it compares to similar blues and greens: Color How it differs from Beach Glass Beach Glass Soft blue-green with gray Palladian Blue Brighter and more distinctly blue Healing Aloe Lighter and softer overall Quiet Moments Lighter, with an LRV close to 61, and leans slightly more blue Benjamin Moore Beach Glass LRV and Light Performance LRV, or light reflectance value, measures how much light a paint color bounces back into a room versus how much it absorbs. The scale runs from 0 (pure black) to 100 (white). This color has an LRV of 49.7, according to the official listing of Benjamin Moore, which places it almost exactly in the middle of the scale. North-facing rooms: Cooler, indirect light pulls the color deeper and grayer, and some of that airy, coastal quality fades. North-facing rooms never get direct sun, so the color settles into a moodier, more subdued side. South-facing rooms: Direct sun keeps the color feeling fresh and calming, and its blue-green tones read clearly without looking washed out. The strong, warm light in south-facing rooms tends to bring out the green side rather than the blue. East-facing rooms: Morning sun brings a brief window of warmth, so the color can look slightly greener early in the day before settling into a cooler, more blue-gray tone for the rest of the afternoon. West-facing rooms: Afternoon and evening sun bring the strongest warm light of the day, which can push the color toward its greener, warmer side as the sun gets lower in the sky. How Lighting Conditions Change the Look of Beach Glass Beyond room orientation, the type and intensity of light in a space play a big role in how the color performs day to day. Darker rooms: The color pulls deeper, grayer, and cooler, losing some of its lighter coastal quality when natural light is limited Lighter, sun-filled rooms: It reads fresh and clear, with the blue-green tones showing up most true to their intended shade. Warm bulbs: Warm-toned lighting emphasizes the green side of the color, giving it a slightly more sea-glass, earthy feel indoors. Cool LED bulbs: Cooler artificial light highlights the blue-gray side, making the color feel crisper and more subdued. Designer tip: Test the color on at least two walls in the room, ideally one that gets direct sun and one that does not, since the same gallon can look noticeably different depending on exposure. Where to Use Benjamin Moore Beach Glass in Your Home This color adapts well across the home, from calm living spaces to spa-style bathrooms, though its best use depends on light, function, and nearby finishes. 1. Living Rooms with Benjamin Moore Beach Glass This shade creates a relaxed, easygoing backdrop that works well with natural textures like linen, rattan, and light wood tones. It is calm enough to live with daily without feeling monotonous. In larger living rooms with plenty of natural light, it can anchor the whole space without competing with furniture or artwork. It also works well on a single accent wall for those who want the color without committing to a full room. 2. Bedrooms with Benjamin Moore Beach Glass Because it leans more toward soothing than energizing, it is a popular bedroom choice. Pairing it with soft white or warm cream bedding helps balance its cooler undertone. It tends to work best in bedrooms that get some natural light during the day, since darker bedrooms can make the color feel flatter and less restful. Layering in warm-toned nightstands or lamps also helps keep the room from feeling too cool at night. 3. Bathrooms with Benjamin Moore Beach Glass This is one of the most popular applications for the color, since its blue-green, water-inspired quality suits spa-style bathrooms especially well. It pairs naturally with white tile, marble, and brushed metal fixtures. Because bathrooms often rely more heavily on artificial lighting, it is worth testing the color under the room’s actual vanity lights before committing. This helps confirm whether it leans more blue or green once the sun goes down. 4. Kitchens with Benjamin Moore Beach Glass This shade also works as a cabinet color, particularly when the surrounding walls stay lighter and neutral. Warm hardware finishes, such as brass or bronze, help offset its cool base. It also pairs well with butcher block or light wood countertops, which help balance out the coolness of the paint. For kitchens with limited natural light, keeping the walls a shade or two lighter than the cabinets helps the space feel open. Colors That Pair Well with Benjamin Moore Beach Glass The right trim and accent colors can make this shade feel warmer, cooler, brighter, or more grounded, depending on the look you’re going for. Best White Trim Colors The right white trim can either soften the cool undertones of this shade or create a sharper contrast around doors, windows, and architectural details. Benjamin Moore White Dove: Adds warmth and prevents the overall palette from feeling too cool. Benjamin Moore Simply White: Creates a cleaner, crisper contrast against the blue-green walls. Benjamin Moore Super White: Gives the room a more modern, high-contrast finish. Benjamin Moore’s coordinating suggestions also include whites such as Snow White OC-66 and Super White OC-152, giving you additional options for creating a balanced color scheme. Overall, the best trim color depends on how much contrast you want. Softer whites create a warmer transition, while crisp whites highlight the wall color’s blue-green character. Best Accent Colors for Benjamin Moore Beach Glass Choosing the right accent colors can help this cool-toned shade feel more balanced and connected to the rest of the room. The best pairings either add warmth, create subtle contrast, or build on its soft coastal character. Navy Blue: Adds depth and a bit of drama without clashing with the cooler base tone. Warm wood tones: Balance the cool undertones and keep the space from feeling sterile. Soft beige and greige: Create a quiet, layered coastal palette that feels soft and cohesive. Natural greens: Reinforce the organic, sea-glass feel of the color and work especially well with plants and natural materials. Overall, these accent colors help bring out different sides of the shade. Navy creates contrast, wood adds warmth, and softer neutrals and greens keep the palette calm and natural. Benjamin Moore Beach Glass Compared with Similar Colors Beach Glass has good company among other Benjamin Moore blue-greens, and seeing how it stacks up can help confirm it’s the right fit before buying a sample. Paint color Difference from Beach Glass Benjamin Moore Quiet Moments Lighter and slightly softer, with a higher LRV near 61 Benjamin Moore Healing Aloe More muted and gray overall Benjamin Moore Palladian Blue Brighter and more clearly blue Benjamin Moore Mount Saint Anne Deeper and more saturated Benjamin Moore Night Mist Leans more green-gray and reads slightly lighter Benjamin Moore Iced Marble Very close in tone and often used as a match Of all these options, Beach Glass still stands out for its balance. It is neither as light as Quiet Moments nor as saturated as Mount Saint Anne, which is part of why it remains such a versatile, easy-to-live-with choice. What Not to Use with Benjamin Moore Beach Glass Choosing it without testing samples: Screen colors and in-store chips rarely match how a paint color behaves on an actual wall. A physical sample tested at home is the only reliable way to judge it. Using too many cool colors: Pairing this color with an entirely cool-toned room, including cool grays, cool whites, and chrome fixtures, can make the space feel cold rather than calm. Ignoring lighting direction: Because it sits at a mid-range LRV, the room’s light exposure has an outsized effect on how the color reads throughout the day. Pairing it with the wrong whites: Some stark, blue-based whites can make the color look flatter and more blue-gray than intended. Warmer whites tend to soften that effect. Is Benjamin Moore Beach Glass a Good Paint Color? Overall, Beach Glass earns its popularity. It suits many homes and styles, though like any mid-tone color, it rewards some planning around lighting and trim choices. Pros Cons Calm and versatile across multiple design styles Can shift noticeably depending on the room’s lighting Softer and more livable than a traditional bold blue May feel too cool in rooms with limited natural light Works well with both warm and cool accent colors Requires more careful trim selection than a true neutral Adds color to a room without overwhelming it Can look different across an open floor plan with varied light In the end, Beach Glass remains a dependable, versatile choice for homeowners seeking a calm, coastal-inspired color that adapts to nearly any room, style, or lighting condition. Testing at Different Times of Day Paint behaves differently under morning, afternoon, and evening light. Morning light tends to bring out the cooler blue-gray side of this shade, midday sun softens it toward green, and evening artificial light can deepen it slightly. Viewing a sample across all three helps avoid surprises after the whole room is painted. Real home application examples A Beach Glass bathroom vanity paired with brushed nickel hardware A single Beach Glass accent wall behind a bed with warm wood furniture Living room walls in Beach Glass paired with oak floors and linen upholstery Frequently Asked Questions Is Benjamin Moore Beach Glass Warm or Cool? It leans cool overall, thanks to its gray and blue undertones, though warm natural light can bring out softer green notes throughout the day. What is the LRV of Benjamin Moore Beach Glass? Benjamin Moore Beach Glass 1564 has an LRV of 49.7, placing it in the medium range of the light reflectance scale. Does Benjamin Moore Beach Glass Look Green? It can, particularly in warm, direct sunlight, but most homeowners describe it as a muted blue-green rather than a true green. What White Goes Best with Benjamin Moore Beach Glass? White Dove, Simply White, Snow White, and Super White are all strong options, depending on whether the goal is warmth or crisp contrast. Is Benjamin Moore Beach Glass Good for a Bathroom? Yes. Its soft, water-inspired blue-green tone pairs especially well with white tile, marble, and spa-style design details. Making Beach Glass Work in Your Home Benjamin Moore Beach Glass is the rare paint color that never quite settles, it shifts with the morning light, changes when a lamp turns on, and responds to every piece of furniture placed nearby. That quiet unpredictability is exactly what makes it worth living with. Test it on two walls, check it at different times of day, and pair it with a warm white trim before committing. Do that, and Beach Glass tends to earn its place on the wall, not just for one season, but for years.
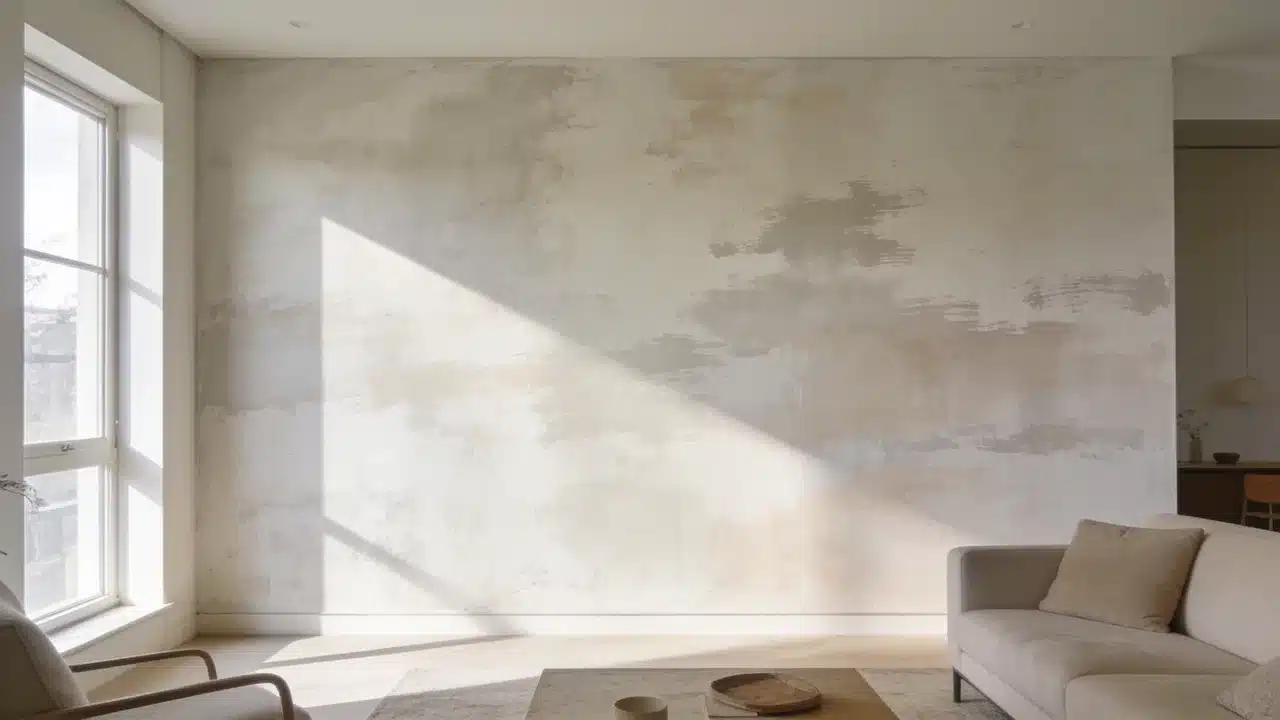
Limewashing walls starts with preparing the surface and applying thin mineral-based layers with a block brush. Random crisscross strokes create the cloudy variations that define this finish. The appeal comes from how the color changes as lighting shifts throughout the day. A wall that reads soft white at noon can look warm and shadowed by late afternoon. After a decade working with color, I have found that this changing appearance is one reason homeowners connect with limewash. The process involves preparing the wall, applying multiple coats, and caring for the finished surface. What is Limewash Paint and How Does It Work? Limewash is one of several textured wall finishes unlike regular paint, which creates an even surface with a consistent sheen, it’s applied in thin, semi-transparent layers that leave visible brushstrokes. Limewash is applied in thin, semi-transparent layers, allowing brushstrokes and color variation to remain visible. The brushwork stays visible in the final coat. That variation is the point. Color behavior matters here. The paint appears darker when wet and noticeably lighter once dry. Adding extra paint too early can reduce the soft variation that gives limewash its character. Let each layer dry fully before assessing the wall. Tools and Materials Needed to Limewash Walls Collect all materials before starting. Limewash dries differently from standard wall paint, so stopping halfway across a wall can create visible transition marks. Item Purpose Limewash paint Creates the textured finish Mineral primer Helps limewash bond with walls Block brush Creates the signature movement Drop cloth Protects floors Painter’s tape Protects edges Stir stick Keeps paint consistent Spray bottle Helps maintain a wet edge How to Prepare Walls for Limewashing Proper preparation helps limewash absorb evenly and creates a more consistent finish. Skipping any of these steps affects the final result. Clean and Repair the Wall: Remove dust, grease, and dirt with a damp cloth and mild cleaner. Fill holes with patching compound. Let everything dry before priming. Prime the Surface: New drywall requires mineral primer. Previously painted walls need primer only if the existing finish is glossy or in poor condition. Highly porous surfaces can absorb limewash quickly, resulting in uneven color if not properly prepared. Test the Color and Finish: Apply a sample patch to the actual wall. This finish reads differently at 7 am than at 7 pm. Check both before committing. How to Limewash Walls Step by Step Follow the order carefully because preparation, drying time, and application technique all affect the final appearance. Step 1: Prepare the Limewash Paint Stir thoroughly for at least two minutes before use. Follow the product’s dilution instructions if thinning is required. Pour the paint into a clean application bucket and stir again. Continue stirring during application to maintain an even consistency. Settled paint creates uneven coverage and color variation across the wall. Step 2: Apply the First Coat Using the Limewash Technique Load the block brush about a quarter of the way up the bristles. Apply using loose, unstructured crisscross strokes from the center of each section. Keep a wet edge throughout and work in small sections. Deposit most of the paint at the center and feather outward to blend the edges. Do not aim for full coverage on the first coat. Step 3: Add Additional Layers for Depth Let the first coat dry fully before adding a second coat, typically 12 to 24 hours, depending on humidity and temperature. The wall will look darker when wet and lighter when dry. Apply each additional coat using the same crisscross technique. Two coats suit most walls. A third thin coat adds consistency where needed. Step 4: Finish, Cure, and Evaluate the Wall Remove painter’s tape once the final coat dries. Stand back and assess the full wall in both morning and evening light before deciding if another coat is needed. Allow full curing before touching the surface. Mist lightly if the manufacturer recommends it. A matte sealer is optional but adds protection in high-traffic areas. Limewash Wall Care and Maintenance Limewash walls require less maintenance than many traditional painted surfaces. Keeping water exposure to unprotected areas to a minimum is what matters most. For cleaning, use a dry or barely damp cloth. Strong cleaners strip the finish. For repairs, apply a thin layer of the original product over the affected area. Feather the edges using the same crisscross approach as the original coat. Sealing is optional. A matte sealer adds protection in high-traffic areas. Without sealer, the surface may change gradually as it ages. How to Choose Limewash Colors for Different Rooms Limewash changes with lighting, so a shade can look different throughout the day. This helps reveal how the color responds to morning and evening light. Bedrooms: Soft neutrals like warm white, beige, and muted taupe work well. These shades create a calm backdrop while keeping the limewash texture visible. Living Rooms: Warm earth tones such as sand, clay, soft brown, and muted olive pair well with natural materials and add depth to larger spaces without feeling heavy. Small Rooms: Lighter shades like soft cream, pale beige, and light gray can help small rooms feel more open. Always test the color first, because limewash can appear stronger across an entire wall. Low-Light Rooms: Avoid very cool shades in rooms with limited sunlight, as they can make the space feel cold. Warmer neutrals and earthy colors usually work better under softer lighting. Can You Paint Over Limewash? You can paint over limewash after checking the surface condition and preparing it for the new coating. Run a hand over the existing wall. If material transfers, the layer must be stabilized before anything is placed on top. Remove loose or dusty limewash, or stabilize it before applying primer and new paint. Clean the wall with a damp cloth, then let it dry completely. Apply a suitable primer before the new paint. Water-based paints tend to work over primed limewash. Oil-based products need a compatible intermediate primer. Mistakes to Avoid When Limewashing Walls These common issues usually arise from problems during preparation or application. Mistake Cause Fix Finish looks streaky Too much paint applied Use thinner layers Texture looks flat Not enough stroke variation Add another coat Paint color does not stick Poor surface preparation Prime correctly first Color looks wrong Assessed before full drying Wait until completely dry Application lines visible Wet edge lost mid-wall Work faster and maintain wet edge Frequently Asked Questions What are The Disadvantages of Limewash Paint? Limewash may require more preparation than regular paint, and the final color can be difficult to judge until each coat has fully dried. Does Limewash Paint Need a Primer? Primer is recommended on new drywall, glossy surfaces, and highly porous walls to improve adhesion and create more even absorption. How Long Does Limewash Last on Interior Walls? A properly applied limewash finish can last for years indoors when protected from excessive moisture and cleaned gently. Can You Apply Limewash with a Roller? A roller can speed up coverage on large areas, but a block brush creates the natural variation and texture associated with limewash. What Surfaces Can be Limewashed? Limewash works best on porous surfaces such as plaster, brick, and mineral-based walls that allow the finish to be properly absorbed. Happy Reading The process for limewashing walls is more forgiving than most paint techniques. Variation is the point, and a perfectly even coat works against the finish. Get surface preparation right, use the crisscross stroke, and let each layer dry before assessing the color. The finish looks different at 7 am than at 7 pm. That movement is part of what makes it worth the effort. Try a small section first to test the technique. Share the result in the comments once done.

My grandma once painted her kitchen a green so bright it looked like a lime popsicle. She loved the idea of adding color, but within a month, she was ready to repaint. That memory stayed with me for years and made me hesitant about green walls. Then I came across Benjamin Moore Saybrook Sage, and it completely changed how I saw green paint. This is a soft, muted sage that feels calm, natural, and timeless. It brings a touch of the outdoors inside without making the entire room revolve around the color. Choosing the right green is about more than liking a paint chip. Undertones, lighting, flooring, and trim all influence how the shade comes to life in a space. Saybrook Sage works because it brings color in a way that still feels comfortable and easy to live with. What Makes Benjamin Moore Saybrook Sage Stand Out? Saybrook Sage HC-114 comes from Benjamin Moore’s Historical Colors collection, and it has a quiet, grounded quality that works in both older homes and newer spaces. Unlike brighter greens that demand attention, Saybrook Sage has a soft, grayed-down look that blends naturally into a room. It adds color while still letting your furniture, textures, and decor take the spotlight. Feature Details Color Name Saybrook Sage Code HC-114 Collection Historical Colors LRV Around 45 to 46 Color Family Green Undertone Soft gray-green with a touch of yellow LRV, or Light Reflectance Value, shows how much light a paint color reflects back into a room on a scale from 0 to 100. With an LRV around45 to 46, Saybrook Sage sits comfortably in the medium range. It has enough depth to feel intentional without becoming too dark or heavy. The result is a balanced sage that feels fresh in bright rooms and cozy in softer lighting. Why Does Saybrook Sage Feel So Calm and Natural? Saybrook Sage connects a room to nature without turning it into a themed space. Think of dried herbs, olive leaves, and weathered stone, all soft and worn by time. The gray running through Saybrook Sage takes the edge off the green, so it never feels artificial or sharp. That softness is what makes everyone pick it when they want personality on the walls without a bold statement. This color complements a room instead of overpowering it. Think of a living room with a linen sofa and a wooden coffee table. Saybrook Sage sits behind those pieces like a quiet backdrop. It lets the textures do the talking. In a bedroom, paired with soft cotton bedding and warm lamp light, it feels like a place to rest. In a home office, it creates a calm backdrop without feeling cold or plain. Is Saybrook Sage Too Green? You are probably wondering if Saybrook Sage will feel like a true sage green or if it will lean too far into green once it reaches your walls. One reason it works well is that it stays on the softer side. Saybrook Sage leans more toward gray than green in most spaces, and that muted quality is what keeps it feeling calm and natural rather than bright or artificial. The finishes around it will still influence the way it reads. Warm wood tones can bring out the earthy side, while crisp whites and cooler finishes can make the gray influence stand out more. In bright natural light, Saybrook Sage reveals a fresher side, with sunlight making the green feel lighter and more natural while keeping its soft, muted character. In lower light, the shade becomes deeper and quieter, with gray undertones becoming more noticeable. Warm lighting can bring out subtle olive tones, while cooler light may emphasize its gray influence. Testing a sample on your wall is the best way to see how it works with your room’s lighting, flooring, and finishes. Where Does Saybrook Sage Work Best? Saybrook Sage is one of those colors that can move comfortably from room to room. It does not need a specific style or a perfect setting to work, but certain spaces really bring out its personality. The fun part is seeing how differently it can feel depending on what surrounds it. In one room, it feels warm and earthy. In another, it feels calm and refreshing. Here are the spaces where Saybrook Sage naturally fits in. 1. Living Rooms with Warm Textures Saybrook Sage works especially well in a modern living room where natural materials and simple design elements create a balanced feel. Wood furniture, linen upholstery, woven rugs, and soft textures bring out the earthy side of the green while adding warmth and comfort without making the space feel overly styled. Used as the main wall color, Saybrook Sage creates a calming backdrop for a modern living room with layered textures, natural finishes, and pieces that add character over time. 2. Kitchens with Sage Green Cabinets A kitchen is one of the places where Saybrook Sage can make a real impact. On islands or cabinets, it adds color while still keeping the space feeling timeless and easy to live with. Pair it with white countertops, warm wood shelving, brass hardware, or a marble backsplash, and the green starts to feel balanced rather than trendy. It gives the kitchen personality without taking over the entire room, and the right approach topainting kitchen cabinets can help this soft green finish look even more polished. 3. Bedrooms with a Softer Palette Bedrooms are a natural match for Saybrook Sage because the color has a quiet, calming quality. Neutral bedding, soft lighting, and natural fabrics like cotton or wool create a space that feels comfortable and settled. It adds enough character to make the room interesting while still keeping the peaceful feeling you want in a place meant for rest. 4. Bathrooms and Smaller Spaces Saybrook Sage can be a beautiful choice for bathrooms, powder rooms, and entryways where you want a little more personality. It pairs nicely with white tile, natural stone, and brushed metal finishes. Smaller spaces are a great place to experiment with this shade because the color feels intentional without overwhelming the room. The result is fresh, inviting, and full of character. Is Saybrook Sage Good for Exteriors? Painting a house green can feel like a big risk. Saybrook Sage offers a gentler way to try it. Its muted, gray-green quality reads as sophisticated rather than loud from the street. Outdoor light changes throughout the day, so the color shifts slightly from morning to evening. That shift is part of what makes it feel connected to the surrounding landscape. With natural materials like cedar shakes, stone foundations, and brick walkways, Saybrook Sage creates a cohesive exterior by enhancing its earthy, muted tones. White trim can brighten the shade and create a classic look, while darker accents such as charcoal, black, or deep navy add contrast and depth without overpowering the soft green. What Colors Pair Well with Saybrook Sage? Saybrook Sage is flexible, but the surrounding colors determine whether it feels cozy, fresh, or dramatic. The same green can feel softer with warm whites, more natural with earthy textures, or more dramatic with broader accents. The good thing about this shade is that it already has a muted, balanced quality, so you do not need to fight against it. A few thoughtful choices can help bring out the side of Saybrook Sage that best fits your home. Warm White Trim Colors Warm whites are one of the easiest ways to make Saybrook Sage feel comfortable and inviting. Benjamin Moore White Dove creates a soft, classic contrast, while Simply White adds a little more brightness. For a cleaner, sharper look, Chantilly Lace creates a crisp edge that works well in more modern spaces. Beyond trim, these whites also work beautifully on ceilings, cabinets, and larger surfaces when you want the room to feel fresh without losing the green’s warmth. Natural Materials and Earthy Tones Saybrook Sage pairs naturally with materials that bring warmth and texture into a room. Oak, walnut, rattan, linen, leather, and stone all complement its earthy side and keep the space feeling grounded. Decor colors like warm beige, soft tan, cream, and muted brown work especially well here. These tones help the green feel connected to nature while adding layers that make the room feel comfortable rather than flat. Deeper Colors for Contrast If you want Saybrook Sage to feel a little more dramatic, deeper colors can add beautiful contrast. Shades like Hale Navy, Kendall Charcoal, and Essex Green work well on doors, built-ins, furniture, or accent walls. You can also bring in darker decor through charcoal seating, navy textiles, black metal accents, or deep wood finishes. These richer elements add depth to the room while letting the softness of Saybrook Sage remain the foundation. Saybrook Sage Compared to Other Benjamin Moore Greens Choosing between sage greens can be tricky because many shades have a similar calm, nature-inspired feel. The small differences in undertones and depth are what make each one feel different once it is on your walls. Saybrook Sage sits in a comfortable middle ground. It has enough color to add personality, but it stays muted enough for everyday spaces. Paint Color LRV Undertone Overall Feel October Mist Lighter Green with gray Fresh, gentle, slightly cooler Pale Smoke Lighter Gray with faint green Airy, subtle, almost neutral Healing Aloe Similar range Green with blue hints Fresh, coastal, cooler Saybrook Sage and October Mist are close in feel, but October Mist is lighter and softer, while Saybrook Sage feels slightly warmer and more grounded. Against lighter shades like Pale Smoke and Healing Aloe, it brings more warmth and earthy character. Mistakes to Avoid When Using Saybrook Sage Saybrook Sage is a fairly easy color to live with, but a few small choices can change how it feels in your home. Taking a little time before painting can help you avoid surprises once the color is on the wall. The biggest mistake with Saybrook Sage is skipping the natural light test. A shade that feels perfect in the morning can tell a completely different story by evening. It is also worth checking how it works with your existing floors, furniture, and trim. A white with the wrong undertone or too many competing green shades nearby can make the room feel less balanced. A sample on your own wall, viewed at different times of day, will always tell you more than a paint chip ever could. Is Saybrook Sage the Right Green for Your Home? Saybrook Sage is a great choice if you want to bring color into your home without going too bold. Its soft, muted quality works beautifully for nature-inspired spaces, homes with warm textures, and anyone looking for an alternative to traditional neutrals. It may not be the right fit if you prefer a brighter green, a cooler modern shade, or a true neutral. Like any paint color, the final look depends on your lighting, finishes, and surroundings. Before committing, test a sample on your own walls and watch how it changes throughout the day. The right color is the one that feels natural in your space. Frequently Asked Questions Is Benjamin Moore Saybrook Sage a Good Whole Home Color? Yes, its muted quality makes it easy to carry through multiple rooms without feeling repetitive. It shifts slightly with different lighting, which keeps each room feeling distinct even with one shade throughout. Does Saybrook Sage Work with Dark Wood Furniture? Yes, dark wood tones like walnut bring out the warmth in Saybrook Sage. The pairing feels grounded and traditional rather than mismatched. Is Saybrook Sage a Good Front Door Color? Yes, Saybrook Sage can work beautifully as a front door color, especially on homes with natural stone, brick, or wood details. If you want stronger contrast, deeper shades like Hale Navy can create more impact. What Flooring Looks Best with Saybrook Sage? Light to medium wood floors pair especially well, since they echo the earthy quality in the paint. Natural stone tile also works nicely in bathrooms or entryways.
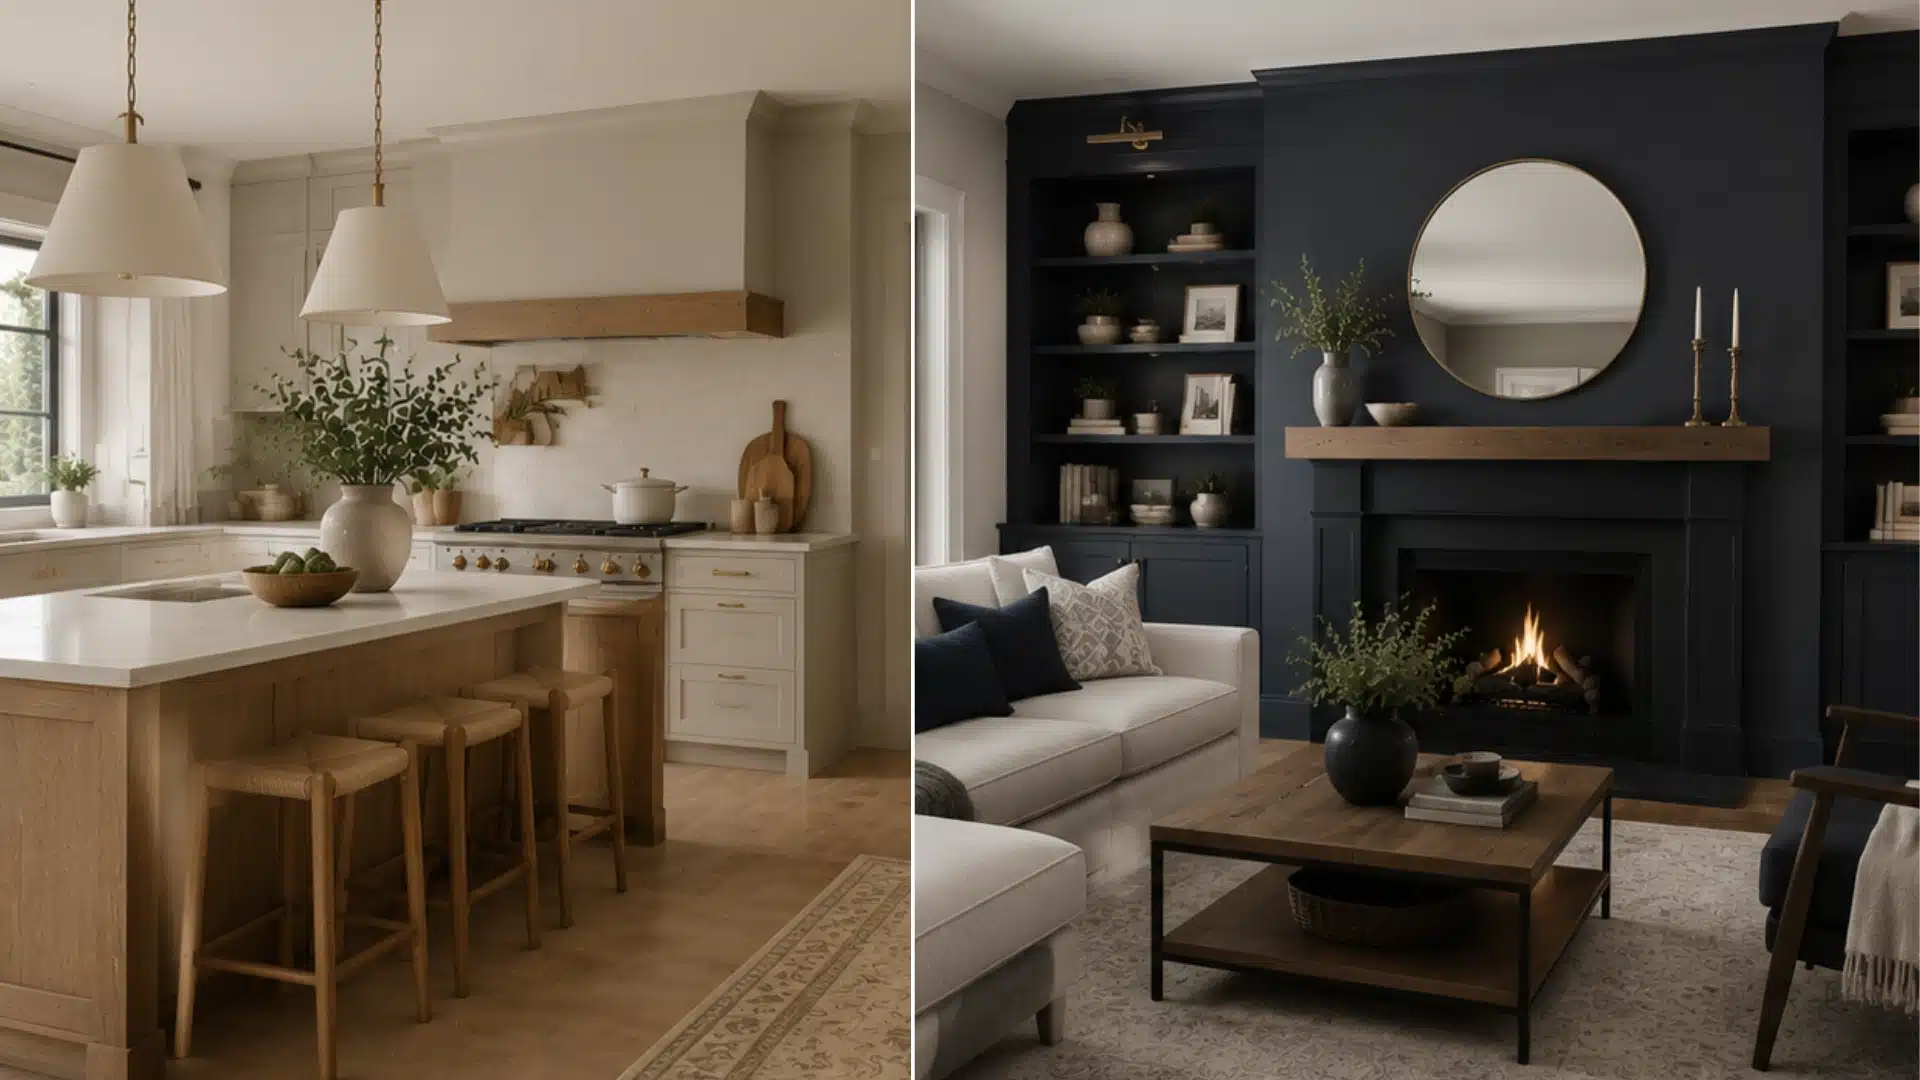
I’ve spent more hours than I’d like to admit digging into this color, and it still catches me off guard every time. Edgecomb Gray is one of those Benjamin Moore colors people can never quite agree on: gray or beige? Honestly, both, and that’s the whole appeal. How it actually looks in your room depends on more than the paint chip. I’ve seen homeowners fall for a sample at the store, only to watch it look completely different once it’s up on their living room wall. Natural light, flooring, and nearby finishes can shift it from soft beige to a cooler gray, so this blog breaks down the undertones, LRV, and pairings that actually hold up before you commit to a gallon. What Color is Benjamin Moore Edgecomb Gray? Edgecomb Gray HC-173 sits in Benjamin Moore’s Historical Collection. It is also known as Baby Fawn OC-15 in some regional collections. That trips people up when they’re comparing swatches online, leading to two names for the same chip. It’s a warm greige, built from both beige and gray rather than leaning hard into either. That middle-ground quality makes it a transitional color. It doesn’t scream farmhouse, and it doesn’t scream modern gray box. It just sits quietly in the background and lets furniture and trim do the talking. A simple way to think about it. Too gray? No. Too beige? No. A balanced warm neutral that adapts to the room? Yes. Feature Details Paint Color Benjamin Moore Edgecomb Gray Color Code HC-173 Collection Historical Collection Type Warm greige LRV 63 Undertones Warm beige-tan base with a faint green-gray note Best For Walls, open-concept spaces, bedrooms, exteriors What Undertones Does Benjamin Moore Edgecomb Gray Have? Edgecomb Gray carries a faint gray-green undertone beneath its warm beige-tan base. It rarely reads as true green on the wall. Instead, it mostly shows up under fluorescent bulbs or in rooms with heavy greenery just outside the window. What it does is keep the color from tipping too far into pink or peach, which is part of why it photographs so evenly across different rooms. If you want to lean into that undertone rather than mute it, Saybrook Sage carries a similar gray-green base at full strength. It’s an easy match for an adjoining room or a powder bath. Does Edgecomb Gray Look Pink or Purple? Occasionally, in low or artificial light. Warm flooring, brick, or incandescent bulbs can pull out a dusty pink cast more than the paint itself does. Is Edgecomb Gray More Beige or Gray? It depends on exposure. North-facing rooms push it toward gray, south-facing rooms bring out beige, and evening light adds warmth either way. Does Edgecomb Gray Have a Yellow Undertone? Not really. Its warmth reads more beige-tan than yellow, which keeps it from getting the golden cast that some warm neutrals show under bright artificial light. Best Rooms to Use Benjamin Moore Edgecomb Gray Edgecomb Gray works in almost any room, but it shines where natural textures and warm materials already exist. Here is how it performs across the most common spaces. Living rooms handle this color well, particularly open layouts with natural textures like wood flooring, linen upholstery, and stone accents. It reads calm without going flat. Bedrooms benefit from the same softness. Paired with soft whites and warm neutrals on bedding, it creates a restful, low-contrast feel that doesn’t compete with décor. Kitchens work well when this greige is on the walls behind white or off-white cabinetry, especially with marble or quartz counters and brass or matte black hardware for contrast. Bathrooms do best when paired with warm-toned stone or tile. A very cool blue-gray tile can clash with its warmth, making both look slightly off. Colors That Pair Well with Edgecomb Gray Edgecomb Gray rarely stands alone in a room. Its warm, in-between quality makes it a great backdrop for both bold accents and quiet neutrals. The right pairing depends on whether you want strong contrast, added depth, or something that blends in without competing for attention. 1. Benjamin Moore Hale Navy Hale Navy and Naval give Edgecomb Gray something grounded to play against. It works well on a front door, a kitchen island, or an accent wall in a living room or entryway, where the contrast reads as intentional rather than heavy-handed. Keep the surrounding trim in a soft white so the navy has room to stand out. 2. Natural Wood Tones Oak and walnut reinforce the earthy quality of Edgecomb Gray rather than fighting it. Use them for flooring, open shelving, or furniture in a living room, kitchen, or bedroom to keep the palette grounded and warm. Lighter wood tones, such as white oak, also work well, especially in rooms with plenty of natural light. 3. Benjamin Moore Kendall Charcoal Kendall Charcoal adds depth without clashing with Edgecomb Gray’s warmth. Use it on trim, built-ins, or a fireplace surround in a living room, study, or home office, anywhere you want definition without introducing a colder undertone. It also works well as a door color in a hallway painted in Edgecomb Gray. 4. Benjamin Moore White Dove White Dove is the most common whole-home pairing, since it creates a soft, cohesive palette. It works well on trim, ceilings, and kitchen or bathroom cabinetry throughout a house painted mostly in Edgecomb Gray. The two colors share enough warmth that the transition between rooms never feels abrupt. 5. Benjamin Moore Vintage Vogue Vintage Vogue brings a moody, smoky green that grounds a room without clashing with Edgecomb Gray’s warmth. It works especially well on a kitchen island, a dining room accent wall, or an entryway for a bit of drama. Keep it to one surface rather than the whole room, so it reads as an intentional accent. Similar Paint Colors Edgecomb Gray is often compared with a handful of other Benjamin Moore neutrals, since several fall within the same warm, medium-light range. Edgecomb Gray vs Revere Pewter Edgecomb Gray is noticeably lighter and reads softer on the wall. Revere Pewter’s LRV is around 55, giving it more visual weight and making it a better fit for rooms that need a grounded, moodier feel. Edgecomb Gray vs Pale Oak Pale Oak reads airier and slightly cooler than Edgecomb Gray, with less beige presence overall. It works well in bright, light-filled rooms, while Edgecomb Gray holds its warmth better in spaces with less natural light. Edgecomb Gray vs Agreeable Gray Edgecomb Gray leans warmer and more beige overall, while Agreeable Gray reads cooler and closer to a true neutral gray. It suits homes already built around cool finishes, where Edgecomb Gray would feel out of place. Edgecomb Gray vs Accessible Beige Edgecomb Gray carries more gray influence and reads less tan than Accessible Beige. It leans further into a warm tan, with less gray to soften it, making it the warmer choice of the two for traditional interiors. Of these, Revere Pewter draws the most comparisons, since the two colors are easy to confuse. Its lower LRV gives it more weight, making it the better pick for rooms that need depth. How Does Edgecomb Gray Look in Different Lighting? The same gallon can look different from room to room. Daylight direction and bulb temperature pull Edgecomb Gray toward its gray or beige side in ways a paint chip never shows. 1. North-facing rooms The gray side becomes more noticeable here. It still reads warm compared to a true cool gray, but loses some beige softness. Pairing it with warm wood tones or brass fixtures helps counter the coolness. 2. South-facing rooms This pulls the color toward its beige and tan side. According to one in-depth color review, warm southern light plays up the color’s beige undertones and can even bring out a hint of pink. 3. East-facing rooms Eastern light runs warm and yellow in the morning but turns cooler by afternoon, pushing the color from beige toward a cooler greige as the day goes on. 4. West-facing rooms Western light does the opposite. It starts cool and shadowy in the morning, then turns warm and red-tinged by evening, which draws out the color’s beige tendencies later in the day. Can You Use Benjamin Moore Edgecomb Gray on Cabinets? Yes. It’s a common choice for traditional and transitional kitchens looking for something softer than stark white. It pairs naturally with: Benjamin Moore White Dove Benjamin Moore Chantilly Lace Brass or aged-brass hardware Natural wood open shelving or floating shelves One caution worth repeating from professional painters: always test a sample directly on the cabinet material before committing. Cabinet finishes reflect light differently than flat wall paint, especially with satin or semi-gloss sheens. A color that reads warm and soft on a wall can look noticeably different on cabinet doors. Is BM Edgecomb Gray Good for Exteriors or Interiors? It holds up well outdoors, particularly on homes with natural stone, brick, or wood accents. The warmth in the undertone complements farmhouse and traditional exteriors without looking stark against greenery or brick. Indoors, it works just as well on walls, cabinets, and trim, since the same warm base that reads well in daylight also holds up under standard interior bulbs. Exterior sunlight is far more intense than interior lighting, which changes how the color behaves compared to an interior wall: Setting How Edgecomb Gray Reads Interior walls Balanced warm greige that shifts with room exposure and bulb type Exterior siding or trim Brighter and lighter overall, since direct sunlight is much stronger than indoor light. Always test a large sample board outdoors, on more than one side of the house, before painting the full exterior. The Pros and Cons of Choosing Edgecomb Gray No paint color works everywhere, and Edgecomb Gray is no exception. Weighing where it excels against where it can fall short helps set realistic expectations before you commit to a full room or a whole house. Pros Cons Warm without tipping into full beige, so it avoids feeling dated Appearance shifts noticeably depending on room orientation and light, so a single swatch can be misleading Works across traditional, transitional, and modern farmhouse styles without a full redesign Can look slightly muddy in rooms with limited natural light or heavy shade Pairs easily with both cool and warm wood tones, which simplifies furniture shopping Needs testing against existing flooring and furniture before committing, especially in older homes None of this makes Edgecomb Gray a bad choice. It just means the room’s light and existing finishes matter as much as the paint chip does. Is Edgecomb Gray Right for Your Home If you want a neutral that leans warm rather than cool, this color is a good fit. The bigger question is whether your room gets consistent light and already leans warm in its existing finishes. Edgecomb Gray shifts more than most colors depending on exposure and what’s around it. It works best in homes already leaning toward warm tones, with wood tones, brass fixtures, or natural stone nearby. It’s less reliable in cool, blue-based spaces. A sample board checked across a few hours of daylight will tell you more than any photo online. Start there before buying the gallon. Frequently Asked Questions Will Edgecomb Gray clash with cool-toned flooring? It can. Gray-based tile, cool oak, or blue-undertone hardwood may pull out unwanted contrast. Warm or neutral wood tones are a safer match, so test a sample against your actual flooring before committing. How many coats of Edgecomb Gray does a room need? Most walls need two coats for even coverage, especially over a darker existing color. A tinted primer matched to the paint base can help reduce streaking on the first coat. Does Edgecomb Gray look good in small rooms or hallways? Yes. Its medium-light LRV keeps small spaces from feeling boxed in, though hallways with little natural light may need a warmer bulb to avoid a flatter, grayer look. Is Edgecomb Gray a safe choice for resale value? Real estate agents often favor warm neutrals like this one because they appeal to a wide range of buyers and photograph well for listings, without the risk of a trend-heavy color. Does Edgecomb Gray work on ceilings? It can, particularly at a lighter tint, if the walls are already the full shade. A flat ceiling finish in Edgecomb Gray softens the contrast between walls and ceiling in rooms with lower light.
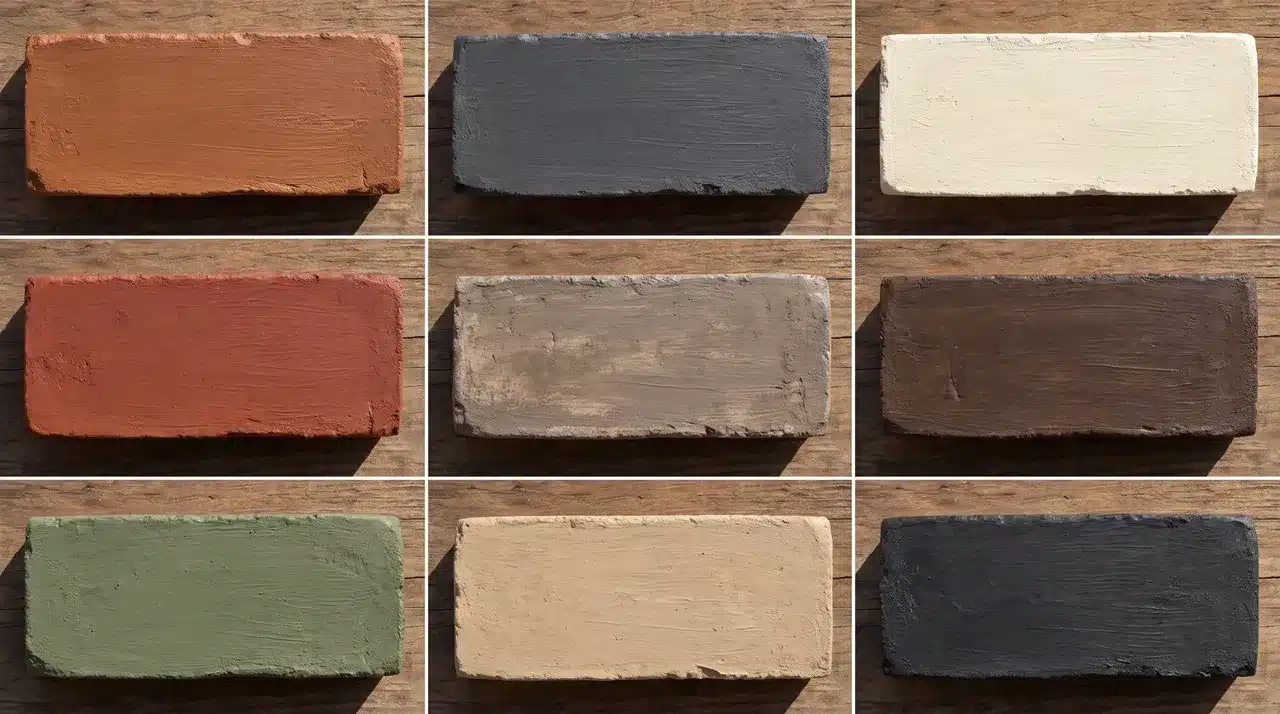
Brick either makes a home look put-together or makes it look tired. There’s rarely an in-between. Faded, chipped, or oddly colored brick stands out fast, especially next to a new roof or door. The fix doesn’t have to mean tearing anything down. Brick stain colors change the brick’s color while keeping its real texture and grain intact. Nothing gets hidden under a flat coat. Your final result depends on a few things. Your brick’s original color matters, along with its porosity, your mortar, your lighting, and how opaque you go. What is Brick Stain and How Does It Change Brick Color? Brick stain is a mineral-based or acrylic colorant that absorbs into the porous surface of masonry. Because it penetrates the brick, the natural texture and variation stay visible after application. Unlike paint, which creates a surface coating that hides brick texture and will eventually peel, stain bonds with the masonry, keeping the natural variation visible. The brick changes color but retains its surface character throughout. Because the colorant bonds to the masonry surface, peeling is less likely than with a paint coating. 11 Brick Stain Colors for Exterior Brick The right shade should complement the architecture of the home. Different styles work better with certain shades, finishes, and color depths. 1. Crisp White White stain gives dark or heavily red brick a bright, clean lift. It brightens the brick without hiding its natural texture. This has more depth than an opaque white coating. Crisp white pairs well with black windows, dark roofs, and natural wood doors. Red, pink, or brown undertones may still show through, though. A test patch shows exactly how much comes through before you commit. 2. Warm Off-White Off-white softens a home’s look without the stark feel of bright white. This shade creates a softer result than a true white stain. It complements cream mortar and warm roofing nicely. Warm off-white suits traditional, cottage, and farmhouse exteriors especially well. It keeps a home from looking too stark or clinical. Many homeowners choose it for a gentle, welcoming update. 3. Light Gray Light gray calms down brick with strong orange or red tones. It reduces the intensity of warm, orange-heavy brick colors. This shade creates a clean, neutral background for your whole exterior. Light gray pairs well with white, navy, charcoal, or black accents. Keep in mind it can look cooler on north-facing walls. Check a sample against your actual wall before committing to the full project. 4. Warm Gray Warm gray offers a softer alternative to a blue-based gray stain. It works well with beige mortar and warm roof shingles. This shade suits ranch, Craftsman, and transitional homes especially well. Warm gray also helps connect gray siding with brown exterior materials. It avoids the cold, flat look that cooler grays sometimes create. Homeowners often pick this shade when they want a balanced, neutral finish. 5. Charcoal Gray Charcoal gray gives brick a bold, grounded look. It makes natural texture appear less busy to the eye. This shade works well with cedar, cream trim, and matte-black fixtures. Charcoal gray suits modern homes that want strong visual contrast. Dark colors absorb more heat, so testing first matters here. Always check a sample in full sun before staining the entire wall. 6. Greige Greige blends the coolness of gray with the warmth of beige. It coordinates well with stone, stucco, and natural wood finishes. This shade softens red brick without looking cold. Greige suits homes with a mix of warm and cool materials. Its flexible undertones make greige a reliable option because it rarely clashes with existing materials. 7. Taupe Taupe creates a quiet, earthy finish with less contrast than darker shades. It complements bronze windows and brown roofing nicely. Taupe pairs well with cream, olive, and muted black accents. This shade offers a softer look than charcoal or bright white. It suits traditional homes that want a subtle, understated update. Taupe rarely overwhelms other exterior colors already in place. 8. Medium Brown Medium brown restores an earthy look to faded or discolored masonry. It suits traditional, rustic, and Craftsman-style exteriors especially well. This shade pairs nicely with beige trim and dark brown doors. Medium brown can unify brick with mismatched red and orange tones. It works particularly well on older homes with weathered, uneven brick. This makes it a reliable pick for restoring a tired exterior. 9. Refreshed Red Refreshed red brings depth back to washed-out or repaired brick. It restores richness to brick that has faded over time. This shade keeps a home’s traditional character fully intact. Refreshed red also helps new bricks blend into older masonry. It pairs well with black, sage, cream, and warm white accents. This shade is often chosen to fix patchy repair work. 10. Muted Sage Green Sage green gives brick a soft, gray-green cast. It introduces a subtle, muted tone without looking bold or unusual. This shade complements landscaping and natural wood details nicely. Test sage green against the roof and mortar first. It may look different across light and dark brick sections. A small test patch helps confirm the color reads consistently. 11. Soft Black Soft black creates a bold, modern exterior update. It produces a contemporary, architectural look without feeling harsh. Soft black shows more natural variation than an opaque black paint. This shade pairs well with warm wood and off-white trim. It works best in homes with plenty of natural light. Strongly contrasting trim also helps this shade stand out. How to Choose the Right Brick Stain Color Start with your roof, since it’s the hardest material to change. Brown roofs pair well with brown, greige, or off-white stains. Black roofs pair with white or charcoal. Mixed shingles call for a neutral like greige. Mortar color also shapes your brick stain color, light mortar brightens it, while dark mortar adds contrast. Factor in fixed exterior materials you can’t easily change, like stonework, siding, window frames, gutters, and walkways. Your home’s exterior style points toward certain color families. Colonial homes often suit refreshed red, while contemporary homes suit soft black. Sunlight changes everything. Direct sun can wash out light colors, and shade can flatten warm tones. North-facing walls often look cooler than south-facing ones. Before you decide, test two or three stain concentrations directly on your exterior brick. Texture and lighting both affect the final color. Brick Stain Color Pairing Ideas Picking a brick stain color is only half the job. The right trim, door, and roof pairing ties the whole exterior together. Use this table for quick pairing ideas once you have a shade in mind. Brick Stain Trim Front Door Roof Warm White Soft black Natural oak Charcoal Light Gray Crisp white Navy Black Charcoal Cream Cedar Black Greige Warm white Dark bronze Brown Taupe Ivory Olive green Weathered brown Refreshed Red Cream Black Dark gray Medium Brown Beige Deep green Brown Sage Off-white Walnut Charcoal These pairings are a starting point, not a fixed rule. Your own lighting, landscaping, and personal taste still matter. Test your chosen brick stain color next to real trim and door samples before you commit. DIY Brick Staining vs. Hiring a Professional DIY works well on small, easy-to-reach projects with bare brick in good condition. It also suits projects that require a single uniform color, as long as you test samples first. That’s the idea behind painting brick stain. Hire a professional instead if your house has multiple stories or if the brick needs repairs or deep cleaning. A pro also helps when you want several blended colors or when replacement bricks need to match older ones. The same goes for surfaces that may already have a sealer or coating. Signs of water intrusion or masonry failure call for expert eyes right away. When a project feels risky, hire a pro. How to Test Brick Stain Colors Correctly Clean a section of brick and mortar that represents the whole wall Choose a spot with some natural color variation Test at least three nearby shades Apply the coats or dilution level you plan to use on the full project Let every sample dry completely Check the colors in the morning, afternoon, and evening light Step back and view the samples from the street, not just up close Confirm the color on both a sunny day and a cloudy one Physical testing matters because brick texture, porosity, and original color all change how a stain looks once it dries. Mineral Stains recommends testing samples directly on your own surface for this same reason. Conclusion The best brick stain color depends on your brick, mortar, roof, and fixed materials. Natural light plays a role too. Start with physical samples. Test a few colors and dilution levels before you commit. Before you begin, confirm your brick is clean, porous, unsealed, and structurally sound. Once you’ve picked a favorite, compare your test patches from the street, not just up close. That is the view your neighbors and guests will actually see. Take your time with the final choice, since the right brick stain color should complement your home for years to come. Frequently Asked Questions What Is the Best Stain to Use on Brick? There’s no single best stain. Water-based and mineral-based options both work well, as long as the product matches your brick’s porosity and exposure to outdoor weather. Is Staining Brick a Good Idea? Yes, in most cases. Staining refreshes faded or mismatched brick while keeping its natural texture. It usually costs less than a full brick replacement, too. What Colors Does Brick Stain Come in? Brick stain comes in many colors, including white, gray, charcoal, brown, greige, and taupe. Sage, refreshed red, and custom color blends are also common today. What are the Most Popular Brick Colors? White, gray, and charcoal rank among the most popular brick stain colors right now. They pair well with many rooflines, trim colors, and door choices. What are the Popular Brick Colors in 2026? In 2026, white, black, charcoal, and classic red remain popular brick stain colors. Blonde, tan, and warm earthy tones round out this year’s top picks.
Home Building & Costs
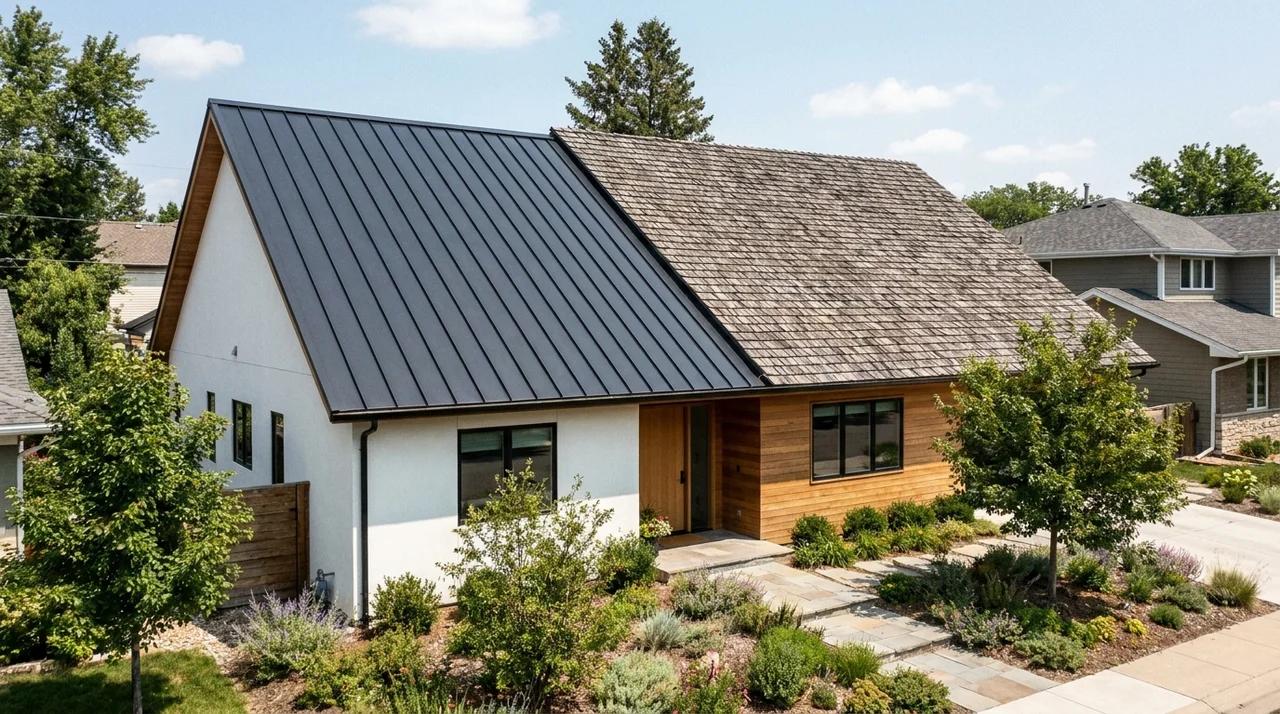
Quick Answer: Metal roofs win on lifespan (40-70 years vs. 15-30) and cost less per year despite a higher upfront price, since shingles need to be replaced 2-3 times over that span. Shingles remain smarter for tight budgets or short-term homeownership. A roof replacement is a major decision, and the material you choose can affect your costs for decades. Choosing the wrong option may lead to frequent repairs, higher energy bills, or the need for another replacement sooner than planned. When comparing a metal roof vs. shingles, price is not the only factor that matters. Both roofing options are common, but they differ in lifespan, performance, maintenance, and long-term value. This comparison examines the key areas homeowners should consider, including cost, durability, weather performance, maintenance, energy efficiency, and resale value. Knowing how each option works can make the decision easier. Metal Roof vs Shingles: How They Compare Before getting into the finer details, it helps to see how metal roofing and asphalt shingles stack up side by side. Factor Metal Roof Asphalt Shingles Average lifespan 40 to 70 years 15 to 30 years Upfront cost Higher Lower Weight Lighter per square foot Heavier Weather resistance Strong against wind, snow, and fire Moderate, varies by grade Maintenance Low, occasional inspection Moderate, more frequent repairs Energy efficiency Reflects heat, can lower cooling costs Absorbs more heat Installation Requires specialized labor Widely available, faster install Curb appeal/style options Modern to traditional looks Wide range of colors and textures Repair ease Trickier to patch, panel replacement Simple spot repairs Resale value impact Often higher due to longevity Standard, expected by most buyers What is a Metal Roof? A metal roof is a roofing system consisting of metal panels or shingles attached to the roof structure. Common materials include steel, aluminum, zinc, and copper. Each option has its own benefits in terms of its price, weight, durability, and rust resistance. Metal roofing is available in different styles. Standing seam panels have raised vertical seams that connect the panels, while metal shingles are designed to create a more traditional roof appearance. Metal roofing is a popular choice because it can last for decades, withstand harsh weather, and require less routine maintenance than some other roofing materials. However, the installation process plays a major role in performance. Proper fastening, suitable underlayment, and room for metal expansion help prevent issues and ensure the roof performs well over time. What are Asphalt Shingles? Asphalt shingles are one of the most common roofing choices for homes in the United States. They are made with a fiberglass or organic base, covered with asphalt, and finished with mineral granules that help protect the roof from sunlight and changing weather conditions. There are three main types of asphalt shingles. Three-tab shingles are the simplest and usually the most affordable. Architectural shingles are thicker, more durable, and have a layered look. Luxury shingles are designed to resemble higher-end materials like slate or wood shakes. Shingles are a popular roofing choice because they are cost-effective, easy to install, widely available, and simple to repair when damage occurs. However, not all shingles perform the same. Higher-quality architectural shingles generally last longer and handle wind better than basic three-tab options, making them a stronger choice for many homes. Metal Roof vs Shingles Cost Comparison The final roofing cost depends on more than just the material. Factors such as roof size, slope, labor rates, and material quality can affect the overall price. Cost Factor Metal Roofing Asphalt Shingles Cost per sq ft installed $7 to $14 $3.50 to $6.50 Average cost for a 2,000 sq ft roof $14,000 to $28,000 $7,000 to $13,000 Cheapest material option Steel Three-tab shingles Most expensive material option Copper or zinc Luxury/designer shingles Labor requirement Specialized installers Widely available contractors Typical repair cost Higher, panel-based Lower, spot repairs Replacement frequency over 50 years 0 to 1 time 2 to 3 times Long-term value Higher due to lifespan Lower due to more replacements Metal Roof vs Shingles: Durability and Lifespan The lifespan of a roof depends on the material, installation quality, and the conditions it faces over time. Metal and shingles can both perform well, but their durability differs. Metal Roof Lifespan A properly installed metal roof can last around 40 to 70 years. Steel and aluminum roofs often last 40 to 50 years, while copper and zinc options can last much longer. Metal roofs handle heavy rain, strong winds, snow, and fire exposure well. Many systems are built to withstand high wind speeds, making them suitable for storm-prone areas. Shingle Roof Lifespan Asphalt shingles usually last around 15 to 30 years. Basic three-tab shingles often have a shorter lifespan than architectural shingles. Heat, sunlight, ventilation, installation quality, and weather conditions all affect how long shingles last. Roof lifespan depends on more than the material. Proper installation, ventilation, and local weather conditions all play a major role in how long it performs. Which Roof Handles Weather Better? Weather performance is where the differences between metal roofing and shingles matter most. The right choice depends heavily on where you live. Weather Condition Metal Roof Asphalt Shingles Heavy Rain Sheds water quickly due to the smooth surface and interlocking panel design Relies on layered overlap, curling or granule loss increases infiltration risk High Winds Concealed fasteners can resist winds above 100 mph when properly installed Three-tab shingles are vulnerable to uplift; architectural shingles perform better, but tabs can still separate Snow and Ice Snow slides off naturally, reducing structural load Holds snow longer; poor attic ventilation can lead to ice dams along the eaves Hail Can dent depending on panel thickness and impact grade Granule loss and cracking are possible; higher-rated products hold up better Best Regional Fit Hurricane zones, Mountain West, Upper Midwest, wildfire-risk areas Temperate and moderate climates with milder seasonal weather Metal Roof vs Shingles: Which is More Energy Efficient? Your roof plays a bigger role in home comfort than you might expect, especially in the summer. 1. Metal Roofing and Heat Reflection Metal roofs reflect more solar radiation than asphalt roofs. When paired with proper ventilation and quality insulation, this reflective property can help reduce heat transfer into your living space. Many metal roofing products also carry cool-roof certifications that indicate measured reflectance values. 2. Shingles and Heat Absorption Standard asphalt shingles absorb more heat, which can raise attic temperatures on hot days. Cool-roof shingle options are available and use special granule coatings to improve reflectance, though they still generally absorb more heat than metal. 3. Other Factors That Matter Roof color, attic insulation quality, and ventilation design all influence how much heat enters your home. A dark metal roof with poor ventilation will not outperform a light-colored shingle roof with a well-designed attic system. Energy savings vary based on your climate, home design, and existing insulation, so no single number applies across the board. Which Requires More Maintenance: Metal or Shingles? Neither roof type is completely maintenance-free, but the time and cost involved differ significantly. 1. Metal Roof Maintenance Metal roofs require relatively little routine attention. The main tasks include periodic inspections of fasteners, seams, and protective coatings. Catching a loose fastener or a small coating scratch early prevents bigger issues down the line. Repairs are less frequent but should always be handled by someone familiar with metal systems. 2. Shingle Roof Maintenance Shingles needs more regular monitoring. Replace damaged or missing shingles promptly. Moss and debris buildup hold moisture against the surface and accelerate wear. Granule loss, visible as bare patches or granules collecting in gutters, signals that the shingles are aging. 3. Post-Storm and Routine Roof Checks After every major storm, walk the perimeter and look for visible damage. Check your attic space for any signs of daylight or water staining. Keeping gutters clear year-round prevents water from backing up along the roofline, a common source of preventable damage. Pros and Cons of Metal Roofs and Shingles Every roofing material comes with benefits and limitations. Comparing the strengths and weaknesses side by side makes the choice easier. Comparison Metal Roof Asphalt Shingles Pros Long lifespan, strong weather resistance, low maintenance, better heat reflection Lower upfront cost, easy repairs, wide style options, easy installation Cons Higher initial cost, specialized installation, and repairs can be more complex Shorter lifespan, more frequent maintenance, and more affected by severe weather Best For Homeowners wanting long-term durability and fewer replacements Homeowners looking for an affordable and practical roofing option Are Metal Roofs Better Than Shingles? Metal roofs outperform asphalt shingles in lifespan, weather resistance, and long-term maintenance cost. A metal roof installed today is likely the last roof that the house will need. Shingles will require at least two full replacements during that same period, which significantly narrows the cost gap over 40 to 50 years. Metal is not the better choice in every situation. Shingles cost roughly half as much to install and are easy to repair with materials available at any home improvement store. Metal repairs require matching panels and a contractor familiar with the system. If a tight installation budget or straightforward repairability is the priority, shingles deliver that. The cleaner way to frame it: metal roofs are the better long-term investment for homeowners who plan to stay in the home, live in a climate with extreme weather, or want low annual maintenance. Asphalt shingles are the better near-term choice for homeowners with upfront budget constraints, those planning to sell within a decade, or those in mild climates where the weather does not place much stress on roofing materials. Neither material fails at its job. The difference is which trade-offs fit the home, the budget, and the timeline. How to Choose Between a Metal Roof and Shingles The right roofing material comes down to four useful questions, and your answers will point fairly clearly in one direction. 1. How long do you plan to stay in the home? If you are in it for the long haul, metal pays for itself over time by eliminating one or two full replacement cycles. If you plan to sell within 10 years, shingles keep your upfront costs low while still satisfying most buyers. 2. What is your local climate like? Metal handles extreme conditions better, whether that is heavy snow loads in the upper Midwest, high winds along the Gulf Coast, or wildfire risk in the West. Shingles perform reliably in moderate climates where conditions are less demanding on the roof. 3. What can you spend now versus later? Shingles cost roughly half as much to install, which is a real advantage if your budget is tight today. Metal costs more upfront but typically requires fewer repairs and no replacement over a 50-year period, making the long-term math closer than the initial numbers suggest. 4. How important is low maintenance to you? Metal roofs ask very little of you year to year. Shingles need more consistent monitoring, particularly after storms, and individual repairs add up over time. If you want a roof you can mostly ignore between inspections, metal is the lower-effort option. Final Thought Choosing between roofing materials depends on what fits your home, budget, and long-term plans. A metal roof offers a longer lifespan, better weather performance, and lower maintenance needs, while asphalt shingles provide affordability, simple repairs, and easy installation. When choosing between a metal roof and shingles, consider your climate, home design, upfront cost, and future replacement needs. Before choosing, compare contractor quotes, check material quality, and look beyond the initial price. A roof that matches your needs can perform better and cause fewer issues over time. Share your roofing choice and experience in the comments below. Frequently Asked Questions How Much Does a Metal Roof Weigh Compared to Shingles? A metal roof weighs about 1.3 to 1.5 pounds per square foot, making it lighter than asphalt shingles and reducing stress on the roof structure. Why Do Insurance Companies Not Like Metal Roofs? Insurance companies usually support metal roofs because of their durability. However, higher replacement costs, concerns about hail damage, and installation standards may affect coverage. What is the 25% Rule for Roofing? The 25% rule means that if more than 25% of a roof section is repaired or replaced within 12 months, the entire section may require code upgrades. What Color Roof Increases Home Value? Neutral roof colors like charcoal gray, black, and weathered wood often attract buyers. These shades work well with various home styles and improve overall exterior appeal. What is the Cheapest Time of Year to Get a New Roof? Winter months, especially December through February, are often the cheapest time to replace a roof. Lower demand may help homeowners get off-season discounts of around 5% to 15%.
Not all drywall sheets are the same. Many people pick whatever thickness is available at the store, only to discover problems later. A ceiling starts to sag, a wall feels less sturdy than expected, or the project costs more because the wrong board was chosen. Drywall thickness is not just a measurement. It affects strength, sound control, fire resistance, installation difficulty, and where the material can be used. Most interior walls use ½-inch drywall because it offers a good balance of durability, weight, and cost. Ceilings and areas that require extra performance often use ⅝-inch drywall because the thicker panel better handles stress. This guide explains every drywall thickness option, where each one works best, and how to choose the right board for walls, ceilings, basements, garages, and sound-sensitive rooms. Standard Drywall Thickness and Sizes Drywall measurements include thickness and sheet size. Thickness affects strength, sound control, and durability, while sheet size affects installation and the number of seams. Common drywall thickness options include: ¼ inch: Used for repairs, overlays, and curved surfaces ⅜ inch: Used for older repairs and lightweight applications ½ inch: Standard choice for most interior walls ⅝ inch: Used for ceilings, fire-rated walls, and sound control Location Recommended Thickness Reason Interior walls ½ inch Standard residential choice Basement walls ½ or ⅝ inch Depends on moisture, sound, and code requirements Basement ceiling ⅝ inch Better resistance against sagging Garage walls ⅝ inch Type X Often required for fire-rated assemblies Bathroom walls ½ inch moisture-resistant drywall Better suited for humid areas Soundproof rooms ⅝ inch or specialty sound-rated drywall Adds more mass for noise control Curved walls ¼ or ⅜ inch Easier to bend and shape For most homes, ½-inch drywall provides the right balance of strength, cost, and easy installation. However, drywall type and construction quality also affect overall performance. The standard drywall width is 4 feet. Common sheet lengths include: 8 feet: Best for most residential walls 10 feet: Helps reduce seams on taller walls 12 feet: Useful for large walls and open spaces Longer sheets create fewer joints and reduce finishing work. However, they are heavier and harder to move. For most residential projects, 4-by-8-foot drywall sheets are the easiest to handle and install. Which Drywall Thickness Works Best for Your Space? Different drywall textures and thicknesses are designed for different situations. From flexible repair panels to stronger boards for ceilings and sound control, each option has its own purpose. Understanding where each thickness works best helps you avoid choosing a board that is too thin, too heavy, or unsuitable for the job. 1. ¼ Inch Drywall Quarter-inch Drywall is the thinnest standard option available. Its lightweight design makes it easier to bend, which is why it is often used when flexibility matters more than strength. Common Uses of ¼ Inch Drywall Limitations of ¼ Inch Drywall Repairing damaged wall sections Lower impact resistance compared with thicker panels Covering existing drywall surfaces Provides less sound control Creating curved walls or arches Reduced durability for everyday wall applications Adding a second layer over existing walls Not suitable for standard wall construction If you are repairing a small area or working around a curved feature, ¼-inch drywall can be useful. For full walls, ceilings, or heavily used areas, a thicker option is usually the better choice. Because it bends more easily, some installers use multiple layers of ¼-inch drywall for curved applications. This requires more labor but allows them to create shapes that would be difficult to achieve with thicker boards. 2. ⅜ Inch Drywall Three-eighths-inch Drywall was more common in older homes and renovation projects. It is still available today, but it is rarely the first choice for new construction. Common Uses of ⅜ Inch Drywall Limitations of ⅜ Inch Drywall Matching existing drywall thickness in older homes Less common in modern construction due to stronger alternatives Small repair projects Provides less strength than thicker drywall options Lightweight applications Lower durability for high-use areas Slightly curved surfaces Not typically recommended for standard wall installations If you are repairing an older home, matching the existing drywall thickness matters. Installing ⅜-inch drywall next to ½-inch drywall can create uneven surfaces that become noticeable after painting, even with careful finishing. For restoration work, matching what is already installed is often more important than choosing the thickest available option. 3. ½ Inch Drywall Half-inch drywall is the most common drywall thickness used in residential construction. Common Uses of ½ Inch Drywall Limitations of ½ Inch Drywall Bedrooms, living rooms, and hallways Provides less sound control compared with thicker drywall options Standard interior walls May not be suitable for areas requiring higher fire resistance Most residential partitions Can be more prone to sagging when used on ceilings with wider joist spacing General home construction projects Offers less impact resistance than ⅝-inch drywall Works well with standard wall framing Not the best choice for high-performance applications like home theaters or specialty sound rooms A standard 4-by-8-foot sheet of ½-inch drywall usually weighs around 50 to 55 pounds. This makes it manageable for many installations without requiring specialized lifting equipment. For most interior walls, moving to a thicker board does not provide enough benefit to justify the added weight and cost. 4. ⅝ Inch Drywall Five-eighths-inch Drywall is the thickest commonly used standard drywall option. It is selected when a project needs additional strength, sound control, or fire resistance. Common Uses of ⅝ Inch Drywall Limitations of ⅝ Inch Drywall Ceiling installations Heavier than thinner drywall options, making it harder to handle Garage walls requiring fire-rated assemblies More expensive because it uses additional material Shared walls between living spaces More difficult to cut, carry, and install Home theaters and sound-sensitive rooms May require additional labor or help during installation Areas needing better sound control or fire resistance Not always necessary for standard interior walls where ½-inch drywall is sufficient Many ceiling installations require two people to lift and position the sheets safely. Some ⅝-inch drywall products are also made as Type X drywall. These boards contain special core additives that improve fire resistance and are commonly required in certain fire-rated assemblies. For example, garages attached to living spaces often have specific fire separation requirements, so the correct drywall type matters as much as the thickness. Drywall Thickness by Room and Area The right drywall thickness depends on where you are installing it. A wall in a bedroom does not have the same requirements as a basement ceiling or a garage wall. How Thick Should Drywall Be for Ceilings? Ceilings need careful drywall selection because panels are constantly pulled downward by their own weight. Thinner drywall can sag over time, especially with wider joist spacing. Factors that affect ceiling drywall choice include: Joist spacing: Wider spacing may require thicker drywall for better support. Ceiling size: Larger areas place more stress on panels. Texture type: Heavy finishes add extra weight. Moisture exposure: Bathrooms and basements may need added protection. ⅝-inch drywall is commonly preferred for ceilings because it is stiffer and resists sagging better than thinner boards. While ½-inch drywall may work in some cases with closer joist spacing, many contractors choose ⅝-inch drywall for better long-term performance. How Thick Should Drywall Be for Basement Walls? Basement walls typically use ½-inch or ⅝-inch drywall, depending on the space requirements. The right choice depends on factors like moisture levels, sound control, fire ratings, and framing conditions. Factors that affect basement drywall selection include: Moisture exposure: Damp areas may require moisture-resistant drywall. Sound control: ⅝-inch drywall can help reduce noise transfer between floors. Fire requirements: Some basement areas may require fire-rated drywall. Wall framing: Stud spacing can affect the thickness needed. ½-inch drywall works for most finished basement walls, while ⅝-inch drywall is preferred when extra strength, sound control, or fire resistance is needed. Always check local building codes before installation. How Thick Should Drywall Be for Interior Walls? ½-inch drywall is the standard choice for most interior walls in homes. It provides a good balance of strength, cost, and ease of installation for bedrooms, living rooms, hallways, and other common areas. In some cases, ⅝-inch drywall may be a better option. It is often used for shared walls, rooms that need better sound control, or areas where extra fire resistance is required. The right thickness depends on the wall’s purpose, framing conditions, and performance needs. For most residential interior walls, ½-inch drywall is sufficient and remains the most common choice. Side by Side Comparison Basis of Comparison Interior Walls Ceilings Basement Walls Recommended Thickness ½-inch drywall ⅝-inch drywall ½-inch or ⅝-inch drywall Main Requirement Everyday strength and easy installation Sag resistance and added stiffness Strength, moisture control, and sound management Reason for Thickness Choice Balances cost, durability, and handling Thicker panels hold their shape better against gravity Thickness depends on moisture levels, sound needs, and code requirements Common Use Areas Bedrooms, living rooms, hallways, partitions Main ceilings, larger spans, areas with wider joist spacing Finished basements, living spaces below other rooms When to Choose Thicker Drywall Shared walls or rooms needing better sound control Wider joist spacing or heavier ceiling finishes Better sound control, fire resistance, or added durability Key Consideration Wall purpose and performance needs Joist spacing and ceiling load Moisture exposure, framing, and local building codes Does Thicker Drywall Reduce Noise? Thicker drywall can help reduce sound transfer, but it does not completely soundproof a room on its own. The added thickness increases the wall’s mass, making it harder for sound vibrations to pass through the surface. Sound control depends on several factors working together, including: Insulation inside the wall cavity helps absorb sound before it travels through the wall Framing design affects how vibrations move through the structure Multiple drywall layers add more mass for better noise reduction Acoustic sealants reduce sound leaks around gaps, outlets, and joints Proper installation prevents weak points that allow sound to pass through ⅝-inch drywall generally performs better than thinner boards because it provides more mass. It is commonly used in areas where noise control matters, such as: Home theaters Bedrooms near noisy spaces Shared walls between units Home offices For better results, sound-rated drywall combined with insulation and proper sealing often performs better than simply using a thicker standard panel. The entire wall assembly determines how effectively sound is reduced. Does Drywall Type Matter More Than Thickness? Drywall thickness affects strength, weight, and sound control, but it is only one part of how a drywall panel performs. The type of drywall you choose can matter just as much, especially in rooms exposed to moisture, fire risks, or higher noise levels. A ⅝-inch regular drywall panel is not automatically the best choice for every situation. A bathroom, garage, or home theater may need a specialized product instead. Here are the most common drywall types: Drywall Type Best For Main Benefit Regular Drywall Bedrooms, living rooms, hallways Affordable and versatile Moisture-resistant Drywall Bathrooms, laundry rooms, basements Handles humid conditions better Type X drywall Garages, fire-rated walls Improves fire resistance Sound-rated Drywall Home theaters, offices, shared walls Reduces sound transmission For example, using thicker regular drywall in a bathroom does not replace the need for moisture-resistant materials. Likewise, adding ⅝-inch drywall to a noisy room helps, but combining it with insulation and proper sealing creates much better results. The best choice usually comes from combining the right thickness with the right drywall type. Drywall Thickness Cost Differences Drywall thickness affects more than performance. It also changes material costs, handling difficulty, and installation time. Drywall Thickness Approximate Cost per 4×8 Sheet Handling and Installation Best Value For ¼ inch $10–$15 Lightweight and easy to handle Repairs, overlays, and specialty projects ⅜ inch $10–$18 Easy to install but less common today Matching older drywall and small repairs ½ inch $12–$20 Easier to carry, cut, and install Most interior walls and residential projects ⅝ inch $15–$25 Heavier and may require extra help during installation Ceilings, fire-rated areas, and sound-control spaces Note: Prices are approximate and may vary depending on location, supplier, drywall type, and brand. Can You Install Thicker Drywall Over Existing Walls? Installing new drywall over existing walls is possible in some situations, but it is not always the best solution. Quarter-inch Drywall is commonly used for overlays because it adds minimal thickness while creating a smoother surface. Before adding another layer, consider: Door and window trim may no longer fit correctly Electrical boxes may sit too far behind the wall surface Wall dimensions will slightly increase Moisture or damage problems may remain hidden underneath Adding thicker drywall over an existing surface may help improve appearance or add some sound control, but it does not fix damaged framing, leaks, or structural issues. For major renovations, removing old drywall and starting fresh is often the better option because it allows inspection of insulation, wiring, and wall conditions. Key Takeaways for Your Next Project Choosing the right drywall thickness depends on where it will be installed and what the space requires. For most interior walls, ½-inch drywall remains the standard option because it provides a practical balance of strength, cost, and ease of installation. Thicker ⅝-inch drywall is better suited for ceilings, fire-rated areas, and rooms where improved sound control is needed, while thinner panels work best for repairs and specialty projects. The right choice is not always the thickest board available. Considering the room type, framing, moisture exposure, building requirements, and installation needs helps prevent problems like sagging ceilings, weak surfaces, or unnecessary costs. A few careful decisions before installation can help create a stronger and longer-lasting wall system. Frequently Asked Questions What is the most common drywall thickness? ½-inch drywall is the standard choice for most residential interior walls because it offers a good balance of strength, cost, and ease of installation. Can ⅝-inch drywall be used on interior walls? Yes, ⅝-inch drywall works on interior walls where extra strength, sound control, or fire resistance is needed, but ½-inch drywall is more common for standard rooms. What thickness of drywall is used for ceilings? ⅝-inch drywall is commonly used for ceilings because its added stiffness helps reduce sagging, especially with wider joist spacing. Can you use ¼-inch drywall on walls? ¼-inch drywall is mainly used for repairs, overlays, and curved surfaces. It is not recommended as a standalone wall covering. Does drywall thickness affect fire rating? Yes. Fire-rated assemblies often use ⅝-inch Type X drywall because its reinforced core slows the spread of fire. The exact requirement depends on the building assembly and local code.
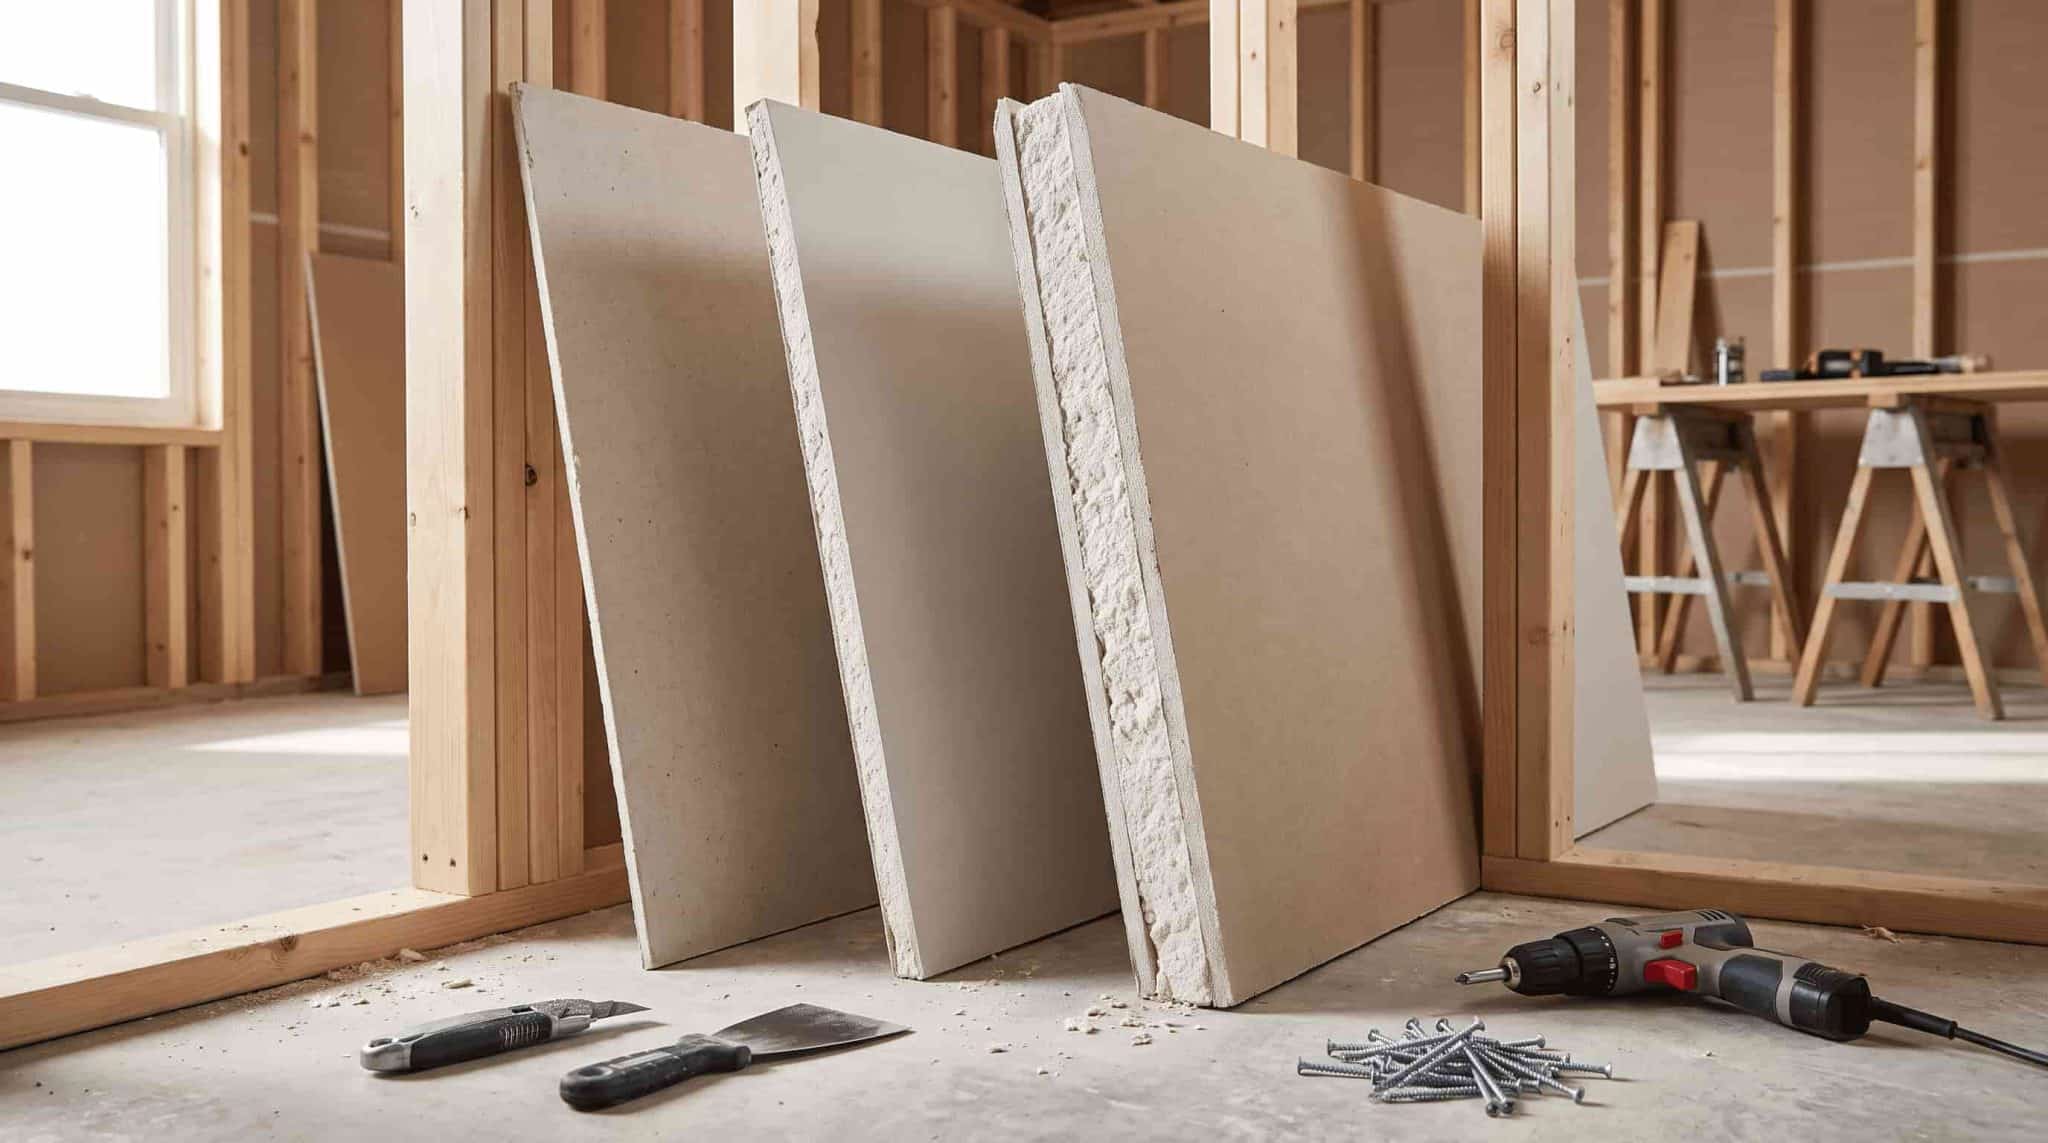
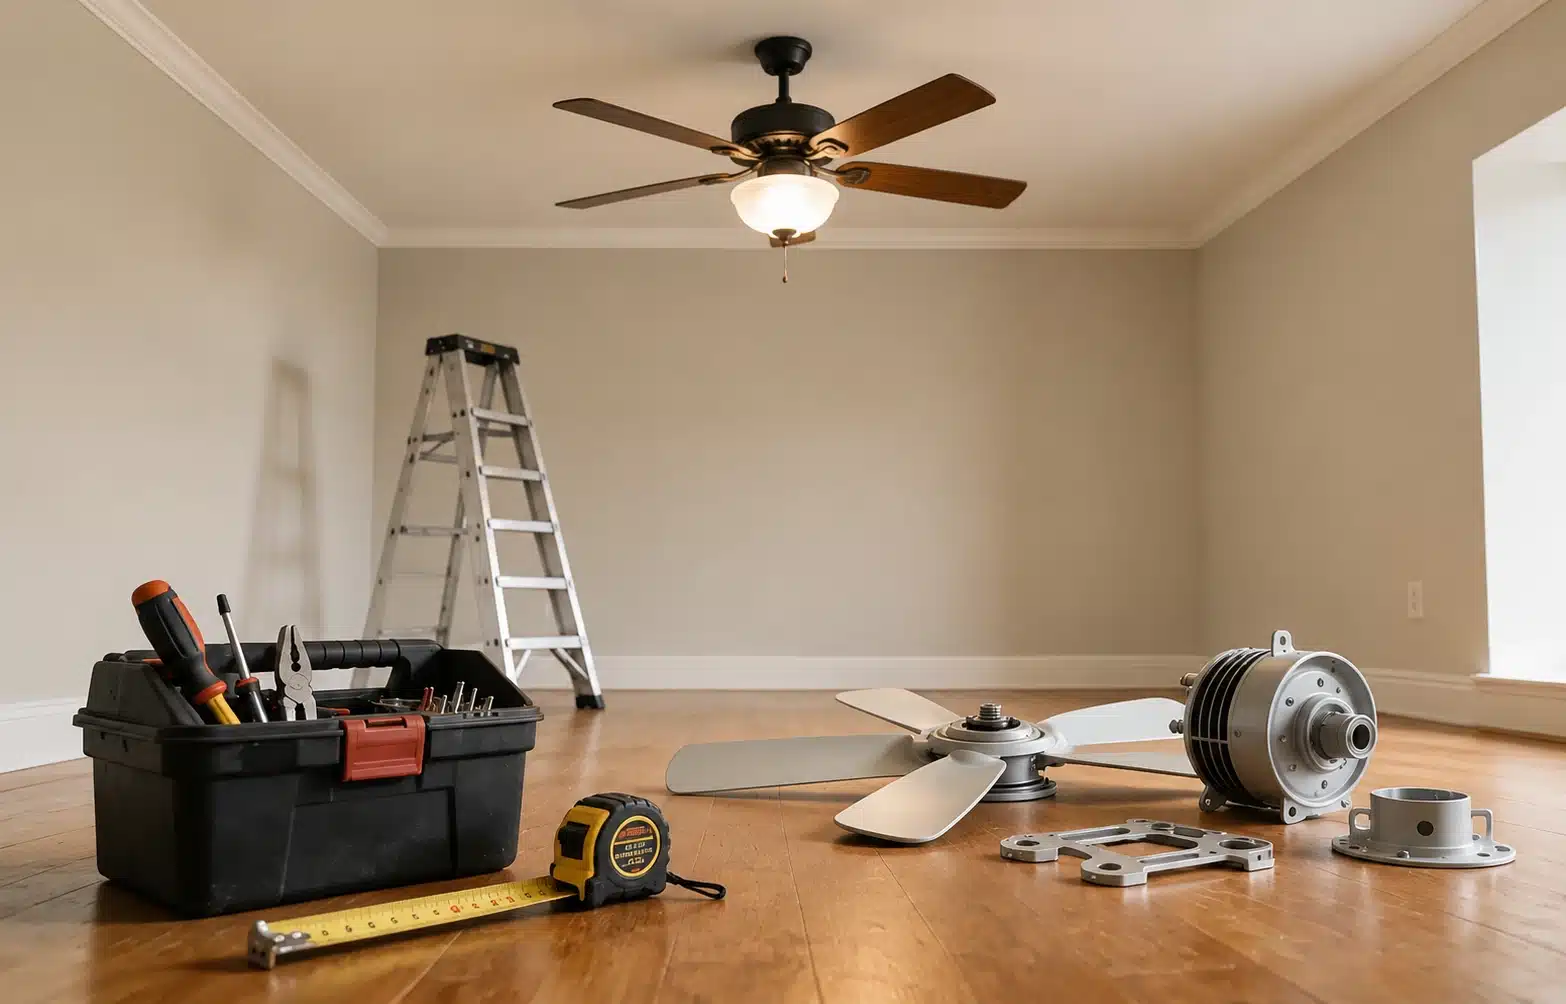
Quick Answer: Ceiling fan installation costs between $146 and $360 for a standard job with existing wiring, averaging around $253. New wiring, a vaulted ceiling, or an outdoor install can push the total past $600. The biggest cost driver is whether wiring already exists at the installation spot. You budgeted for the fan. You forgot that the installation is a separate cost. That catches most of us off guard. The final number depends almost entirely on what is already in your ceiling. Confirmed wiring and a fan-rated box keep costs low. No wiring, a vaulted ceiling, or an outdoor location pushes it significantly higher. According to Energy Star, certified fans can be up to 44% more energy-efficient than standard models, which changes how you think about the upfront cost. You will typically be billed $60 to $130 per hour for a licensed electrician. I will walk you through every variable so you know exactly what to expect before you make the call. How Much Does Installing a Ceiling Fan Cost? The price depends on one question, do you already have wiring in that spot? Find your scenario below. Your Installation Scenario What You Will Pay Fan replacement with existing wiring $85–$300 New install at existing fixture location $146–$360 New install with no existing wiring $400–$1,000 Vaulted or angled ceiling install $300–$600 Outdoor or wet-rated fan installation $250–$500 Smart fan setup with wiring $150–$600 Two or more fans in one visit Save $50–$100 on labor You will see different averages depending on which source you read. They measure different types of jobs. A simple swap looks nothing like a new install with fresh wiring. Labor runs $50 to $250. Your total depends on your scenario and who you hire. What Factors Change the Final Price? Several things move your number up or down. Here is what you need to know before you pick up the phone. 1. Labor: Who Should You Hire? A handyperson charges $50 to $80 per hour for a straightforward swap with existing wiring. An electrician charges $60 to $130 per hour, often with a $150 minimum for the first hour and a $100 to $200 job fee. Here’s my rule: hire a handyperson only if the wiring is confirmed and the box is fan-rated. Any work involving new wiring or circuit work requires a licensed electrician to avoid safety and code issues. 2. New Wiring vs. Existing Wiring Your wiring situation is the single biggest cost driver on any job. Replacing a fan on existing wiring runs $100 to $300 in labor, while new wiring adds $200 to $700. Open attic access keeps costs low; finished drywall means cutting in, fishing cable, and patching, which can add $300. New wiring runs $5 to $17 per linear foot, and a new circuit adds $150 to $600. In older homes where the electrician finds broader issues, such as an outdated panel or degraded circuits, the scope can expand well beyond a single fan install, and rewiring costs are worth knowing before that conversation happens. 3. Ceiling Type and Height Standard 8-foot ceilings add no extra cost. Vaulted or angled ceilings past 34 degrees need a sloped adapter, about $37. Ceilings 12 feet or higher may need scaffolding or a lift, adding $50 to $150. For downrod length, per Hunter Fan, subtract 9 feet from your ceiling height, then convert the result to inches. A 12-foot ceiling needs a 36-inch downrod. Downrods run $10 to $75. 4. Fan Type and Accessories Fan Type Fan Price Install Impact Standard (4–5 blade) $50–$300 Simple, 1–2 hours Low-profile or hugger $50–$400 Same as standard Smart or Wi-Fi-enabled $120–$600 Extra setup and app config Outdoor or wet-rated $100–$400 Weatherproof wiring required Dual-motor or directional $150–$1,850 Heavy; may need ceiling brace Your fan choice affects price and installation time, as shown above. A wall control or remote receiver adds $28 to $100. If your ceiling box can’t support a fan’s weight, swapping it runs $15 to $50 in parts plus $50 to $100 in labor. DC motor fans cost more upfront but use less power, and a fan can let you raise your thermostat by about 4 degrees while staying comfortable. Ceiling Fan Installation Cost by Location Where you live can shift your total installed cost by $100 or more. Local cost of living, licensing requirements, and demand all play a role. City Avg. Installed Cost Boston $392 New York City $406 Washington DC $378 Chicago $322 Seattle $364 Denver $322 Austin $294 Philadelphia $314 These numbers are a baseline, not a final price. Your actual invoice depends on your home’s specific wiring and layout, as well as the pro you hire. Should You Repair or Replace Your Fan? Before you budget for a full replacement, check whether a simple fix solves the problem for less money. Here is how to decide. Repair it if: Your fan is under 10 years old The issue is a wobble, a cracked blade, or a dead light kit The motor runs quietly and does not overheat The repair cost is lower than buying and installing something new Typical repair cost: $50 to $400 Replace it if: Your fan is 10 to 15 years old or more The motor hums, overheats, or stalls at different speed settings You cannot find replacement parts for your model You want smart controls, a DC motor, or quieter operation Your ceiling box is not fan-rated That last point matters most. A box built for a light fixture is not designed to support the weight and rotation of a fan. A wobbling or noisy fan is often a symptom, not the real problem, so check the box behind it before you buy anything new. If it is not rated, the whole setup needs to be replaced, which typically runs $150 to $600 installed. DIY Installation vs. Hiring a Professional You can save $100 to $250 on labor by doing it yourself. But getting it wrong costs you more than that to fix. Here is a look at both sides. Your DIY cost equals the fan price plus $10-$40 in materials. That covers wire connectors, mounting hardware, and basic tools. DIY works for you if: You are swapping a fan in the exact same location Your existing wiring and a fan-rated ceiling box are confirmed Your ceiling is standard height and easy to reach with a stepladder You have real experience with basic electrical work Always hire a pro if: New wiring or a new circuit is required There is no existing fixture at your installation location Your ceiling is vaulted, sloped, or over 10 feet tall Your ceiling box is not rated for fan support Local permits or inspections apply to the work Improper wiring is the top cause of ceiling fan failure. A fan that wobbles or stops working after a few months almost always traces back to the original installation. Professional work protects your home and keeps your warranty valid. How Much Time Does Ceiling Fan Installation Take? The time required depends on your existing setup and the scope of the installation. A simple fan swap at an existing wired location with a fan-rated box typically takes one to two hours. That includes removing the old fixture, checking the box, connecting the wires, mounting the new fan, and testing it at all speed settings. New installations requiring new wiring, circuit changes, or ceiling box upgrades take 2 to 4 hours. Add another hour if the electrician needs to access a finished attic, fish cable through drywall, or patch anything after the work is done. High ceilings change the picture. Anything above ten feet requires a ladder setup, careful downrod measurement, and slower work at height. That alone can add thirty to sixty minutes to an otherwise simple job. Outdoor installs and smart fan configurations add even more time. Running weatherproof wiring and configuring app controls or wall switches adds complexity that a standard swap does not. Tips to Lower Ceiling Fan Installation Cost Hiring an electrician is recommended when the installation involves electrical changes or safety concerns beyond a simple replacement. Consider professional help if you have: No existing wiring for the ceiling fan location No fan-rated electrical box for proper support Circuit capacity concerns or electrical issues High ceilings require specialized equipment Outdoor installations needing weather-rated connections Permit requirements related to electrical modifications A qualified electrician can confirm the fan is mounted securely and connected correctly, especially when the installation goes beyond replacing an existing fixture. Mistakes to Avoid When Installing a Ceiling Fan Most ceiling fan problems trace back to decisions made before installation, not during it. Buying a fan before checking the wiring is the most common mistake. Smart fans, fans with separate light kits, and fans with multiple speed controls may need a neutral wire that older homes do not have at the switch location. Finding that out after purchase means either returning the fan or running new wiring. Next, make sure the fan is sized correctly for the room. A fan too small for the space moves insufficient air. A fan too large for a low ceiling becomes a clearance hazard. Measure your room and ceiling height before you buy anything. Skipping the ceiling box check is where safety problems start. A standard light fixture box is not rated to support the weight and continuous rotation of a fan. Using one is a code violation and a real physical risk. Finally, accepting a vague quote creates the most budget surprises. Any estimate that doesn’t separate labor, materials, ceiling box work, and potential wiring changes leaves room for charges you didn’t plan for. Ask for a line-item quote before work begins. Frequently Asked Questions How Much will Home Depot Charge to Install a Ceiling Fan? Home Depot ceiling fan installation costs vary by location and project needs, including wiring, mounting requirements, and labor complexity. Exact pricing requires a quote. Are Ceiling Fans Worth Installing? Ceiling fans can be worth installing because they improve air circulation, reduce cooling demand, and provide comfort while using less energy than air conditioning. Are Ceiling Fans Outdated in 2026? Ceiling fans are not outdated in 2026. Modern designs, smart controls, efficient motors, and stylish finishes keep them practical for many homes. Why Should You Not Sleep with a Ceiling Fan on all Night? Sleeping with a ceiling fan running all night is generally safe, but some people may experience dryness, allergies, noise concerns, or discomfort from constant airflow. Is a 52-Inch Fan too Big for a 12×12 Bedroom? A 52-inch ceiling fan is usually suitable for a 12×12 bedroom and provides balanced airflow. Check ceiling height and blade clearance before installation. Final Thoughts So, what does installing a ceiling fan actually cost? For a simple replacement of existing wiring, you are looking at $85 to $300. A full new install without wiring goes up to $1,000. Your location, ceiling type, and fan choice all shift that number. The real work happens before you dial a number: know your wiring situation and check that your box can handle a fan. Everything else in this guide flows from those two answers. Have you installed a ceiling fan before? Drop your experience in the comments below. I would love to know what it cost you.
More style and spaces to explore — and stories that inspire every corner.
Wood & Furniture
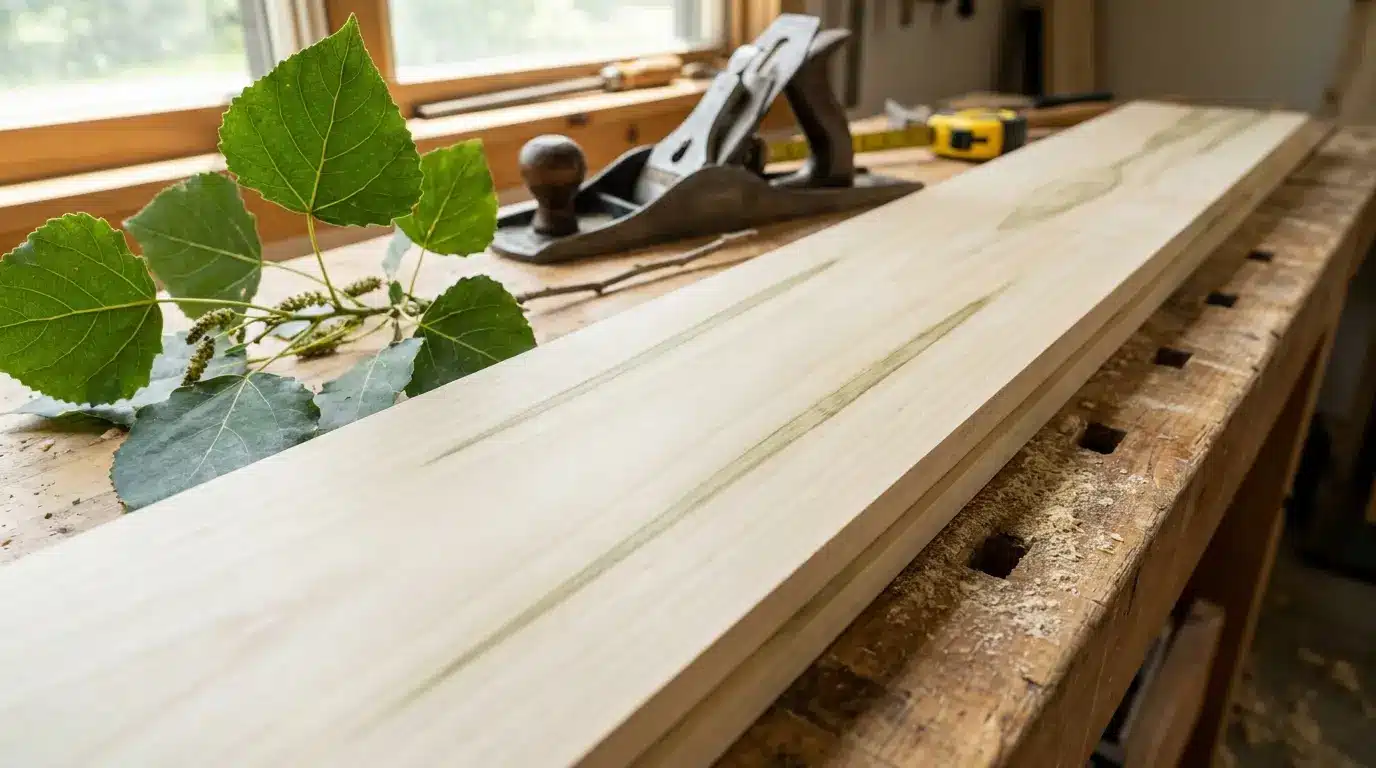
Poplar wood Value Classification Hardwood Janka hardness 540 lbf Common nicknames Tulip poplar, yellow poplar, whitewood Best for Painted furniture, frames, trim, plywood Not ideal for Flooring, cutting boards, outdoor furniture With more than 20 years of woodworking experience in carpentry and custom furniture, I have seen how different woods perform in real-world projects and which lower-cost options are actually worth using. Yes, poplar is a hardwood. It comes from a broadleaf tree rather than a conifer, which is why it’s classified as such. Still, its Janka hardness rating is much lower than woods like oak or maple, so it dents and scratches more easily. That is why poplar often causes confusion at the lumberyard. Although it is technically a hardwood, it behaves more like a softer wood in everyday use. Why Poplar Counts as a Hardwood The hardwood and softwood labels do not describe how hard a wood feels to the touch. Hardwood comes from angiosperms, flowering trees that drop their leaves each fall. Softwood comes from gymnosperms, mostly cone-bearing evergreens like pine, spruce, and cedar. Poplar flowers every spring and sheds its leaves every autumn. That single trait places it in the hardwood group, no matter how soft the milled lumber feels. Most lumber sold as poplar actually comes from the tulip tree, or Liriodendron tulipifera. American yards almost always stock this wood as poplar, even though true Populus trees, like aspen and cottonwood, also exist. Pine, fir, and cedar never enter this conversation, since they grow cones instead of flowers. Density and weight play no part in the classification at all. How to Identify Poplar Wood If you already own a board and want to confirm the species, follow these steps. Check the color: Poplar sapwood runs creamy white in most boards you encounter. Its heartwood shifts from pale yellow-brown to olive green, sometimes within the same board. Check the grain and texture: The grain remains straight and even, with a fine-to-medium texture, similar to oak or ash. Look for mineral streaks: Some boards pick up green, gray, or purple streaks as the tree grows. Woodworkers call this rainbow poplar, and it often sells at a premium. Compare the weight: Hold a poplar board next to an oak board of the same size. The poplar will feel noticeably lighter almost right away. What Poplar Wood is Used for Builders reach for poplar all the time, just not always where you can see it. 1. Furniture and Frame Parts These sit under upholstery or paint, where appearance is not important to the buyer. Among the types of wood for furniture, poplar is commonly used for hidden frames because it is lightweight, affordable, and easy to work with. Builders choose it for furniture supports since the frame stays concealed after assembly. Its low weight also helps reduce shipping costs on large orders. 2. Paint-ready Cabinets and Trim Cabinets, shelves, and trim take a smooth coat once primed properly. Millwork, molding, and door parts often use poplar, too, since most are painted rather than left natural. The straight grain helps paint sit evenly across long trim runs. Many kitchen cabinet makers use poplar for face frames before painting the whole piece. 3. Plywood Core Material Plywood cores gain lightweight strength from poplar without adding much extra bulk. This makes plywood easier to install without giving up rigidity. Manufacturers like poplar cores because they resist warping better than some softwood alternatives. This keeps plywood sheets flat during storage and shipping. 4. Pallets and Crates These rely on poplar for its low cost and light weight during transport. Poplar boards withstand repeated loading without breaking down quickly. Shipping companies also value how easily poplar takes nails and staples. Its lightweight also keeps freight costs down for large shipments. 5. Small Hobby Builds Carved signs, wooden toys, and photo frames made at home often use poplar. Its soft texture makes hand carving easier for beginners. Poplar also holds paint and varnish well on finished projects. Painters favor poplar because it holds a clean, even coat without much prep work. Carpenters like it because it rarely splits when nailed close to an edge, even on thin trim pieces. Why Poplar Feels Softer than Other Hardwoods The Janka scale ranks wood hardness by pressing a steel ball into a board until it embeds halfway. Poplar scores 540 pounds of force, compared to 1,290 for red oak, 1,450 for maple, and 1,010 for walnut. Even Douglas fir, a softwood commonly used for house framing, rates around 700 on the Janka hardness scale, making it harder than poplar. This lower Janka rating helps explain why poplar is easy to cut, shape, and work with in a workshop. A quick comparison clears up why poplar confuses so many buyers. Trait Hardwood Softwood Tree type Angiosperm, flowering Gymnosperm, cone-bearing Leaves Broad, drop each fall Needles, mostly evergreen Common examples Oak, maple, poplar Pine, cedar, fir Typical density Usually higher Usually lower Exceptions Poplar, balsa Douglas fir, yew Density sits in the usual column for a reason. Poplar and balsa are both hardwoods that score low on the Janka scale. Douglas fir and yew are softwoods that hold up better than people expect. The tree’s method of reproduction determines the label, not how the board feels in your hand. Poplar Compared to Other Common Hardwoods A side-by-side table makes these differences easier to see than raw numbers alone. Wood Janka hardness Durability Best use Poplar 540 lbf Low to moderate Painted furniture, frames, trim Black cherry 950 lbf Moderate Fine furniture, cabinets Black walnut 1,010 lbf High Furniture, veneer, gun stocks Red oak 1,290 lbf High Flooring, cabinets, trim Hard maple 1,450 lbf Very high Flooring, butcher blocks Poplar sits at the bottom of this list on hardness, but it also costs noticeably less than the others. For painted or hidden work, like frames or trim, that price gap usually favors poplar. For daily use in the open, such as a dining tabletop, oak or maple makes more sense. Is Poplar a Durable Hardwood Durability depends on how you use the wood, not just its hardwood label. Indoors, poplar lasts for years, especially once painted or sealed. It works well for modularfurniture, cabinet parts, and frames where heavy impact is limited. It dents more easily than oak or maple, so it struggles on floors or tabletops. Furniture frames, cabinet boxes, and trim rarely take hard hits, making poplar a practical choice for these applications. Regular dusting and occasional waxing help painted poplar furniture maintain its finish longer. Outdoors, poplar breaks down quickly without a sealed finish. With the right protection, it can still perform well for suitable projects. A fresh coat of paint or sealant every few years helps keep outdoor pieces protected. Poplar’s Limits Worth Knowing No single wood species works for every job, and poplar has a few clear limits worth knowing. Dents and scratches under everyday use, making it a poor fit for tabletops or floors with regular traffic. Blotches when stained, unless you apply a pre-stain wood conditioner first to even out absorption. Rots fairly quickly outdoors without a sealed finish over the top. Carries none of the natural rot resistance found in cedar or redwood. Needs a sealed finish before it faces rain, sun, or ground contact. Frequently Asked Questions Is it okay to burn poplar in a wood stove? Yes, seasoned poplar can be burned in a wood stove. It lights easily but burns faster and produces less heat than denser hardwoods. Is poplar better than pine? Poplar is usually better for indoor furniture because it is smoother and has less resin. Pine is often preferred when you want a stronger grain and a rustic look. Which variety of poplar is best? Tulip poplar is one of the best varieties for woodworking because it is lightweight, easy to shape, and widely available. The best type depends on the project. What is the lifespan of a poplar tree? Most poplar trees live for about 30 to 50 years. Some healthy varieties may survive for 100 years or longer in suitable conditions. How fast can a poplar tree grow? Poplar trees are fast-growing and may grow about 3 to 5 feet each year. Growth depends on the variety, soil, sunlight, and water supply. Is Poplar the Right Choice? Picking poplar comes down to what the finished piece needs to survive over time. Choose poplar for painted furniture, hidden frames, interior trim, and budget builds where looks matter more than raw toughness. Skip it for flooring, cutting boards, or any surface that sees daily wear without a protective coat. Its lower price beats oak, maple, or walnut whenever a project calls for paint over a natural wood look. A first apartment bookshelf, a painted nightstand, or a set of interior door trim all fit this description well. If the piece stays indoors under a coat of paint or primer, poplar rarely disappoints the person who picked it.

Most furniture is built for a fixed room in a fixed life. Buy a sofa, put it against the wall, leave it there for a decade. That approach works until the room changes, the family grows, or the apartment gets smaller, and the sofa suddenly does not fit through the door. Modular furniture was designed around that problem. Instead of one rigid piece, you get a system of components that can be rearranged, expanded, or scaled down as your space and needs shift over time. This blog covers what modular furniture actually is, the main types available, how it differs from sectional furniture, what it typically costs, and what to check before buying a system for your home. What is Modular Furniture? Modular furniture is built from separate, standardized units called modules that can be combined, rearranged, or expanded to fit different spaces and needs. Instead of buying one fixed piece, you assemble a system from individual components. A modular sofa might include armless seats, corner pieces, and ottomans that can be arranged in dozens of layout combinations. The same logic applies to shelving, storage, beds, and office furniture, where each module functions independently yet connects seamlessly with others. A modular shelving unit, for example, might start as a single small cube and later grow into a full wall of connected storage without replacing the original piece. Why Modular Furniture is Popular Now Modular furniture has moved well beyond a niche design trend to become a genuine market force, backed by real numbers. The U.S. modular furniture market reached $24.3 billion in 2025 and is projected to continue growing steadily through 2035, driven largely by shrinking home sizes and rising urban living costs. Younger buyers and small families are a major part of this shift, favoring pieces that combine practicality with style over furniture that locks them into one fixed layout. Demand from offices and co-working spaces has also added to the momentum, as businesses look for seating and desk systems that can be rearranged as teams and layouts change. This mix of residential and commercial demand is why modular furniture, once a mid-century design idea, has become an everyday shopping category rather than a specialty product. What are the Features of Modular Furniture True modular furniture is defined by four core traits that make it function as a system rather than just a collection of matching pieces. Each unit is built to standardized dimensions, so modules from the same collection connect without gaps or mismatched heights. Those same pieces can be rearranged into different configurations, an L-shape one month and a straight line the next, without buying anything new. Any individual module, such as an armless chair, also serves as standalone furniture when separated from the rest of the set. And because you can add new units later, the system grows with your space and needs rather than becoming obsolete when either changes. What are Types of Modular Furniture Modular design shows up in more categories than most people realize, well beyond the living room sofa. 1. Modular Sofas and Sectionals Armless chairs, corner units, chaises, and ottomans that combine into custom layouts. These pieces can be used as a sofa and a separate chair, or linked into a full sectional, depending on the room. Many systems also include a chaise module that can be moved to either end of the sofa. Best for: living rooms and shared spaces that need flexible seating arrangements. 2. Modular Shelving and Storage Systems Stackable cubes, adjustable shelves, and cabinets that expand as your storage needs grow. New units can be added on top of or beside existing ones without replacing what you already own. Some systems also allow shelves to be repositioned within the same frame as needs change. Best for: closets, home offices, and rooms that need storage to scale over time. 3. Modular Bed Systems Wall beds with built-in cabinetry, desks, or sofas that fold away when not in use. These systems allow a single room to function as a bedroom at night and an office or living space during the day. Some designs fold up vertically, while others tuck into a cabinet unit along the wall. For studios or smaller layouts, space-saving furniture can complement modular bed systems by maximizing available space and improving everyday functionality. Best for: studio apartments and guest rooms that double as other spaces. 4. Modular Office Furniture Desks, partitions, and seating systems designed to be reconfigured as office layouts change. Teams can shift from private desks to open collaboration areas without buying new furniture each time. Panels and dividers can also be added or removed to adjust privacy levels within a shared space. For home setups, minimalist home furniture choices can complement modular systems by creating flexible work areas with practical desk and storage solutions. Best for: co-working spaces and offices that frequently rearrange teams or layouts. How Much Does Modular Furniture Cost Pricing varies widely, but general market patterns give a useful starting point. Budget modular pieces, such as a single armless chair or storage cube, often start at $200 to $400 per module. Mid-range modular sectionals and shelving systems typically run $800 to $2,500 for a full set, depending on size and material. Higher-end designer modular systems, especially from brands rooted in the Eames and Nelson design tradition, can run well above that range. These figures reflect general retail patterns rather than a single fixed price, since cost depends heavily on materials, brand, and module count. What are the Benefits of Modular Furniture Modular furniture earns its popularity by solving problems that fixed furniture simply cannot. Space efficiency is usually the first draw, since modules can be rearranged or scaled down to suit furniture ideas for compact homes and multi-purpose rooms. That same setup gives you flexibility over time, letting the same pieces adapt as your needs shift, whether that is a growing family or a home office turning into a guest room. There is a cost angle too. Buying one module at a time spreads the expense, and you can replace a damaged piece individually rather than buying an entirely new set. That same modularity also makes moving day easier, since smaller pieces are far simpler to carry through narrow doorways and staircases. Modular Furniture Design Ideas for Every Home Beyond the showroom, modular design shows up in everyday settings where flexibility solves a real, ongoing problem. Micro-apartments and studio units: Wall beds and fold-away desks let one room serve as a bedroom, office, and living space depending on the time of day. Co-working offices: Movable desks and partitions let a single floor plan shift between quiet workstations and open team areas within the same day. Rental homes: Renters use modular pieces to furnish a space without committing to furniture that will not fit their next apartment. Growing families: Modular kids’ furniture, like bunk systems that separate into two beds, adapts as children grow or siblings need their own space. Hospitality and healthcare settings: Lobbies and waiting areas use modular seating to reconfigure layouts for events, social distancing needs, or changing foot traffic. How to Choose Modular Furniture for Your Space Picking the right system takes a bit more thought than a standard furniture purchase. Measure your room and doorways first, since modular pieces must still fit through hallways and entryways during delivery. Check how the modules connect, whether through clips, brackets, or simple friction fit, since sturdier connectors tend to hold up better over years of rearranging. Confirm that individual modules can be purchased separately later, in case you want to expand the set or replace a worn piece down the road, and stick to one collection or line rather than mixing modules from different product lines, since fabric and finish rarely match exactly across collections Modular Furniture vs. Sectional Furniture These two terms are constantly confused, so it helps to draw a clear line between them. Knowing the difference makes it easier to find the right product and avoid buying something that doesn’t meet your actual needs. Feature Modular Furniture Sectional Furniture Scope Covers sofas, shelving, beds, and office systems Refers specifically to seating Layout Can be split, expanded, or rearranged freely Arranged into an L-shape, U-shape, or straight line Relationship The broader category One specific type of modular seating Note: Every sectional is modular, but not everything modular is a sectional. Pros and Cons of Modular Furniture Most articles on this topic only list benefits, so here is a fairer, two-sided look. Modular furniture solves real problems, but it also comes with trade-offs worth knowing before you buy. Looking at both sides together gives a clearer picture than either list on its own. Pros Cons Rearranges to fit different rooms and layouts Can feel less structurally solid than one-piece furniture Damaged modules can be replaced individually Matching fabric or finish on future add-ons can be tricky Scales up or down as your space changes Larger systems can be complex to assemble Often easier to move through doorways in pieces Connector hardware can loosen over time with heavy use Weighing both sides against how you actually plan to use the furniture is the best way to decide if it fits your space. No single pro or con should decide the outcome, since the right answer depends on the specific room and household. Frequently Asked Questions Which brand is considered the best for modular sofas? Brands like Burrow, Lovesac, West Elm, and IKEA are highly regarded for modular sofas due to their quality, flexibility, and design options. Do modular couches stay together? Most modular couches use clips, brackets, or locking systems. These connectors prevent the individual sections from separating during use. What is the 4-inch rule for furniture? The 4-inch rule applies to the height of furniture seats. Sofas, chairs, and ottomans should have seat heights within four inches of one another. What furniture store has the best-quality furniture? The best furniture store depends on your needs and budget. Compare materials, construction, warranties, and customer reviews before purchasing. Does Walmart have quality furniture? Walmart offers several reliable and affordable furniture options. However, quality varies depending on the brand, materials, seller, and product. Final Thoughts Modular furniture solves a real problem for a country living in smaller spaces than it used to, but it works best when chosen with intention rather than picked for flexibility alone. Understanding the actual differences between modular and sectional pieces, knowing the honest trade-offs, and checking how well a system can grow with you make the difference between furniture that adapts to your life and furniture that just sits there looking flexible. The right modular setup should feel less like a compromise and more like furniture built for how you live.
Hardwood floors add warmth and value to a home, but their finish can wear down quickly without proper care. Dust, grit, excess moisture, and the wrong cleaning products often cause scratches, dullness, and surface damage. Keeping hardwood floors clean starts with simple habits. Remove debris before mopping, use a cleaner suited to the floor’s finish, and avoid soaking the wood. The right tools and cleaning routine help protect the finish while keeping the surface looking fresh. Essential Tools and Cleaner for Hardwood Floors Before cleaning hardwood floors, gather the right tools and products to avoid scratches, residue, and moisture damage. The items below help remove dirt safely while protecting different floor finishes. Tool / Care Item How to Use It Microfiber mop Picks up dust and grime without scratching the finish, making it a safe choice for regular hardwood floor cleaning. Soft-bristle broom and microfiber cloths Remove loose dirt and handle spills, corners, and small cleaning areas quickly. Hardwood-safe vacuum Use the bare floor setting, turn off the beater bar, and choose soft attachments to prevent scratches and scuffs. pH-neutral hardwood cleaner Choose a water-based cleaner that matches your floor’s finish. Avoid harsh chemicals and residue-forming products that can dull or damage the surface. Know your floor finish. Polyurethane floors handle light damp cleaning, while oil, wax, and water-based finishes require specific products and care methods. Control moisture Use a spray bottle or a lightly damp mop instead of soaking the floor, as excess water can cause swelling or damage. Using the correct tools and controlling moisture make routine cleaning safer and more effective. Always match your cleaning method to your floor’s finish to prevent unnecessary damage. How to Clean Hardwood Floors Step by Step Before you start cleaning, it helps to follow the right order to protect your hardwood finish. The process begins with removing dirt and buildup, then moves through careful mopping, drying, and maintenance steps that keep floors looking clean without exposing them to excess moisture. 1. Remove Dirt and Stubborn Buildup First, remove dust, pet hair, and loose debris using a microfiber mop, soft broom, or hardwood-safe vacuum. For high-traffic areas, use a microfiber cloth with hardwood cleaner to lift stubborn dirt. Gently clean between floorboards with a soft attachment, avoiding excess moisture that can seep into seams. 2. Prepare the Cleaning Solution Always follow the cleaner’s instructions instead of adding extra product. Too much solution can leave behind a sticky film that attracts more dirt and makes the floor look dull. Spray a light mist over a small area rather than soaking the surface. 3. Damp Mop the Floor Use a mop that feels slightly damp, not wet. Work in small sections so moisture does not sit on the wood for too long. Rinse the mop regularly, or replace the microfiber pad when it gets dirty, to avoid spreading grime across the floor. 4. Dry the Floor Properly After cleaning each section, wipe away leftover moisture with a dry microfiber cloth or make a dry pass with your mop. Removing excess water helps protect seams and prevents issues like swelling or warping. 5. Restore Shine After Cleaning If your hardwood looks dull after cleaning, the issue may be a worn finish rather than leftover dirt. Hardwood polish can temporarily improve the appearance, but it does not repair damaged coatings. Floors with heavy wear may need professional refinishing to restore their original look. 6. Maintain Clean Floors Between Deep Cleanings Regular maintenance keeps hardwood floors cleaner and reduces the need for frequent wet cleaning. Sweep high-traffic areas often, place mats near entrances, use furniture pads to prevent scratches, and clean spills as soon as they happen to protect the finish. How to Clean Different Types of Hardwood Floors Sealed Hardwood Floors: Most modern hardwood floors are sealed with polyurethane. Use a damp mop with a pH-neutral cleaner and avoid harsh products that can damage the finish. Unfinished Hardwood Floors: Without a protective coating, hardwood is more susceptible to moisture damage. Use dry cleaning methods and avoid excess water to prevent stains or warping. Engineered Hardwood Floors: The thin layer of real wood over a composite core requires careful moisture control. Use minimal liquid and avoid soaking the surface. Older Hardwood Floors: Older finishes may react differently to cleaners. Test products in a hidden area first and use gentle cleaning methods on worn or aged floors. What Not to Use on Hardwood Floors Before cleaning hardwood floors, knowing what to avoid is just as important as knowing what to use. Certain products and cleaning methods can damage the finish, trap moisture, or create buildup that affects the floor’s appearance over time. Keep these common mistakes in mind to protect your hardwood investment. Avoid Excess Water: Standing water can seep into seams, causing swelling, warping, or cupping. Use a lightly damp mop instead of a wet one. Avoid Steam Cleaners: Steam adds heat and moisture that can penetrate between boards, damaging the wood or subfloor. Avoid Harsh Chemicals: Bleach, ammonia, and abrasive cleaners can dull or strip the hardwood finish. Avoid Wax and Oil-Based Products on Certain Finishes: These products can leave buildup on modern polyurethane floors and affect future refinishing. Always check your floor’s finish first. Common Mistakes When Cleaning Hardwood Floors One of the most common hardwood floor cleaning mistakes is mopping before removing dust and debris, as grit can scratch the finish during cleaning. Using the wrong mop can also cause problems, with abrasive materials damaging the surface and overly wet mops increasing the risk of moisture. Avoid cleaning with water too frequently, as repeated exposure to moisture can wear down the finish over time. Clean spills quickly, since liquids left sitting can seep into the wood and cause water stains or surface damage. Conclusion Keeping hardwood floors looking good comes down to gentle tools and the right cleaner for your finish. Keeping moisture to a minimum every time you clean matters just as much. None of this requires anything complicated, just a routine you actually stick to. A little consistency now saves you from a much bigger refinishing job later. It keeps the floor looking like the investment it was. Frequently Asked Questions What is the best thing to wash your hardwood floors with? Use a microfiber mop with a pH-neutral hardwood floor cleaner recommended for your finish. Avoid excess water and harsh cleaners that can damage the protective coating. Can I use Swiffer wet cloths on hardwood floors? You can use Swiffer wet cloths on some sealed hardwood floors if you use them lightly, but avoid leaving moisture behind. Always check your flooring manufacturer’s recommendations first. What do professional cleaners use on hardwood floors? Professionals typically use microfiber mops and hardwood-safe, pH-neutral cleaners designed for the floor’s specific finish. They focus on low-moisture methods to protect the wood. What is the best homemade cleaner for hardwood floors? A simple, damp microfiber mop is often the safest homemade option for many sealed hardwood floors. Avoid vinegar mixtures, as they may dull or weaken some finishes over time. Is Murphy’s Oil Soap good for wood floors? Murphy’s Oil Soap can be used on some finished wood surfaces, but it may leave residue on certain hardwood floors. Check your finish type and the manufacturer’s care instructions before using it regularly.

Quick Answer: Ergonomic furniture is the type of furniture that is built to match the natural shape and movement of your body. It supports good posture, reduces pain, and helps you sit or stand comfortably for long hours. This is the furniture that adjusts to fit you, not the other way around. It supports your spine, wrists, and legs in a natural position. Working from home or sitting at an office desk both carry the same risk. The right pieces can lower your chance of pain and injury. Ergonomic furniture helps create a more comfortable workspace by improving posture, reducing strain, and making long hours of sitting easier on your body. From adjustable desks to supportive chairs, small changes can make a noticeable difference in daily comfort. What is Ergonomic Furniture? Ergonomic furniture is designed around the science of human movement and body mechanics. It follows the principles of ergonomics, the study of how people interact with their environment. Each piece aims to reduce physical stress on the body during everyday tasks. A regular chair forces you to adapt to its shape, but an ergonomic chair adapts to yours. This furniture keeps your joints in neutral positions. It reduces pressure on your spine and prevents repetitive strain injuries. Long hours at a desk feel less taxing when your setup supports your body correctly. The table below breaks down common types. It shows what each one offers. Furniture Type Key Ergonomic Feature Main Benefit Ergonomic Chair Adjustable lumbar support and seat height Reduces lower back pain Standing Desk Height adjustment for sitting or standing Cuts down sedentary time Ergonomic Keyboard Split or curved design Lowers wrist and hand strain Monitor Arm Adjustable height and angle Prevents neck and eye strain Footrest Angled support for feet Improves leg circulation How Furniture Uses Ergonomic Principles to Support the Body Ergonomics is the science of designing things around how the human body moves and works. It looks at posture, comfort, and movement patterns. Furniture makers use these principles to create pieces that fit the human body. The result is less strain and more support during daily tasks. Good furniture design puts this science into practice. 1. Core Principles of Ergonomics Ergonomic furniture design rests on four core principles. Each one addresses a different source of daily strain, from posture to movement. A well-built chair, desk, or keyboard follows all four at once. 2. Proper Body Alignment Good furniture helps keep your spine, neck, shoulders, and hips aligned. It prevents your body from twisting into awkward angles. This alignment lowers the risk of long-term pain. 3. Adjustability This furniture adapts to different body types and heights. A chair might offer adjustable seat height and lumbar support. A desk might raise or lower to match your reach. 4. Comfort and Support This principle focuses on reducing pressure points. It supports areas that carry the most strain during long hours of use. Soft, shaped surfaces reduce fatigue over time. 5. Ease of Movement Good design lets you shift positions naturally. It encourages healthy movement instead of sitting still for hours. Small posture changes throughout the day protect your joints. What are the Different Types of Ergonomic Furniture Ergonomic furniture comes in several forms, each built for a specific part of your workspace. Some pieces support your seating, while others manage your desk height or screen position. Knowing the main types helps you build a setup that covers your whole body. Below are the pieces most people add first. 1. Ergonomic Office Chairs A good chair is often the first upgrade people make, and for good reason. Look for a seat height you can adjust to match your desk. Lower back support should move up or down to fit your spine. Armrests that shift in height and width keep your shoulders relaxed. Seat depth matters too, since a seat that is too long or short can cut off circulation behind your knees. Breathable fabric keeps you cool during long sessions. 2. Height Adjustable Desks A desk that allows you to switch between sitting and standing gives you more freedom throughout the day. Switching positions cuts down the hours you spend sitting still. Pairing an adjustable desk with the right minimalist home office furniture lets you position your screen and keyboard to suit your height, not a fixed standard. Switching positions cuts down the hours you spend sitting still. Different users benefit in different ways. Taller or shorter people get a desk that actually fits them. Anyone with back pain gets a break from sitting all day. 3. Ergonomic Keyboard and Monitor Setups Your hands and neck need support too, not just your back. A keyboard placed too high or too low forces your wrists into an awkward bend. Split or curved keyboards keep your wrists at a more natural angle. Your monitor should sit at eye level, so you avoid tilting your neck up or down. Getting this height and angle right reduces neck strain and wrist fatigue during long work sessions. 4. Ergonomic Home Office Furniture Remote workers face the same strain as office employees, often with less space to fix it. Compact ergonomic desks fit small rooms without giving up adjustability. A supportive chair matters just as much at home as it does in an office. Look for setups built for smaller spaces that still let you adjust height and support. A healthy home workspace protects your body just as well as a corporate one What are the Benefits of Ergonomic Furniture Choosing the right furniture pays off in ways beyond simple comfort. It changes how your body feels at the end of a workday. It can also affect how well you focus and how much you get done. 1. Improves Posture and Body Alignment Standard furniture often lets you slouch without realizing it. Ergonomic pieces guide your body into a straighter, more balanced position. Over weeks of use, this can train you to sit and stand with better alignment. Small daily corrections add up to a real change in posture. 2. Reduces Neck, Back, and Shoulder Strain Poor desk setups are a common cause of daily aches. A screen placed too low or a chair with no support forces your muscles to compensate. Proper height and support take that pressure off your neck, back, and shoulders. Many people notice less soreness within the first few weeks. 3. Increases Comfort During Long Work Hours Long shifts at a desk feel very different with the right setup. Adjustable features let you fine-tune your chair and desk to your own body. That personal fit makes hours at your desk feel less draining. Comfort during the day can also mean less stiffness once you stand up. 4. Supports Productivity and Focus Discomfort pulls your attention away from your work. Shifting in your seat or rubbing a sore neck breaks your concentration. A comfortable setup removes that distraction. Staying focused gets easier when your body isn’t fighting your furniture. 5. Encourages Healthier Movement Sit-stand desks and adjustable chairs make it easier to change position throughout the day. Small shifts, like standing for a call or adjusting your seat, keep your body from staying still too long. This kind of movement supports circulation and joint health. Over time, it can lower the risk of stiffness tied to long, fixed sitting. Ergonomic Furniture vs Regular Furniture At first, ergonomic and regular furniture can look similar. The real difference shows up in how each one treats your body. Regular furniture follows one fixed shape for everyone. Ergonomic furniture adjusts around the person using it. That gap becomes clear once you compare the two side by side. Feature Ergonomic Furniture Regular Furniture Adjustability Multiple adjustments Limited options Body Support Designed around human posture General comfort Customization Fits individual users Fixed dimensions Long-Term Use Better suited for extended use May cause discomfort over time How to Choose Ergonomic Furniture Picking the right piece takes a bit more effort than grabbing what is on sale. A few practical steps can help you avoid a poor fit and wasted money. Test the piece before you buy: Sit in the chair or try the desk height in a showroom if one is nearby. Many online retailers also offer trial periods, so check the return policy first. A short test run tells you more than any spec sheet. Check for recognized certifications and real reviews: Standards like BIFMA testing help verify durability and safety for office furniture sold in the United States. Reviews from real buyers often reveal how a piece holds up after months of daily use. Set a realistic budget before you shop: Decide which features matter most to you, such as adjustable height or lumbar support. This helps you avoid paying extra for features you will not use. Think about your room layout and space: Measure your area before ordering large items like a standing desk. Furniture for small spaces often includes compact desk alternatives worth considering first. A well-made ergonomic desk still needs to fit your room and its outlets. Frequently Asked Questions What is the Main Purpose of Ergonomic Furniture? Ergonomic furniture supports your body’s natural posture. It reduces strain on your spine, neck, and joints during long hours of use. Is Ergonomic Furniture Good for Back Pain? Yes, it can help. Adjustable lumbar support and proper seat height ease pressure on your lower back. Do Ergonomic Chairs Really Make a Difference? Yes, they do. A chair with adjustable height, armrests, and lumbar support can reduce daily aches within weeks. What Should I Look for in an Ergonomic Desk? Look for height adjustability first. A desk that shifts between sitting and standing supports better posture and movement. Is Ergonomic Furniture Expensive? Prices vary widely. Many budget options offer solid adjustability without the cost of premium brands. Final Thoughts Ergonomic furniture supports your body instead of working against it. From chairs to desks to monitor arms, each piece helps reduce strain. The right setup can ease back pain, improve posture, and keep you comfortable through long work hours. Choosing ergonomic furniture depends on your habits and body. Test adjustability, match pieces to your daily routine, and prioritize quality materials over price alone. A thoughtful setup today can protect your health for years of desk work ahead.
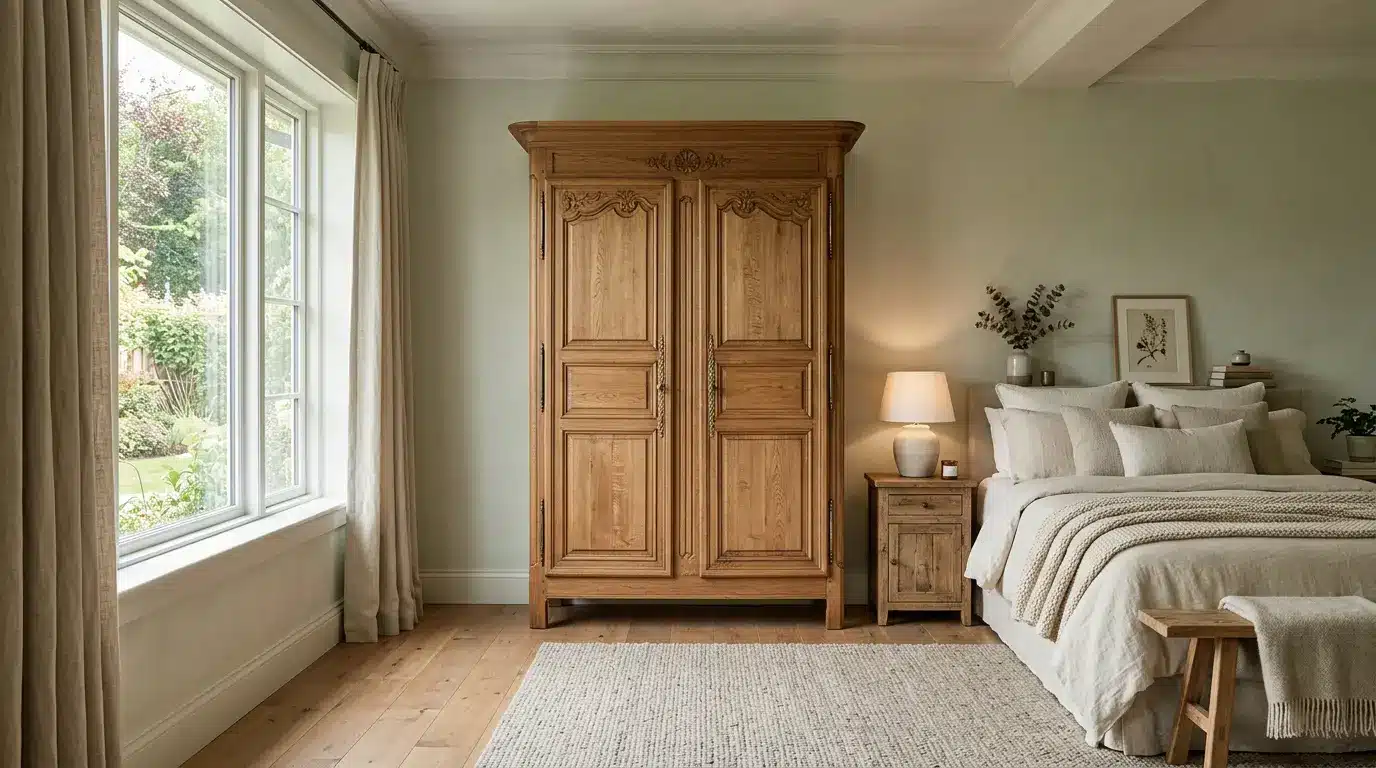
Quick Answer: An armoire is a freestanding storage cabinet used for clothes, linens, electronics, office supplies, or everyday items. It works as a flexible alternative to built-in storage and can be placed in bedrooms, living rooms, offices, or entryways. An armoire is a tall, freestanding storage cabinet built with doors and, traditionally, a good deal of carved wood detail. Unlike built-in closets, an armoire gives homeowners storage they can move, replace, or repurpose as their needs change, which is exactly why the piece has stuck around for centuries while so many other furniture trends have come and gone. Most versions include a full-height design with a mix of shelves, drawers, hanging rods, or compartments inside. The word itself comes from French furniture tradition, tracing back to the Old French armarie, which originally meant a cabinet for storing weapons. Designer Tip: An armoire should do more than solve a storage problem. Its size, finish, and placement need to balance the proportions of the room it sits in, or it ends up feeling like an afterthought rather than a piece of furniture. History and Origins of Armoires Armoires were not originally designed as bedroom furniture. The name comes from the Old French armarie, which traces back to the Latin armarium, meaning a cabinet used for storing weapons, tools, or other valuable items. Early armoires were large, simple storage pieces built mainly for function. Over time, especially during the Gothic and Renaissance periods, artisans began adding carved details, decorative panels, and more refined designs as woodworking techniques improved. By the 17th century, armoires had become symbols of craftsmanship and status in French homes, with makers like André Charles Boulle creating pieces featuring detailed marquetry and intricate carving. This shift from practical storage to decorative furniture is why antique armoires remain valued today. What are the Different Types of Armoires? Armoires come in a variety of designs, and their purpose often depends on their internal construction. Some are designed primarily for clothing, while others work better for linens, electronics, or decorative storage. The right type depends on what you need to store, the size of your room, and your home’s overall style. 1. Wardrobe Armoires Wardrobe armoires are primarily designed for clothing storage and often serve as an alternative to a traditional closet. They usually include a hanging rod for shirts, jackets, and dresses, along with shelves or drawers for folded clothes and accessories. They are especially useful in bedrooms with limited closet space because they provide storage while adding a furniture-like design element. 2. Linen Armoires Linen armoires focus on shelf storage rather than hanging space, making them ideal for towels, bedding, blankets, and table linens. Their enclosed design keeps fabrics protected from dust while giving rooms without built-in linen closets an attractive storage option. They are commonly placed in bedrooms, hallways, or guest areas. 3. Entertainment Armoires Entertainment armoires were originally designed to hide bulky televisions and media equipment behind closed doors. They typically included deep compartments, cable openings, and shelves for electronics. Although less common today, many are still reused for books, games, collectibles, or general living room storage, keeping clutter hidden. 4. Jewelry Armoires Jewelry armoires are compact storage pieces designed to organize smaller accessories. They often include shallow drawers, velvet lined compartments, ring holders, and hooks for necklaces or bracelets. Their slim design makes them a practical choice for bedrooms or dressing areas where regular jewelry boxes may not provide enough space. 5. Antique Armoires Antique armoires are known for their quality construction and timeless appearance. Many are made from solid wood and feature carved details, traditional hardware, and natural aging that gives each piece its own character. They are often used as statement furniture in traditional, vintage, or farmhouse-style interiors. 6. Modern Armoires Modern armoires emphasize simplicity with clean lines, flat-panel doors, and minimal detailing. They are designed to blend into contemporary interiors rather than act as heavily decorative pieces. Many modern versions include adjustable shelves and practical storage layouts, making them suitable for bedrooms, living rooms, and multipurpose spaces. What is an Armoire Used for? An armoire’s role tends to shift depending on which room it lands in, which is part of what makes it such an adaptable piece of furniture. 1. Clothing Storage This is the classic use. Hanging rods hold shirts, dresses, and jackets, while shelves or drawers hold folded sweaters and jeans. A homeowner renovating an older house may choose an armoire specifically because adding a built-in closet would mean cutting into original walls or architectural details worth preserving. 2. Linen Storage The shelving inside many armoires suits bedding, towels, and blankets just as well as clothing, especially in homes with limited linen closet space. 3. Entertainment Storage Older TV armoires were built specifically to hide bulky televisions and media equipment behind closed doors. This use has faded with the rise of flat-screen TVs, though the furniture itself hasn’t gone anywhere. 4. Home Office Storage A closed-door cabinet suits files, office supplies, and books, keeping a home office looking tidy when it’s not in use. 5. Entryway Storage Shoes, bags, and seasonal items all fit comfortably in an armoire placed near a front door, a fairly modern use for a very old piece of furniture. Armoire vs Wardrobe vs Closet The difference between an armoire, wardrobe, and closet often comes down to design, storage style, and use. An armoire is a freestanding piece of furniture with roots in French design, often featuring a mix of hanging space, shelves, and drawers. Wardrobes are also standalone storage units, but they usually focus more on practical clothing storage, especially for hanging garments. Closets, on the other hand, are built into the home and provide permanent storage space. Feature Armoire Wardrobe Closet Type Freestanding furniture Freestanding furniture Built-in storage Design Often decorative or furniture-focused Usually simple and functional Integrated into the room Storage Hanging space, shelves, and drawers Mostly hanging clothing storage Larger storage capacity with shelves and hanging areas Placement Bedrooms or living areas Mostly bedrooms Built into bedrooms or hallways An armoire adds storage with a decorative furniture feel, while a wardrobe focuses mainly on clothing organization. A closet provides the most permanent storage but cannot be moved or easily changed. An armoire can work as a wardrobe, but not every wardrobe has the detailed design or furniture-like character associated with an armoire. Choosing between them depends on your space and needs. Armoires work well in rooms lacking built-in storage or where flexibility matters, while closets suit larger storage needs and permanent organization. How to Choose an Armoire for Your Space Choosing the right armoire is about more than just appearance. Consider your available space, storage needs, interior style, and material quality to find a piece that feels practical and fits naturally into your home. Measure Available Space: Before anything else, measure the height and width of where the armoire will sit, along with door clearance and enough walking space around it once it’s in place. Choose the Right Storage Layout: Decide what you actually need inside. Hanging rods suit clothing, adjustable shelves handle folded items and linens, drawers fit smaller accessories, and open shelving suits books or display pieces. Match Your Interior Style: The style of your armoire should complement the overall look of your room rather than stand out as a separate piece. Traditional interiors pair well with dark walnut armoires featuring carved details and rich wood finishes. Modern spaces usually suit armoires with clean lines, flat panels, and simple finishes that keep the design minimal. Consider Material Quality: Solid wood tends to last longer and holds up better over time, though it comes at a higher price point. Understanding which wood types hold up best for furniture helps narrow the choice, walnut, oak, and mahogany consistently outperform softwoods for pieces that see daily use. Engineered wood offers a more affordable option without sacrificing too much durability for everyday use. Either way, check the hardware quality, since hinges and handles are often the first parts of an armoire to wear out. Where Should You Place an Armoire? 1. Bedroom: Use an armoire as a visual anchor beside the bed or against an empty wall where built-in storage isn’t available. 2. Living Room:A good spot for a piece that doubles as both storage and a design focal point, especially in rooms without built-in shelving. 3. Dining Room:Fits naturally against a long wall, giving the room a furnished, finished look beyond just a table and chairs. 4. Entryway: Positioned near the front door, an armoire can anchor the whole entry the way a console table might, while still hiding everyday clutter behind closed doors. Are Armoires Still Popular Today? Built-in closets have taken over much of the storage role of armoires, which, once filled, naturally reduces how often people reach for one out of necessity. That said, armoires haven’t disappeared. The rise of adaptable, movable furniture has given it something of a second life, particularly in small homes and apartments where built-in storage is limited. Modern armoires today are less about pure necessity and more about combining storage with genuine design intent. People buying one now are often choosing it as much for how it looks as for what it holds. How to Style an Armoire in Your Home An armoire suits a room best when it’s treated as a statement piece rather than something to hide in a corner. Pair it with surrounding furniture that complements its finish, add nearby lighting to highlight its details, and resist the urge to overcrowd the room around it. Updated hardware, like new pulls or hinges, can also refresh an older piece without a full refinish. A few pairings that tend to work well: A vintage armoire in an otherwise modern bedroom, used as a contrast piece A white or painted armoire in a farmhouse interior, keeping the overall palette light A dark walnut armoire in a traditional space, leaning into the furniture’s original character Pros and Cons of Using an Armoire An armoire can add both function and character to a home, but it is not the right storage solution for every space. Its biggest advantage is the flexibility it provides: storage without permanent installation while adding a furniture-like element to the room. However, armoires also take up valuable floor space and may not offer the same capacity as built-in closets. Pros Cons Adds architectural character Takes up floor space Movable storage solution Can be heavy to move Functions effectively without built-ins Holds less than a walk-in closet Serves multiple purposes Requires careful placement planning Understanding both the benefits and limitations helps homeowners decide whether an armoire fits their storage needs, room size, and interior style. Conclusion An armoire is the kind of furniture piece that quietly proves it deserves a spot in the room. It does not need to shout for attention or follow every passing design trend, it simply shows up, holds your things, and somehow makes the space feel more finished. Whether it ends up holding clothes, books, keepsakes, or the mysterious collection of items that need a proper place someday, a well-chosen armoire can become part of your home’s personality. The best pieces are not always the biggest or the most expensive. They are the ones that fit your space, match your style, and make everyday life just a little easier, more than most furniture can claim. Frequently Asked Questions What is the difference between an armoire and a wardrobe? An armoire is usually more decorative and may include shelves, drawers, and hanging space, while a wardrobe is typically designed mainly for hanging clothes. Why is it called an armoire? The word “armoire” comes from the Old French armarie, which originally referred to a cabinet used for storing weapons, tools, or valuable items. What is the English word for armoire? In English, an armoire is generally called a large wardrobe or storage cabinet, though the original French term is commonly used in furniture.
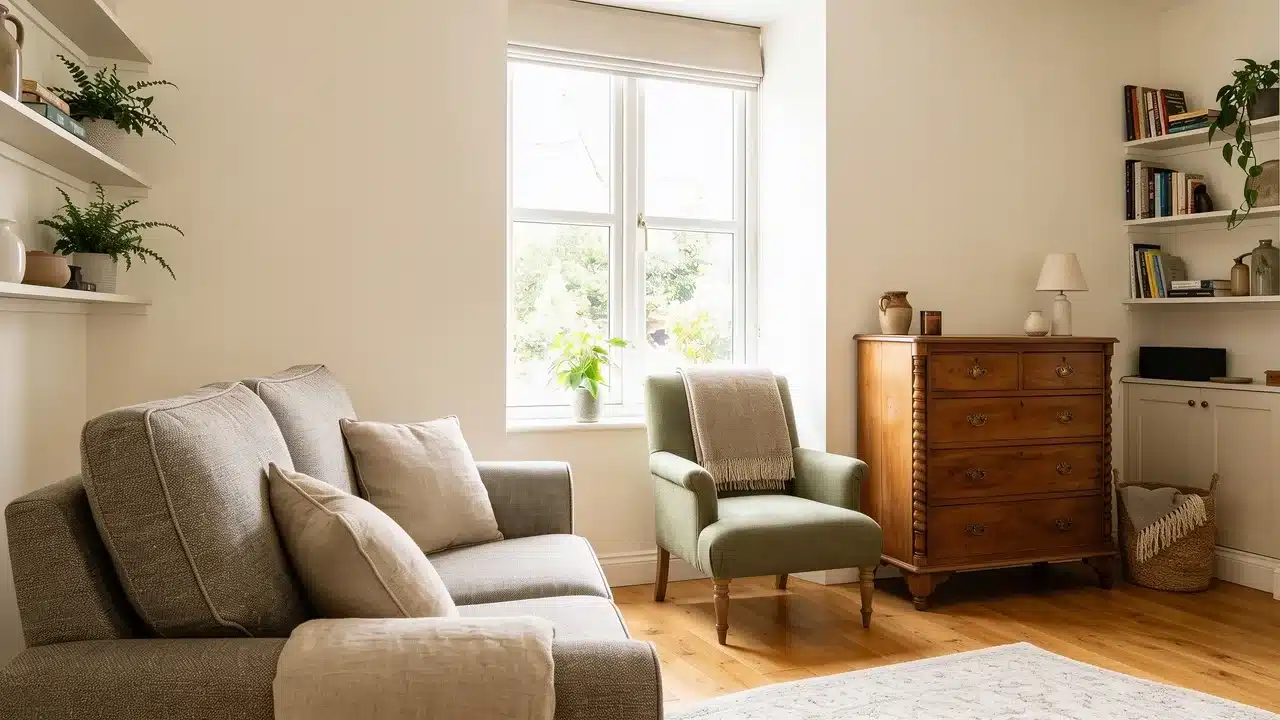
Downsizing comes down to one question, repeated for every room, does this piece earn its spot in the next home? Furniture to keep when downsizing is not always the newest or the largest item you own. It’s the piece that fits the new layout, gets used often, and still means something to you. Cutting back on furniture doesn’t have to mean cutting back on comfort or the pieces that carry real memories. Weigh each item against space, function, build quality, and its personal value, and the smaller home starts to feel like a fit rather than a squeeze. Furniture Worth Keeping When Downsizing Once the evaluation is done, certain furniture categories consistently earn their place in a downsized home. 1. Furniture You Use Every Day A sofa, armchair, dining table, bed frame, dresser, wardrobe, coffee table, or nightstand you reach for every day has already proven its value. Pieces you use daily or near-daily should be your first priority when deciding what to buy. These are the items that shape how comfortable and functional your new home feels from the first day you move in 2. High-Quality Solid Wood Furniture Dressers, cabinets, dining tables, and sideboards are examples of durable furniture that can outlast cheaper counterparts by decades. Oak, walnut, and cherry hold their structure through moves, refinishing, and daily wear. Replacing a well-made solid piece of the same quality usually costs more than keeping and restoring the one you already have. 3. Furniture With Multiple Uses A storage ottoman that works as seating, a footrest, and extra storage all in one uses less floor space. A chest that doubles as a coffee table, a writing desk that fits into more than one room, or a cabinet with flexible storage all follow the same logic. Furniture that adapts to changing needs earns its place after nearly every move. 4. Meaningful Heirloom Furniture Heirloom furniture carries meaning that outlasts its style. A family dining table, antique dresser, or handmade chest deserves space when still in regular use. Condition and fit in the new layout matter as much as the story behind it. Pieces tied to real memories and daily purpose earn their place. 5. Furniture with Built-In Storage Storage matters more once you’ve downsized, since every piece has to pull its own weight. Choosing the right storage solutions for small spaces can help keep a smaller home organized without adding unnecessary furniture. A storage bench by the door, a blanket chest at the foot of the bed, or a dresser and cabinet with deep drawers all keep the home organized without adding a separate storage unit somewhere else 6. Convertible Furniture A piece that serves multiple functions helps a smaller home stay comfortable without an extra room. A sofa bed, or sleeper sofa, combines seating and a guest bed in one piece. A daybed works as everyday seating, and a Murphy bed with a built-in sofa removes the need for a dedicated guest room. 7. Furniture That Fits Your New Home’s Scale Scale gets overlooked more than most. A piece that worked in a larger room can overwhelm a smaller one, even when well made. Apartment-scale sofas, nesting tables, narrow bookcases, and chairs with tapered legs work well in compact rooms. More small space furniture ideas can help create a functional layout without overcrowding the home. Large sectionals, oversized dining sets, and king-size bed frames are the most common mistakes. Which Furniture Should You Let Go While Downsizing? Before moving furniture into a smaller home, review each piece based on fit, function, quality, and personal value. Learning how to declutter before moving can make the downsizing process easier and more intentional. Let Furniture Go If: It creates crowding or makes rooms harder to move through It needs storage space but rarely gets used It no longer suits your current lifestyle or home setup It cannot be repaired, adjusted, or used in any other way You are keeping it only because of guilt or obligation Things to Consider Before Choosing Furniture Before deciding which pieces move with you, a few practical steps make the selection process much more reliable. 1. Measure Your New Space First Room dimensions, doorway widths, and hallway clearances decide whether a piece can even get inside. Measure every room before you commit to keeping anything. Sketch a simple floor plan to scale and place furniture outlines in it before moving day, so you know what fits before the truck is loaded. Check available storage and how much flexibility the layout allows for rearranging later 2. Choose Furniture That Fits Your Life Downsizing is a chance to choose furniture that better suits the way you live today. If you have recently been building a home or adjusting to a new layout, it is also a good time to rethink how much furniture you really need. Consider your daily routines, how often you entertain, and whether your hobbies or priorities have changed. Ask yourself: Do I use this furniture regularly? Does it support my current lifestyle? Would I regret leaving it behind? If the honest answer points toward “no,” that piece becomes a harder case to move. 3. Evaluate Furniture Quality Before Downsizing After years spent looking closely at wood, joinery, and finish work, I’ve learned that build quality is the clearest predictor of whether a piece is worth keeping. Solid wood construction, tight joints, and quality hardware hold up to another move and years of daily use. 4. Separate Sentimental Value from Emotional Attachment Family heirlooms, handmade pieces, and antiques often carry real meaning tied to who made them or what they witnessed. That reason to keep something is valid, as long as the piece still works in your new space and gets used. Keep the pieces that add value to your next home, not the ones you’re holding onto purely out of guilt. Downsizing Furniture Checklist Question Keep or Let Go Does it fit the new home’s layout? Do you use it regularly? Is it built to last through repairs? Does it solve a practical storage or space problem? Does it hold real personal meaning? Should You Replace Some Furniture After Downsizing? Furniture to keep when downsizing should support how you live now, not how you lived in a bigger house. Solid construction, everyday use, and genuine personal meaning are the three things worth considering before anything goes on the truck. Measure everything first, be honest about what you actually use, and keep what still earns its place. A smaller home doesn’t have to feel like a smaller life if every single piece in it is pulling its weight. Walk through each room slowly, imagine the new layout with each piece in place, and let go of anything that no longer fits. Happy Reading The furniture you keep when downsizing should support the way you live now. Choosing pieces with strong construction, practical daily use, and genuine personal meaning helps create a smaller home that still feels complete. From solid wood pieces to flexible storage solutions, each item should have a clear purpose before it takes up floor space. Focus on quality over quantity and keep what truly works for your home. Which piece of furniture are you planning to bring to your new space? Share in the comments below. Frequently Asked Questions How Do You Sell Furniture You Cannot Take with You? Online marketplaces, estate sales, and consignment shops are the most common options. Local buy-and-sell groups also move pieces quickly. Should You Buy New Furniture After Downsizing? Only if existing pieces do not fit the new space. Buying before measuring your new rooms often leads to poor-fitting choices. Is it Worth Reupholstering Furniture Before a Move? Yes, if the frame is solid and the reupholstery cost stays below the price of a comparable replacement piece. Should You Downsize Furniture Before or After Moving? Before. Deciding what stays while you can still measure both homes prevents moving pieces that will not fit the new space. What Should You Do with Antique Furniture That Does Not Fit? Consult an appraiser before selling. Some antiques hold more value than expected and may be worth storing or passing to family.
Testimonials

Karen L
(Austin, TX)
I never thought I could pull off mixing wood tones until I read your guide. I used to second-guess everything — now my living room has walnut, oak, and maple that actually work together. It feels curated, not chaotic.
Jason T
(Cleveland, OH)
Your DIY marble countertop piece gave me the courage to tackle our outdated bathroom. I followed every step, and the result looks shockingly real. My sister asked me where I got it installed!
Sophie M
(Brooklyn, NY)
I’m a first-time homeowner, and your blog has been my quiet design coach. The tone is warm, the tips are smart, and best of all — they work. It’s the only place I’ve found that talks to me like I live in a real home, not a showroom.
Eric B
(Toronto, ON)
Karen L
(Austin, TX)
I never thought I could pull off mixing wood tones until I read your guide. I used to second-guess everything — now my living room has walnut, oak, and maple that actually work together. It feels curated, not chaotic.
Jason T
(Cleveland, OH)
Your DIY marble countertop piece gave me the courage to tackle our outdated bathroom. I followed every step, and the result looks shockingly real. My sister asked me where I got it installed!
Sophie M
(Brooklyn, NY)
I’m a first-time homeowner, and your blog has been my quiet design coach. The tone is warm, the tips are smart, and best of all — they work. It’s the only place I’ve found that talks to me like I live in a real home, not a showroom.
Eric B
(Toronto, ON)
Outdoor

Quick answer: Moss in lawns is best controlled by removing existing growth and improving shade, drainage, soil, and grass health. Moss can quickly take over areas where grass is already struggling, leaving a lawn looking patchy, damp, and uneven. Simply removing the visible growth may improve its appearance for a while, but lasting results depend on correcting the conditions that allowed moss to spread in the first place. This blog explains how to get rid of moss in the lawn, including the main causes, step-by-step removal methods, soil and drainage improvements, reseeding tips, prevention strategies, and common mistakes that can cause moss to return. Why is Moss Growing in the Lawn? Moss growing in lawn areas almost always points to a specific weak spot in your yard’s conditions. Grass needs sunlight, good drainage, and loose soil to grow thick enough to crowd moss out. When one of these is missing, moss moves in fast because it tolerates conditions grass cannot handle. Spotting the exact cause first saves you from wasting time on the wrong fix. 1. Too Much Shade Grass slows down in low light, but moss keeps growing just fine in shade. Areas under trees, near fences, or beside buildings often show the thickest moss growth. Less sunlight means thinner grass blades and more bare soil for moss to settle into. Trimming back branches or thinning tree canopies can shift the balance back toward grass. 2. Poor Drainage and Excess Moisture Moss thrives in soil that stays wet for long stretches. Low spots, compacted clay, or areas with poor drainage retain water near the surface. Grass roots struggle in soggy soil, while moss spreads easily in these damp conditions, and standing water after rain is usually the clearest sign of a drainage issue. 3. Soil with Low pH Grass grows best in soil with a near-neutral pH, while moss tolerates acidic soil far better. A pH below 6.0 often signals conditions that favor moss over turfgrass. Testing your soil is the only reliable way to confirm this cause. Once you know the number, adjusting it is straightforward. 4. Compacted Soil Foot traffic, mowing equipment, and heavy rain can pack soil down over time. Compacted ground blocks air, water, and nutrients from reaching the grass roots properly. Under these conditions, grass thins out, leaving space for moss to take hold. High-traffic areas, such as paths and play zones, usually show compaction first. 5. Thin or Weak Grass Growth Sometimes the real issue is the grass itself, not the soil or light. Old lawns, the wrong grass type for the climate, or years of skipped feeding all weaken turf over time. Weak grass cannot compete with moss for space or nutrients. Strengthening the grass is often just as important as removing the moss on top. How to Get Rid of Moss in Lawn Step by Step Removing moss properly takes a bit more than raking it out and hoping for the best. These steps clear existing moss while setting the lawn up to recover rather than thin further. Step 1: Rake Out the Moss Use a metal-tined rake or a dethatching rake to pull moss away from the soil. Work in small sections and rake firmly, since moss often sits shallow but spreads wide. This step also removes dead grass and debris trapped underneath the moss layer. Bag up the moss and toss it, since it can regrow if left on the lawn. Step 2: Treat Stubborn Patches if Needed For thick or established moss, a moss killer can help clear the rest before raking. Iron sulfate-based products are common and turn moss black within a day or two. Apply on a dry day and water lightly afterward, following the product label for exact timing. Once the moss blackens, rake it out just like in Step 1. Step 3: Loosen and Prepare the Soil Aerate the treated area to break up compacted soil and improve airflow to the roots. A core aerator works well for larger lawns, while a hand aerator suits smaller patches. This step matters as much as removal, since bare, compacted soil invites moss right back. Add a thin layer of compost if the soil feels especially hard or poor. Step 4: Overseed the Bare Patches Spread grass seed suited to your climate and light conditions over the cleared soil. Choosing the wrong variety for your region is one of the main reasons reseeded patches stay thin. Thick, healthy grass is the real long-term barrier against moss returning. Skipping this step is why moss often comes back within a few months. How to Stop Moss from Growing Back Removing moss is only half the job. Moss returns quickly if the lawn conditions that caused it in the first place stay unchanged. 1. Improve Sunlight Exposure Grass needs a solid stretch of direct or filtered light each day to stay dense enough to outcompete moss. Trim back low tree branches and thin out crowded shrubs near shaded lawn edges, since even a small increase in light can make a noticeable difference over the course of a season. If a spot stays shaded no matter what you trim, consider a shade-tolerant grass blend instead of fighting the light problem directly. Some yards simply have permanent shade zones. Replacing those patches with no-grass ground cover options removes the conditions moss needs without the ongoing battle. 2. Improve Lawn Drainage Check for low spots that collect water after rain, and consider regrading small dips and adding topsoil. Redirecting downspouts away from the lawn helps, too, since many drainage problems stem from water running off a roof directly onto the lawn. For larger drainage issues, a French drain or dry well may be worth the investment if soggy patches keep coming back year after year. 3. Test and Adjust Soil pH A pH below 6.0 tends to favor moss over turfgrass, so testing gives you a clear number to work from instead of a guess. Home soil test kits are inexpensive and give a reading within minutes. If the test indicates acidic soil, applying garden lime gradually raises the pH over several weeks. Retest after two to three months, since lime takes time to work into the soil and a single application rarely fixes deeply acidic ground in one pass. 4. Aerate Your Lawn Regularly Compacted soil blocks water, air, and nutrients from reaching grass roots, weakening turf and inviting moss. Core aeration once or twice a year, ideally in spring or fall, loosens the soil and lets roots grow deeper and stronger. Leaving the soil plugs on the lawn after aerating is fine, since they break down and return nutrients to the soil. 5. Maintain Proper Mowing Habits Cutting grass too short weakens it and makes it easier for moss to move in. Most lawns do best when kept at around 2.5 to 3.5 inches, depending on the grass type. Mowing at this height lets grass develop deeper roots and shade out competing growth, such as moss. Keep mower blades sharp, too, since dull blades tear grass rather than cut cleanly, leaving it more vulnerable to stress and disease. Common Mistakes When Removing Moss from Lawn A few missteps during moss removal can undo all the effort put into raking, treating, and reseeding. Skipping the cause and only removing moss: Fixing shade, drainage, pH, or compaction matters as much as raking or spraying. Skip it, and moss almost always returns. Applying moss killer at the wrong time: Extreme heat or rain right after spraying weakens the treatment. Dry, mild days work best. Leaving bare soil unseeded: Raked-out patches left empty invite moss straight back. Seed them right away. Mowing too short after treatment: Low cuts stress new growth and weaken its ability to compete with moss. Keep the mowing height taller while the lawn recovers. Skipping a soil test before applying lime: Lime without a pH test can push the soil too far in the other direction. Test first. Ignoring compacted high-traffic areas: Paths, gates, and play zones get skipped during aeration, but they need it most. Avoiding these mistakes keeps the work already put into moss removal from going to waste. Moss Prevention Lawn Care Schedule Below is a breakdown of what to focus on for each season, so prevention steps occur at the right time rather than all at once. Season Key Tasks Why It Matters Spring Rake out any moss, aerate soil, overseed bare patches, and test soil pH Grass is entering active growth, giving the seed the best chance to establish Summer Mow at proper height, water deeply but less often, and avoid heavy treatments Heat stresses grass, so light maintenance keeps it steady until fall Fall Aerate again if needed, apply lime based on test results, and overseed thin spots Cool weather supports strong root growth and seed germination Winter Trim overhanging branches, check drainage before freezing weather Prepares the lawn for spring by improving light and water flow Summing Up Getting rid of moss in a lawn works best as a two-part process. Remove the moss first, then fix whatever caused it, whether that’s shade, poor drainage, low pH, or compacted soil. Regular aeration, proper mowing height, balanced feeding, and good drainage all work together to keep the grass strong enough to crowd out moss on its own. Small, consistent lawn care habits spread across the year beat one big cleanup every spring. Test your soil, watch for shaded or compacted spots, and stay ahead of the conditions that let moss take hold in the first place. Frequently Asked Questions Will Moss Come Back After Removal? Yes, if you don’t correct the underlying cause. Moss returns quickly in shaded, damp, compacted, or acidic soil. Pairing removal with soil correction and reseeding gives grass a real chance to crowd moss out. Is Baking Soda Good for Killing Moss? Baking soda can temporarily dry out small moss patches by raising the surface pH, but it is not a long-term fix. It also does not address shade, drainage, or compaction, so moss often returns. Does Moss Damage Grass Roots? Moss itself does not directly damage grass roots, but it competes for space, light, and moisture. Thick moss growth can crowd out grass over time, making the lawn thinner in already weak areas. How Often Should I Treat My Lawn for Moss? Check for moss growth once each season, with focused treatment in spring or fall when grass grows fastest. Ongoing preventive steps, such as aeration and proper mowing, matter more than repeated applications of moss killer. Can You Kill Moss Without Killing Grass? Moss can be removed without harming grass. Rake out small patches by hand or use a lawn-safe moss killer. Fixing shade, drainage, soil problems, and weak grass growth helps prevent moss from returning.
Sprinkler output, soil type, grass variety, rainfall, and climate all affect how long a lawn needs to be watered. A large lawn does not automatically need longer watering than a small one. What matters is how quickly your sprinkler applies water and how well your soil absorbs and holds it. Your grass type also affects how much time your sprinkler needs to run. The same weekly water goal can translate into different watering times depending on your lawn’s conditions. This blog shows you a simple test to calculate the right sprinkler time for your yard. You will also learn the best time to water and how to spot over- or under-watering before it damages your grass. How Much Water Your Lawn Needs to Stay Healthy Before you set a timer, you need to know your target number. That target is not random. Grass roots typically reach four to six inches into healthy soil. Watering to that depth trains them to grow deeper rather than stay near the surface. Deeper roots handle dry spells better. Most lawns need 1 to 1.5 inches of water each week. This total includes any rainfall. Cool-season grasses like Kentucky bluegrass and fescue tend to need water at the higher end of that range. Warm-season grasses like Bermuda, zoysia, and St. Augustine often get by on half an inch to one inch of water. Soil plays a role too. Sandy soil drains quickly, so it needs shorter, more frequent watering. Clay soil holds water longer but absorbs it slowly. It needs less frequent watering spread over a longer session to avoid runoff. Loamy soil sits in the middle and usually handles a standard deep watering schedule without much adjustment. Zoning matters here too. Grass and flower beds rarely need the same amount of water. Planning this into your garden layout early on keeps each zone on its own schedule instead of using one blanket setting. A rain gauge tracks how much of your weekly total nature already covers. That takes the uncertainty out of the rainfall side of things. Why Should You Test Your Sprinkler’s Water Output First? Every sprinkler puts out a different amount of water, so guessing your run time rarely works. Here is how to check: Place four to six empty tuna cans or other shallow containers around your lawn. Turn on your sprinkler and let it run for fifteen to twenty minutes. Measure the water depth in each can with a ruler. Add the depths together and divide by the number of cans to get the average. Once you have that average, multiply it by three for a twenty-minute test. Multiply it by four for a fifteen-minute test. That gives you your sprinkler’s output per hour. A quarter-inch average in a twenty-minute test means an hourly output near three-quarters of an inch. Every calculation in this blog starts from this one number. How Long Should You Run a Sprinkler on Your Lawn? Once you know your sprinkler’s actual output, calculating the right watering time becomes much easier. Divide your weekly watering need by your sprinkler’s hourly output. That gives you the total minutes to run the sprinkler each week. Split that total across two or three sessions instead of running it all at once. Deep, less frequent watering builds stronger roots than a quick daily splash. Here is a quick example. Let’s say a lawn needs 1 inch per week, and a sprinkler puts out 3/4 inch per hour. That works out to about eighty minutes total for the week. Split into two sessions, which are roughly forty minutes each. Split into three, it drops to about twenty-seven minutes per session. Actual output varies depending on water pressure and nozzle condition. Use these numbers as a starting point, not a strict rule. Your tuna can test results from the previous section should always take priority over the table below. Here is a rough starting point by sprinkler type, based on common output rates: Sprinkler Type Minutes Per Session Oscillating sprinkler 30 to 45 In ground spray head 15 to 25 In ground rotor head 20 to 30 Impact or pulsating sprinkler 25 to 35 If you water by hand with a hose, plan on ten minutes per section at a steady, soaking pace. Avoid a quick pass. A hose delivers water unevenly. Afterward, check the soil with a trowel to confirm it has reached a depth of a few inches. How Grass Type and Season Change Your Watering Needs Your baseline number needs small tweaks depending on your grass and the time of year. Cool-season grasses generally need close to the full 1.5 inches per week. This is especially true in the heat of summer. Warm-season grasses can often stay healthy on less. Sometimes, once established, half an inch per week is enough. Summer heat raises evaporation, so many lawns need slightly more frequent sessions during that stretch. Spring and fall usually call for less, since cooler air and natural rainfall do some of the work. Winter-dormant lawns in most regions need little to no supplemental water. Climate matters too. Dry, windy regions lose more water to evaporation and often need a third session during the hottest weeks. Humid regions can usually stick to two. Just watch for standing moisture from rain, since watering on top of it raises the risk of fungus. In areas with strict watering restrictions, some people may need to reduce or adjust this schedule. A no-grass front yard built from gravel and drought-tolerant beds needs no such routine. Always subtract rainfall from your weekly goal. Say your lawn needs 1 inch and you get 0.5 inches of rain. Your sprinkler only needs to supply the remaining half inch. A basic rain gauge makes this quick to track from week to week. What is the Right Watering Schedule for New Grass? New grass needs a more careful watering routine than an established lawn, especially during the first few weeks. Fresh seed needs the top inch of soil to stay consistently moist until it germinates. This usually means light watering once or twice a day for the first week or two. Short, frequent bursts work better here than one long soak. The seed sits close to the surface and dries out fast. New sod follows a similar pattern at first, then shifts toward deeper and less frequent watering as roots take hold. Most sod needs daily watering for the first week, then a gradual pullback over the next two to three weeks. Once you see steady new growth and roots that resist a gentle tug, ease back into the normal schedule above. How Does Watering Time Affect Your Lawn? The time of day you water affects evaporation, soil absorption, and how long grass blades remain wet. Aim for the stretch between four and nine in the morning. Cooler air and calmer winds let water soak in rather than evaporate. Grass blades also have hours to dry out before dark falls, which reduces fungal problems. Midday watering wastes water since much of it evaporates before it soaks in. Late evening or overnight watering is the riskiest choice. Wet grass sitting overnight gives fungus hours to take hold, especially in warm, humid weather. If mornings do not work for your schedule, water no later than six in the evening. This gives the grass time to dry before dark. Signs You’re Watering Too Much or Too Little Changes in grass color, blade shape, soil moisture, and the speed at which footprints disappear can help you identify watering problems before the lawn becomes severely stressed. Signs of underwatering include: Dry or brown patches across the lawn Grass blades that curl or fold Footprints or mower tracks that stick around long after you cross the lawn Signs of overwatering include: Soggy or spongy soil that squishes underfoot Mushrooms or visible fungal growth Yellowing grass even though you are watering often Try a quick soil check to back up what your eyes are telling you. After a watering session, push the tip of a screwdriver straight down into the ground. Little to no resistance for the first six inches means your timing is working. If it stops short or takes real effort, the water isn’t reaching deep enough. If you spot underwatering, add a few minutes to each session rather than adding an extra day. This keeps the deep, infrequent pattern that builds strong roots. If you spot overwatering, cut back your minutes per session before reducing how often you water. Small adjustments over a week or two usually bring a stressed lawn back on track. A spot that remains soggy even after reducing irrigation may not drain well enough for healthy turf. Turning it into a hardscaped smart yard space with pavers or gravel may be more practical than continuing to irrigate it as lawn. What Your Watering Schedule May Cost? Minutes and inches are useful, but gallons are what show up on your water bill. One inch of water applied over 1,000 square feet equals roughly 623 gallons. Multiply 623 by your lawn area in thousands of square feet, then multiply that amount by your weekly watering target in inches. Here is how the numbers add up: Lawn Size Gallons for 1 Inch Weekly 2,000 sq ft About 1,250 gallons 5,000 sq ft About 3,100 gallons 8,000 sq ft About 5,000 gallons Most water utilities bill in units of 1,000 gallons. Multiply your weekly total by your local rate to estimate the cost. Rates vary widely by city, so check a recent bill for your exact amount. Seeing the gallon figure next to your bill makes accurate timing worthwhile. Trimming a session from forty-five minutes to thirty adds up fast over a season. First, confirm that a shorter time is enough with your own tuna-can test. Ready to Build a Better Lawn Watering Routine? Most established lawns need about 1 to 1.5 inches of total water each week from irrigation and rainfall combined. Depending on sprinkler output, that often means two or three watering sessions lasting roughly twenty to forty-five minutes each. The exact number for your yard depends on your sprinkler, soil, and grass type. That is why the tuna can test matters more than any generic chart. Grab a few cans of tuna and run that test this week. Plug your number into the formula, then adjust as the seasons shift. Keep an eye on rainfall so you never water more than your lawn needs. A few minutes of measuring now pays off with a lower water bill and a healthier lawn all season long. Frequently Asked Questions Is 10 minutes of sprinkler enough? Ten minutes may be enough for high-output sprinklers, but not every system. Measure the collected water after 10 minutes, then adjust the runtime until your lawn reaches its weekly watering target. Can I water my lawn 2 days in a row? Yes, occasionally, especially during extreme heat or when establishing a lawn. For established grass, deeper watering spaced across the week is usually better than watering on two consecutive days. What temperature is too hot to water grass? There is no fixed temperature cutoff. During very hot weather, water early in the morning when evaporation is lower, and avoid irrigating during the hottest part of the day. Can you overwater new turf? Yes. New turf needs consistent moisture, but constantly soggy soil can restrict oxygen and encourage disease. Reduce watering gradually as roots establish, and the turf begins to hold firmly. Is 3 am too early to start watering a lawn? Three a.m. is earlier than ideal because grass may remain wet longer overnight. Watering closer to sunrise reduces leaf-wetness time while still limiting evaporation and daytime water loss.


Grass Type Feedings Per Year Best Months Avoid Cool-season grass 3 to 4 times Early spring and early fall Heavy feeding during summer heat Warm-season grass 2 to 4 times Late spring through summer Late-season nitrogen before dormancy Newly seeded lawn 4 to 5 times Every 6 to 8 weeks during the first season Skipping starter fertilizer A healthy lawn needs more than regular watering. Grass also depends on properly timed fertilizer to support stronger roots, steady growth, and rich green color throughout the growing season. Timing matters as much as the fertilizer itself. Feeding too early can encourage weak top growth, while applying too much during hot weather can scorch the grass. Fertilizing too late may also interfere with dormancy and increase stress. Below, you’ll learn how often to fertilize, the best months to apply it, how to understand N-P-K ratios, and which application mistakes can damage your lawn. How Often Should You Fertilize Your Lawn? Most lawns need 2 to 4 fertilizer applications per year, but the right schedule depends on your grass type, climate, and growing conditions. University of Illinois Extension suggests roughly one pound of nitrogen per 1,000 square feet per application. Split that across the growing season rather than applying it all at once. Grass Type Feedings Per Year Best Months Cool-season grass 3 to 4 Early spring and early fall Warm-season grass 2 to 4 Late spring through summer Newly seeded lawn 4 to 5 Every 6 to 8 weeks during the first season Cool-season grasses usually need more feeding in spring and fall, while warm-season grasses benefit from applications during their active summer growth. Avoid fertilizing just because the calendar says it is time. Grass absorbs nutrients most effectively during active growth, while extreme heat, drought, or dormancy can reduce the effectiveness of applications. Pro Tip: Your lawn’s fertilizer needs can also change based on soil quality, sunlight exposure, mowing habits, and rainfall. A soil test can help identify nutrient gaps and prevent unnecessary applications. Lawn Fertilizer Schedule by Region and Season Local climate and grass type determine when your lawn can actually use fertilizer. A northern cool-season lawn follows a different schedule than a southern warm-season lawn, so timing applications to coincide with active growth prevents wasted nutrients. Region Spring Fall Winter Northern Regions Light feeding as grass starts growing Heavy feeding for root strength Little to none after dormancy Southern Regions Begin feeding as warm-season grass wakes up Reduce feeding as growth slows Apply only if grass stays active Transition Zones Feed based on dominant grass type Fall feeding benefits many lawns Usually minimal feeding Seasonal fertilizing follows the way grass grows throughout the year. It feeds the roots and blades so they can actually use the nutrients, rather than wasting product on dormant grass. Key factors to adjust your schedule: Grass type: Cool-season and warm-season grasses have different growth cycles. Soil temperature: Fertilizer works best when grass is actively absorbing nutrients. Weather conditions: Avoid feeding during drought, extreme heat, or when soil is frozen. This approach is stronger than separating season and region because readers usually want to know when to fertilize based on where they live. Best Time to Fertilize Your Lawn Based on Grass Type Grass type determines when your lawn is actively growing and ready to use fertilizer. Cool-season and warm-season grasses have different peak growth periods, so their feeding schedules shouldn’t follow the same calendar. Grass type Category Best feeding months Feedings per year Kentucky bluegrass, ryegrass, tall fescue Cool-season Early spring, early fall 3 to 4 Bermuda, zoysia, St. Augustine, centipede Warm-season Late spring through summer 2 to 4 1. Cool-season grass fertilizer schedule Kentucky bluegrass, perennial ryegrass, and tall fescue all grow fastest in spring and fall. Plan your heaviest feedings for those two windows. Use a lighter touch, or skip feeding entirely, during peak summer heat. A typical schedule spreads two to four feedings between early spring and late fall. 2. Warm-season grass fertilizer schedule Bermuda grass, zoysia, St. Augustine, and centipede grass all grow most actively once summer temperatures climb. Fertilize these types through late spring and summer. Then taper off as they head into dormancy in fall. Applying nitrogen too late in the year can leave warm-season grass open to winter injury. How N-P-K Ratios Affect Your Lawn Fertilizer Schedule Every fertilizer bag lists three numbers for nitrogen, phosphorus, and potassium. Most established lawns need far more nitrogen than phosphorus. Nutrient What it does Nitrogen (N) Drives the green color and leaf growth you notice first Phosphorus (P) Supports root development, especially in young or newly seeded lawns Potassium (K) Helps grass handle drought, cold, and general wear The University of Illinois Extension recommends an N-P-K ratio of about 3-1-2 or 4-1-2 for typical home lawns. Most soils already contain enough phosphorus. What Fertilizer Should You Use on Your Lawn? The right fertilizer depends on what your grass needs and what your soil already has. It also depends on timing and the results you want to see. Understanding fertilizer labels: The three numbers on every bag indicate the percentage by weight of nitrogen, phosphorus, and potassium. An 18-6-12 fertilizer is 18 percent nitrogen. Higher numbers mean you need less product to reach one pound per 1,000 square feet. Granular vs liquid fertilizer: Granular fertilizer spreads evenly with a spreader and often uses slow-release nitrogen to feed the lawn over several weeks. Liquid fertilizer is absorbed faster and corrects deficiencies quickly, but it requires careful, even application to avoid streaking or burning. Slow-release vs. quick-release fertilizer: Slow-release nitrogen breaks down gradually, lowering the risk of burn even at higher percentages. Quick-release nitrogen delivers a fast green-up but can scorch grass if overapplied, so many fertilizers blend both types of nitrogen. Signs Your Lawn Needs Fertilizer? Watching for signs of nutrient deficiency tells you when your lawn actually needs feeding. This works better than relying only on a fixed date on the calendar. Signs of nutrient deficiency Sign What it looks like Pale green or yellow color Shows up first in the older sections of the lawn Slow growth Grass needs mowing less often than usual Thin or patchy areas Bare spots that never fill in on their own Poor recovery Struggles to bounce back after mowing or foot traffic Weak roots Shallow root systems that pull up easily Other causes of yellow grass Yellowing grass is not always a nutrient issue. Overwatering, poor drainage, and compacted soil can all starve roots of oxygen. These problems can look just like a nutrient deficiency. Diseases and pests, such as grubs feeding on roots, can also cause grass to turn yellow or brown in patches. A soil test, or a close look at the roots, can help you rule fertilizer in or out. How to Apply Lawn Fertilizer Correctly Correct application spreads nutrients evenly across the lawn. It also reduces the risk of burned grass, product runoff, and fertilizer waste during the growing season. Step 1: Prepare your lawn before fertilizing Check the forecast and skip heavy rain or drought conditions. Mow at your normal height beforehand, clear away debris, and run a soil test if needed. Step 2: Apply the correct amount of fertilizer Follow the rate printed on the bag rather than guessing, since more product does not speed up greening. Use a calibrated spreader to cover the lawn evenly without stripes. Step 3: Water after fertilizer application Granular fertilizer needs a light watering, and the best time to water is during the daytime unless rain is expected. Liquid fertilizer instructions vary by product. Either way, avoid overwatering, which can wash fertilizer into the street. Factors That Affect Fertilizing Frequency A soil test takes the guesswork out of feeding your lawn. It measures existing levels of nitrogen, phosphorus, and potassium, as well as soil pH. That tells you exactly what your grass is missing, instead of guessing with a generic bag every few weeks. Factor Why it matters Grass variety Faster-growing types need more frequent feeding Soil nutrient levels Existing nutrients reduce how much you need to add Lawn age Newly established lawns often need different rates than mature turf Sun exposure Shaded lawns grow more slowly and need less nitrogen than those in full sun Rainfall and irrigation More water moves nutrients through the soil faster Mowing habits Leaving clippings on the lawn returns some nitrogen naturally Prior applications Fertilizer already applied earlier in the season affects timing The University of Illinois Extension recommends testing every few years. Adjust fertilizer type and rate based on the results, not a fixed calendar alone. What Lawn Fertilizer Mistakes Should You Avoid Avoiding these errors protects your grass and field, making every feeding count throughout the growing season, season after season. Applying too much fertilizer: Excess nitrogen scorches grass blades (a problem known as fertilizer burn) and promotes weak growth that invites disease. Fertilizing at the wrong time: Feeding dormant grass in deep summer heat or hard winter cold wastes product and further stresses the lawn. Ignoring soil conditions: Skipping a soil test means guessing what your lawn needs, which can lead to unnecessary nutrient runoff. Using the same schedule every year: Rainfall, temperature, and lawn condition shift year to year, so watch how your lawn responds and adjust. Frequently Asked Questions How many times a year should I fertilize my lawn? Most lawns need two to four feedings a year. Cool-season grasses do best with spring and fall applications, while warm-season grasses need feeding mainly during active summer growth months. What month is best to fertilize a lawn? Cool-season lawns benefit most from feedings in early spring and again in early fall. Warm-season lawns respond best to applications from late spring through summer, once the soil has warmed. Can I fertilize my lawn too often? Yes. Over-fertilizing can burn grass, push weak growth that invites disease, and raise nutrient runoff. Stick to labeled rates and space applications several weeks apart, rather than feeding on a whim. Should I fertilize before or after mowing? Fertilize after mowing, once the grass has a day or two to recover. Mowing right after fertilizing can remove fertilized leaf tips and reduce the benefit the lawn gets. How long should I wait to water after fertilizing? Water lightly within a day of applying granular fertilizer, unless rain is expected soon. This helps nutrients settle into the soil without washing the product off the lawn entirely. Building Your Fertilizer Schedule A steady lawn fertilizer schedule feeds grass when it can actually use the nutrients. It does not rely on a fixed date every month. The right timing depends on your grass type, climate, soil, and how the lawn responds throughout the seasons. Most yards do better with a handful of well-timed feedings than frequent, scattered ones. Testing your soil and picking a fertilizer suited to your lawn will help you avoid common problems.

Get weekly design tips that make
sense for real homes!
Seen & Celebrated




